How to Reset Audio Settings in Windows 11: Complete Guide
Audio issues in Windows 11? We'll walk you through resetting audio settings, running an auto-troubleshooter, and more. Get your sound back on track.

If you're experiencing audio issues on your Windows 11 computer, it can be frustrating trying to figure out the root cause. Whether you're having problems with your headphones, speakers, or microphone, there are a few steps you can take to try and fix the issue. In this post, we'll go through a step-by-step guide on how to reset audio settings in Windows 11 and get your sound back up and running.
1. Check your volume and connections
Before diving into any advanced troubleshooting, make sure that:
- ☑️ The volume isn't muted or too low—on your audio device, Windows, and the app you're using.
- ☑️ Your audio device is properly connected to your PC.
- ☑️ Your desired input & output audio devices (headphones, speaker, microphone, etc.) are selected—in both Windows and the app you're using.
Sometimes the issue can be as simple as a muted/low volume, a loose connection, or an incorrect device being selected.
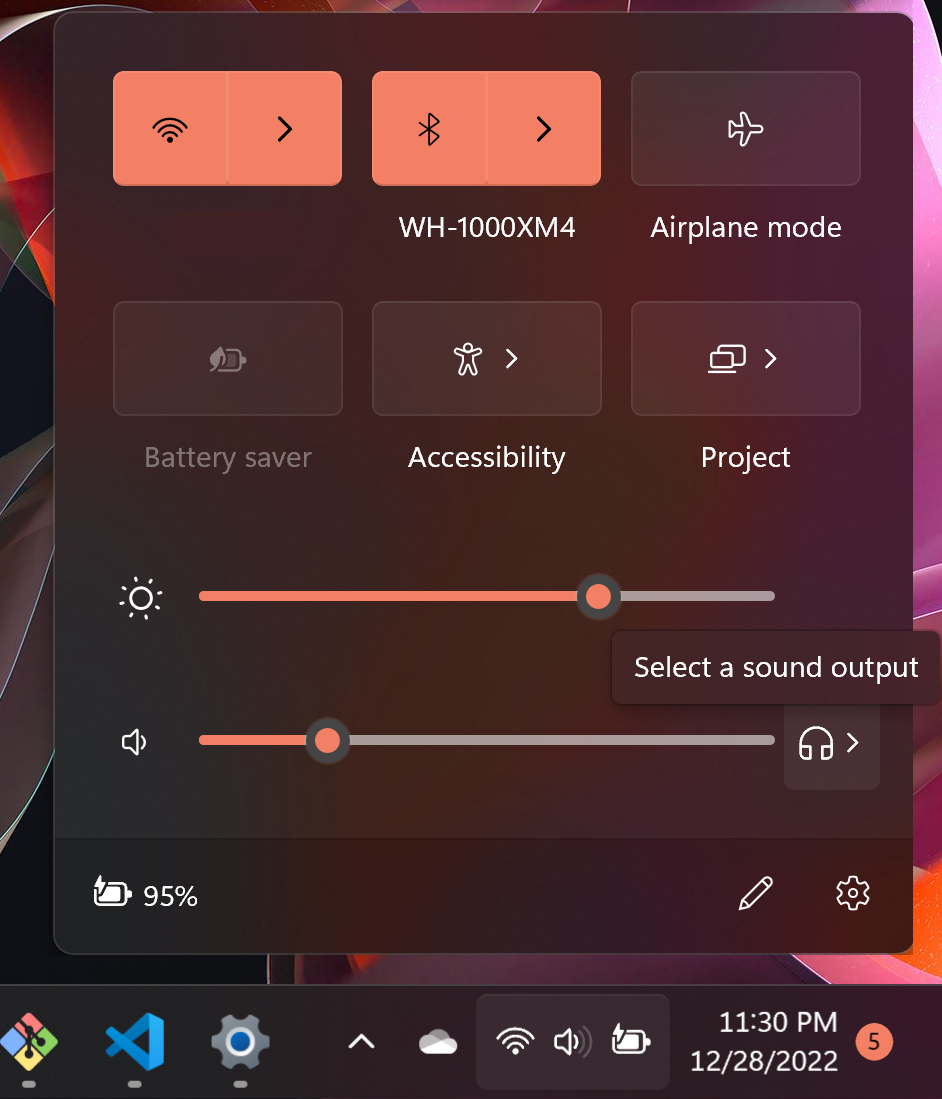
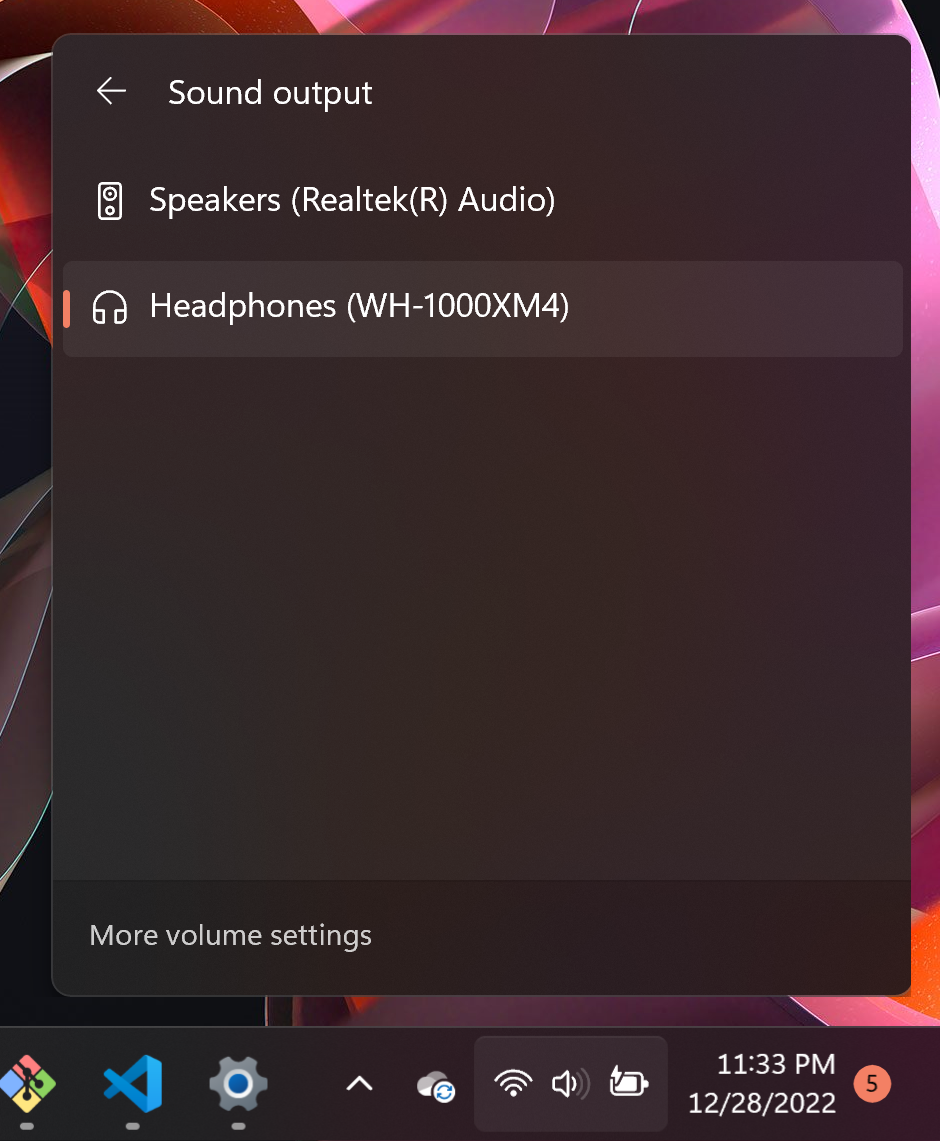
To check the output volume and device in Windows:
- Click on the speaker (volume) icon in the task tray (lower corner of Task Bar).
- Drag the horizontal volume slider left or right to adjust the volume (lower or higher). Note that adjusting the volume will automatically unmute the device.
- Click on the device (headphone) icon beside the volume slider. This will reveal available sound output devices.
- Click to choose your desired output device.
2. Restart your computer
If the issue persists, try restarting your computer. This can often resolve minor audio issues and is a quick and easy step to try first.
3. Reset sound levels and devices to defaults
If the above steps don't work, you can try resetting your sound levels and devices to their default settings. To do this:
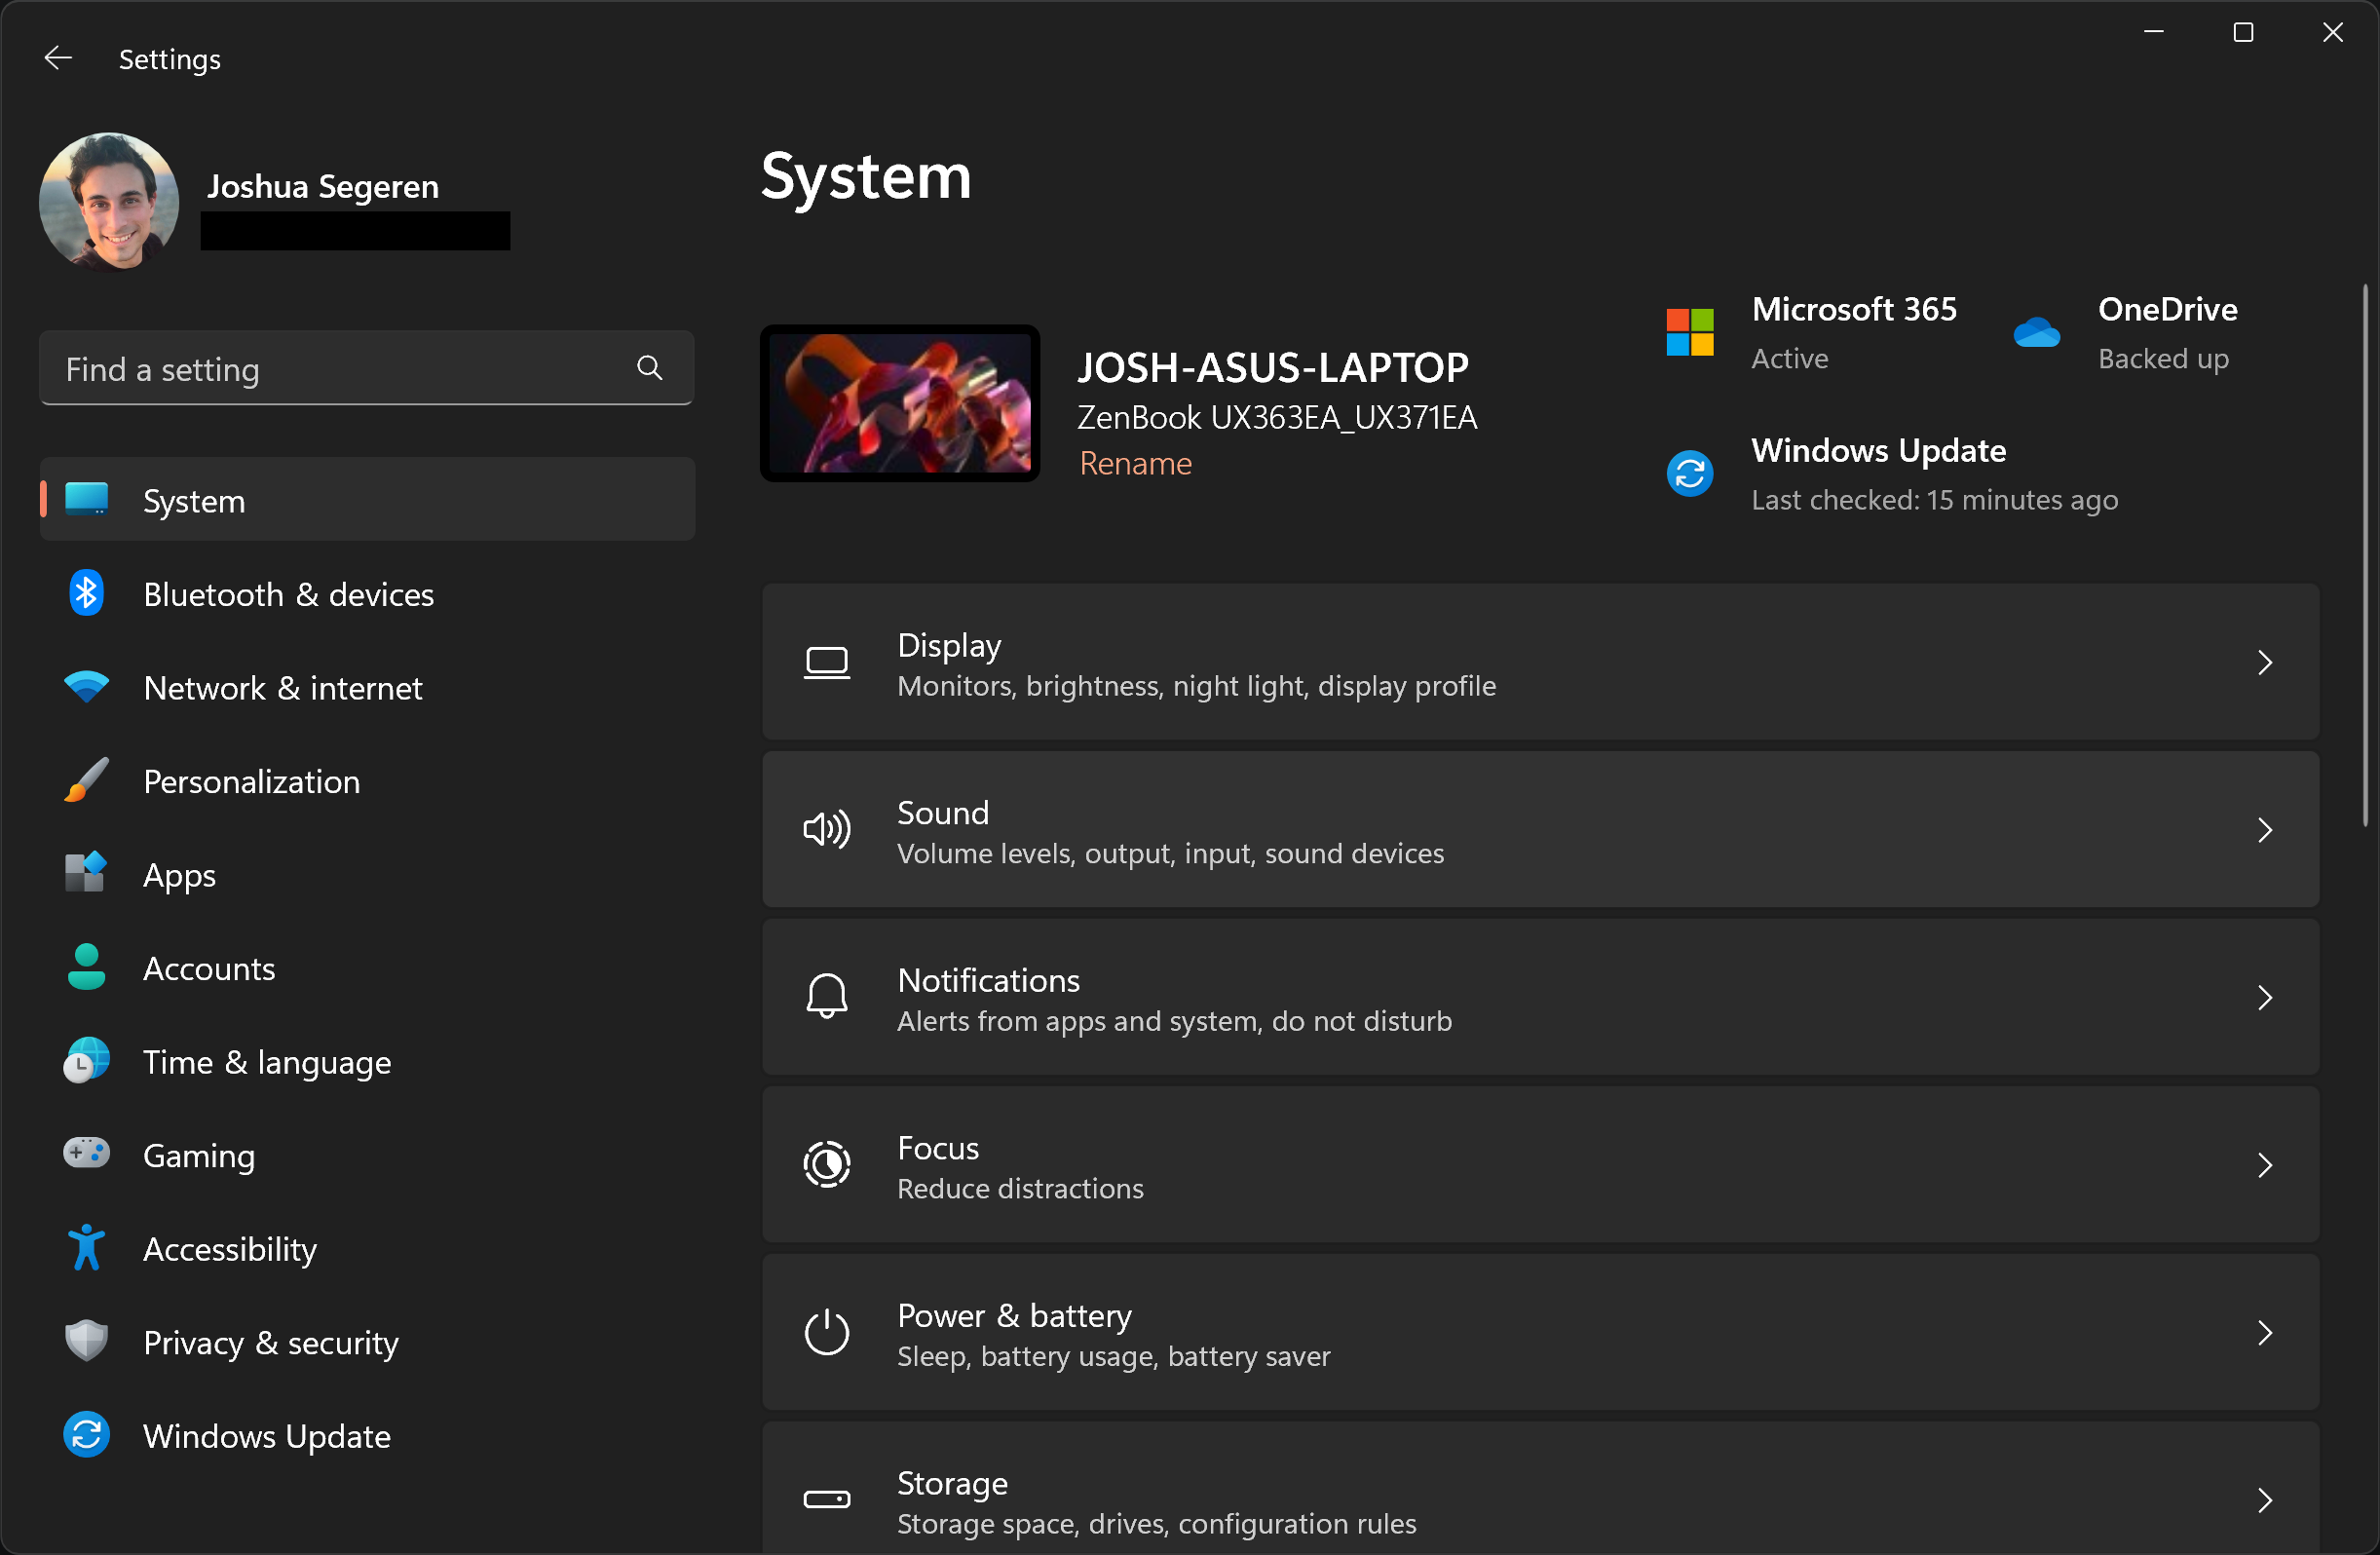
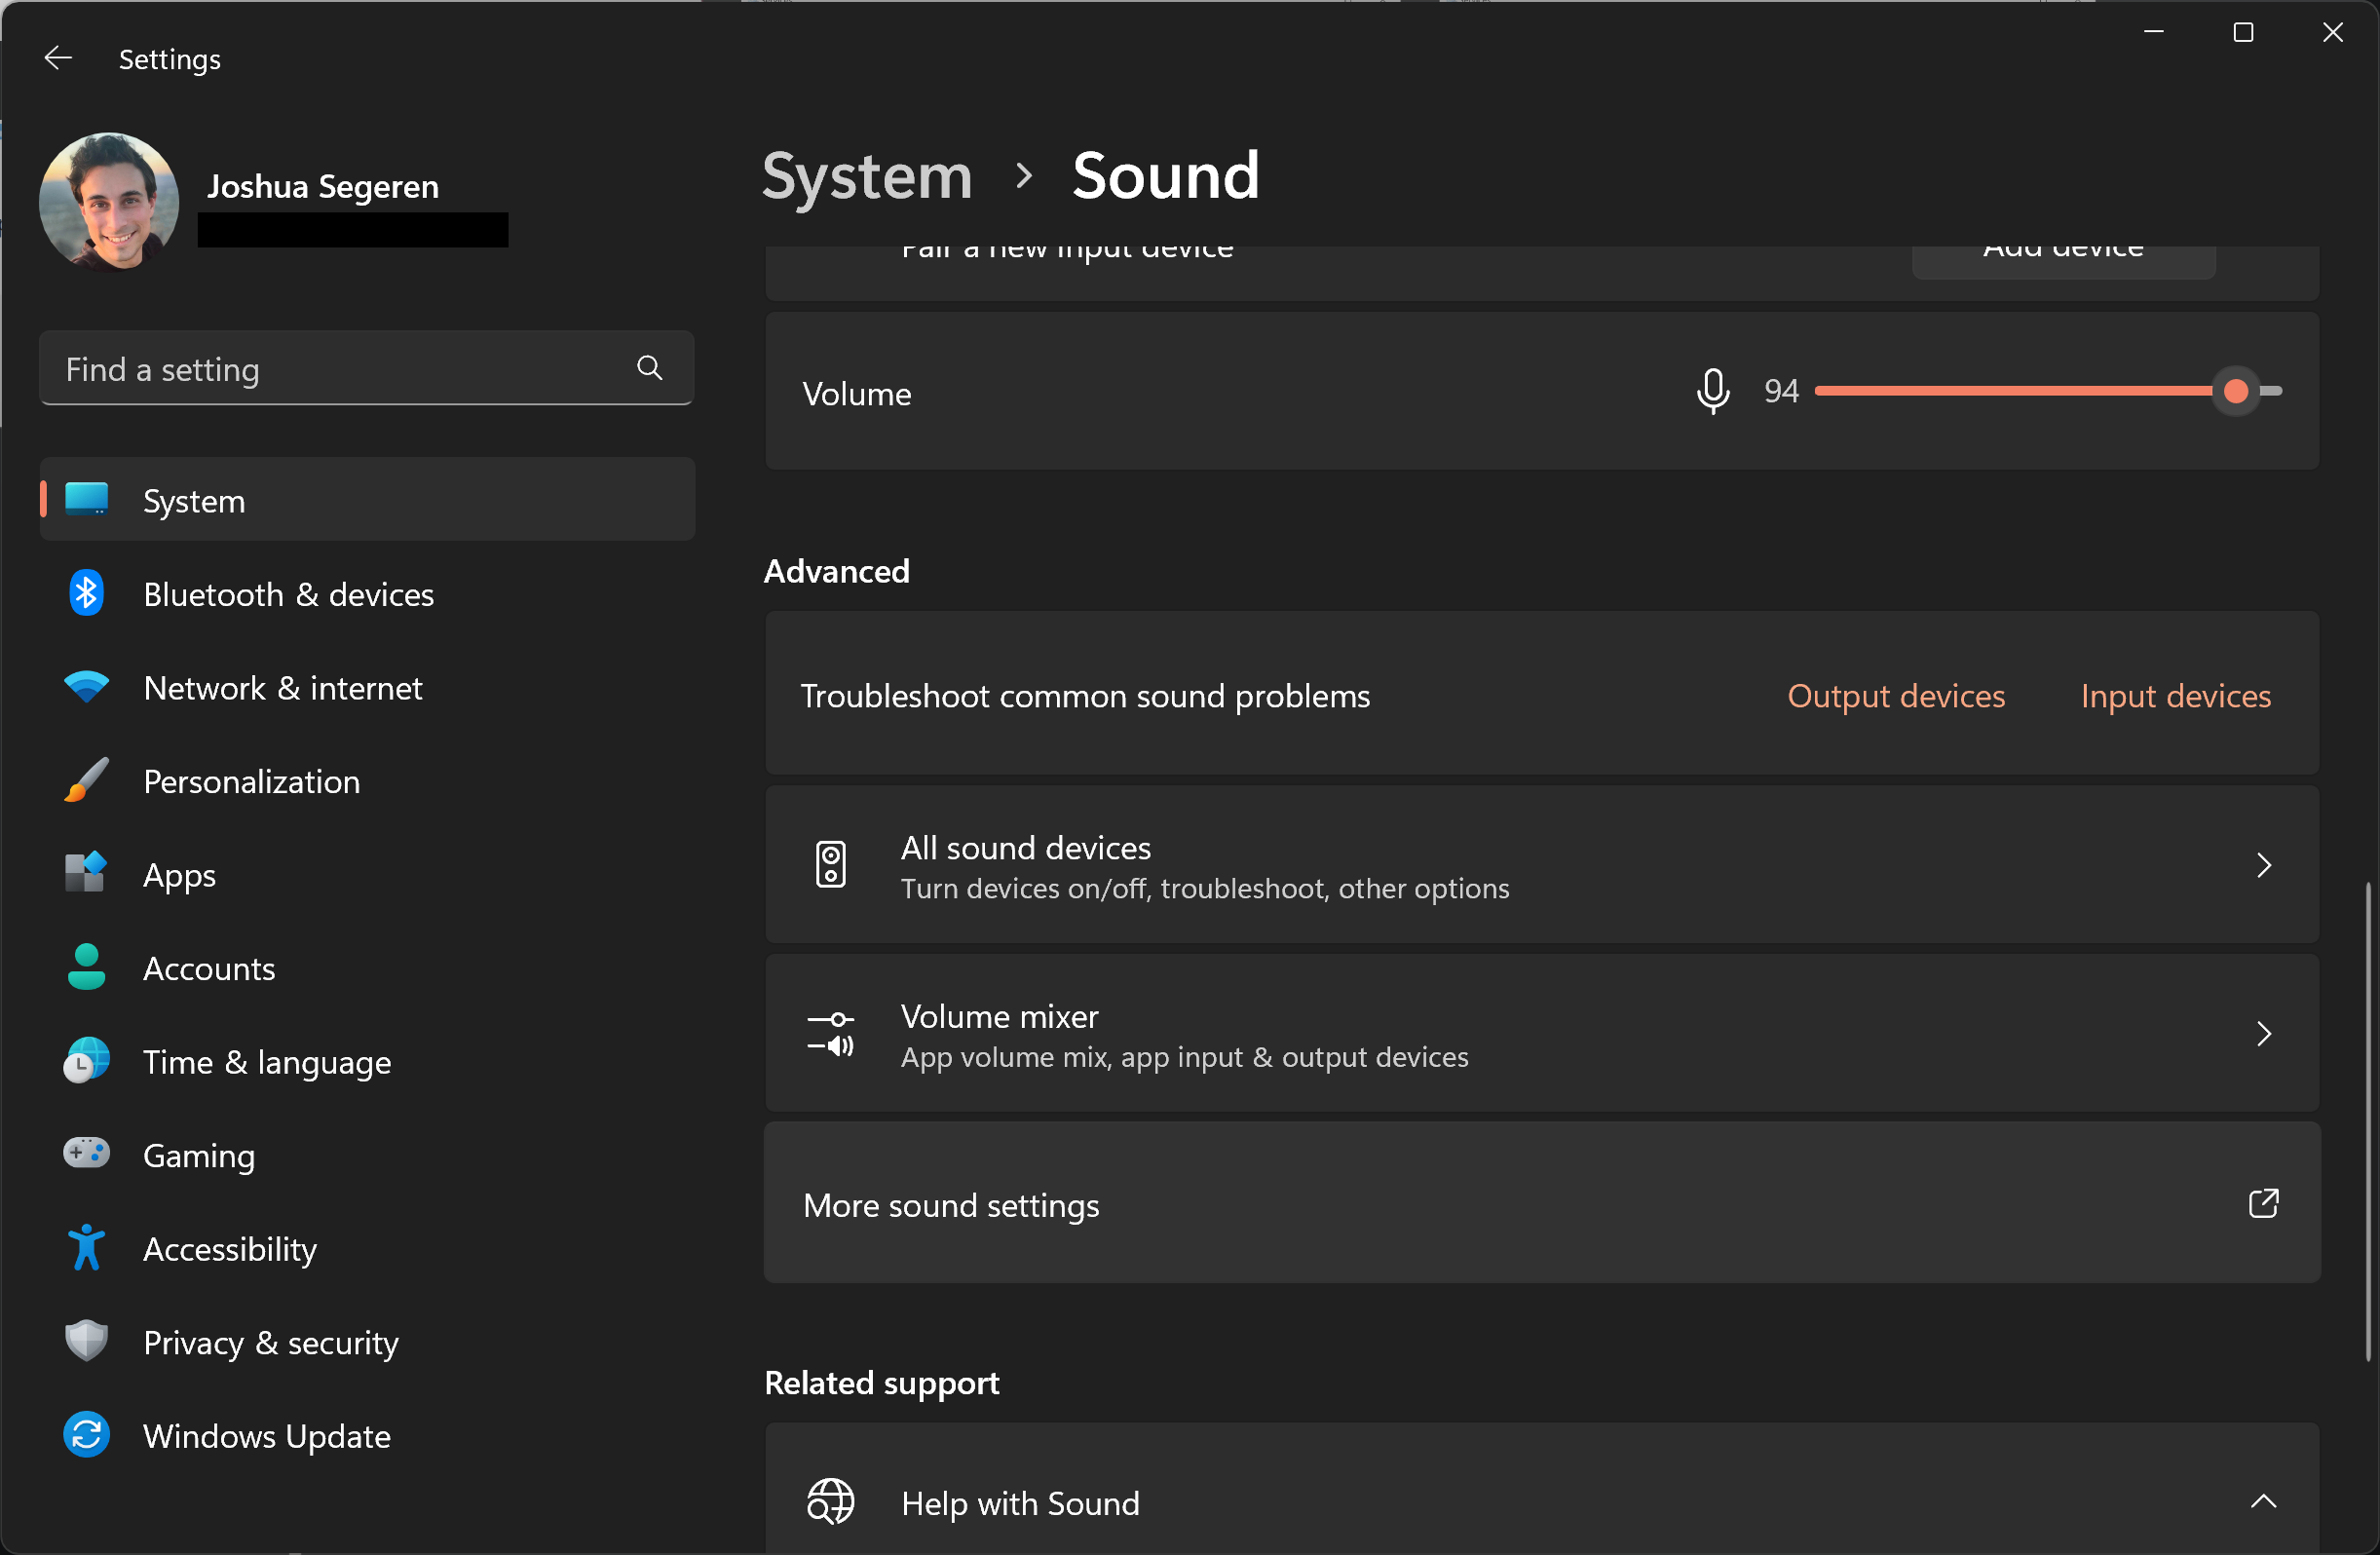
- Go to Windows Settings > System > Sound. (Shortcut: Windows key + I.)
- Under Advanced settings, click "Volume Mixer".
- Scroll to the bottom. Click the "Reset" button. ('Reset sound devices and volumes for all apps to the recommended defaults.')
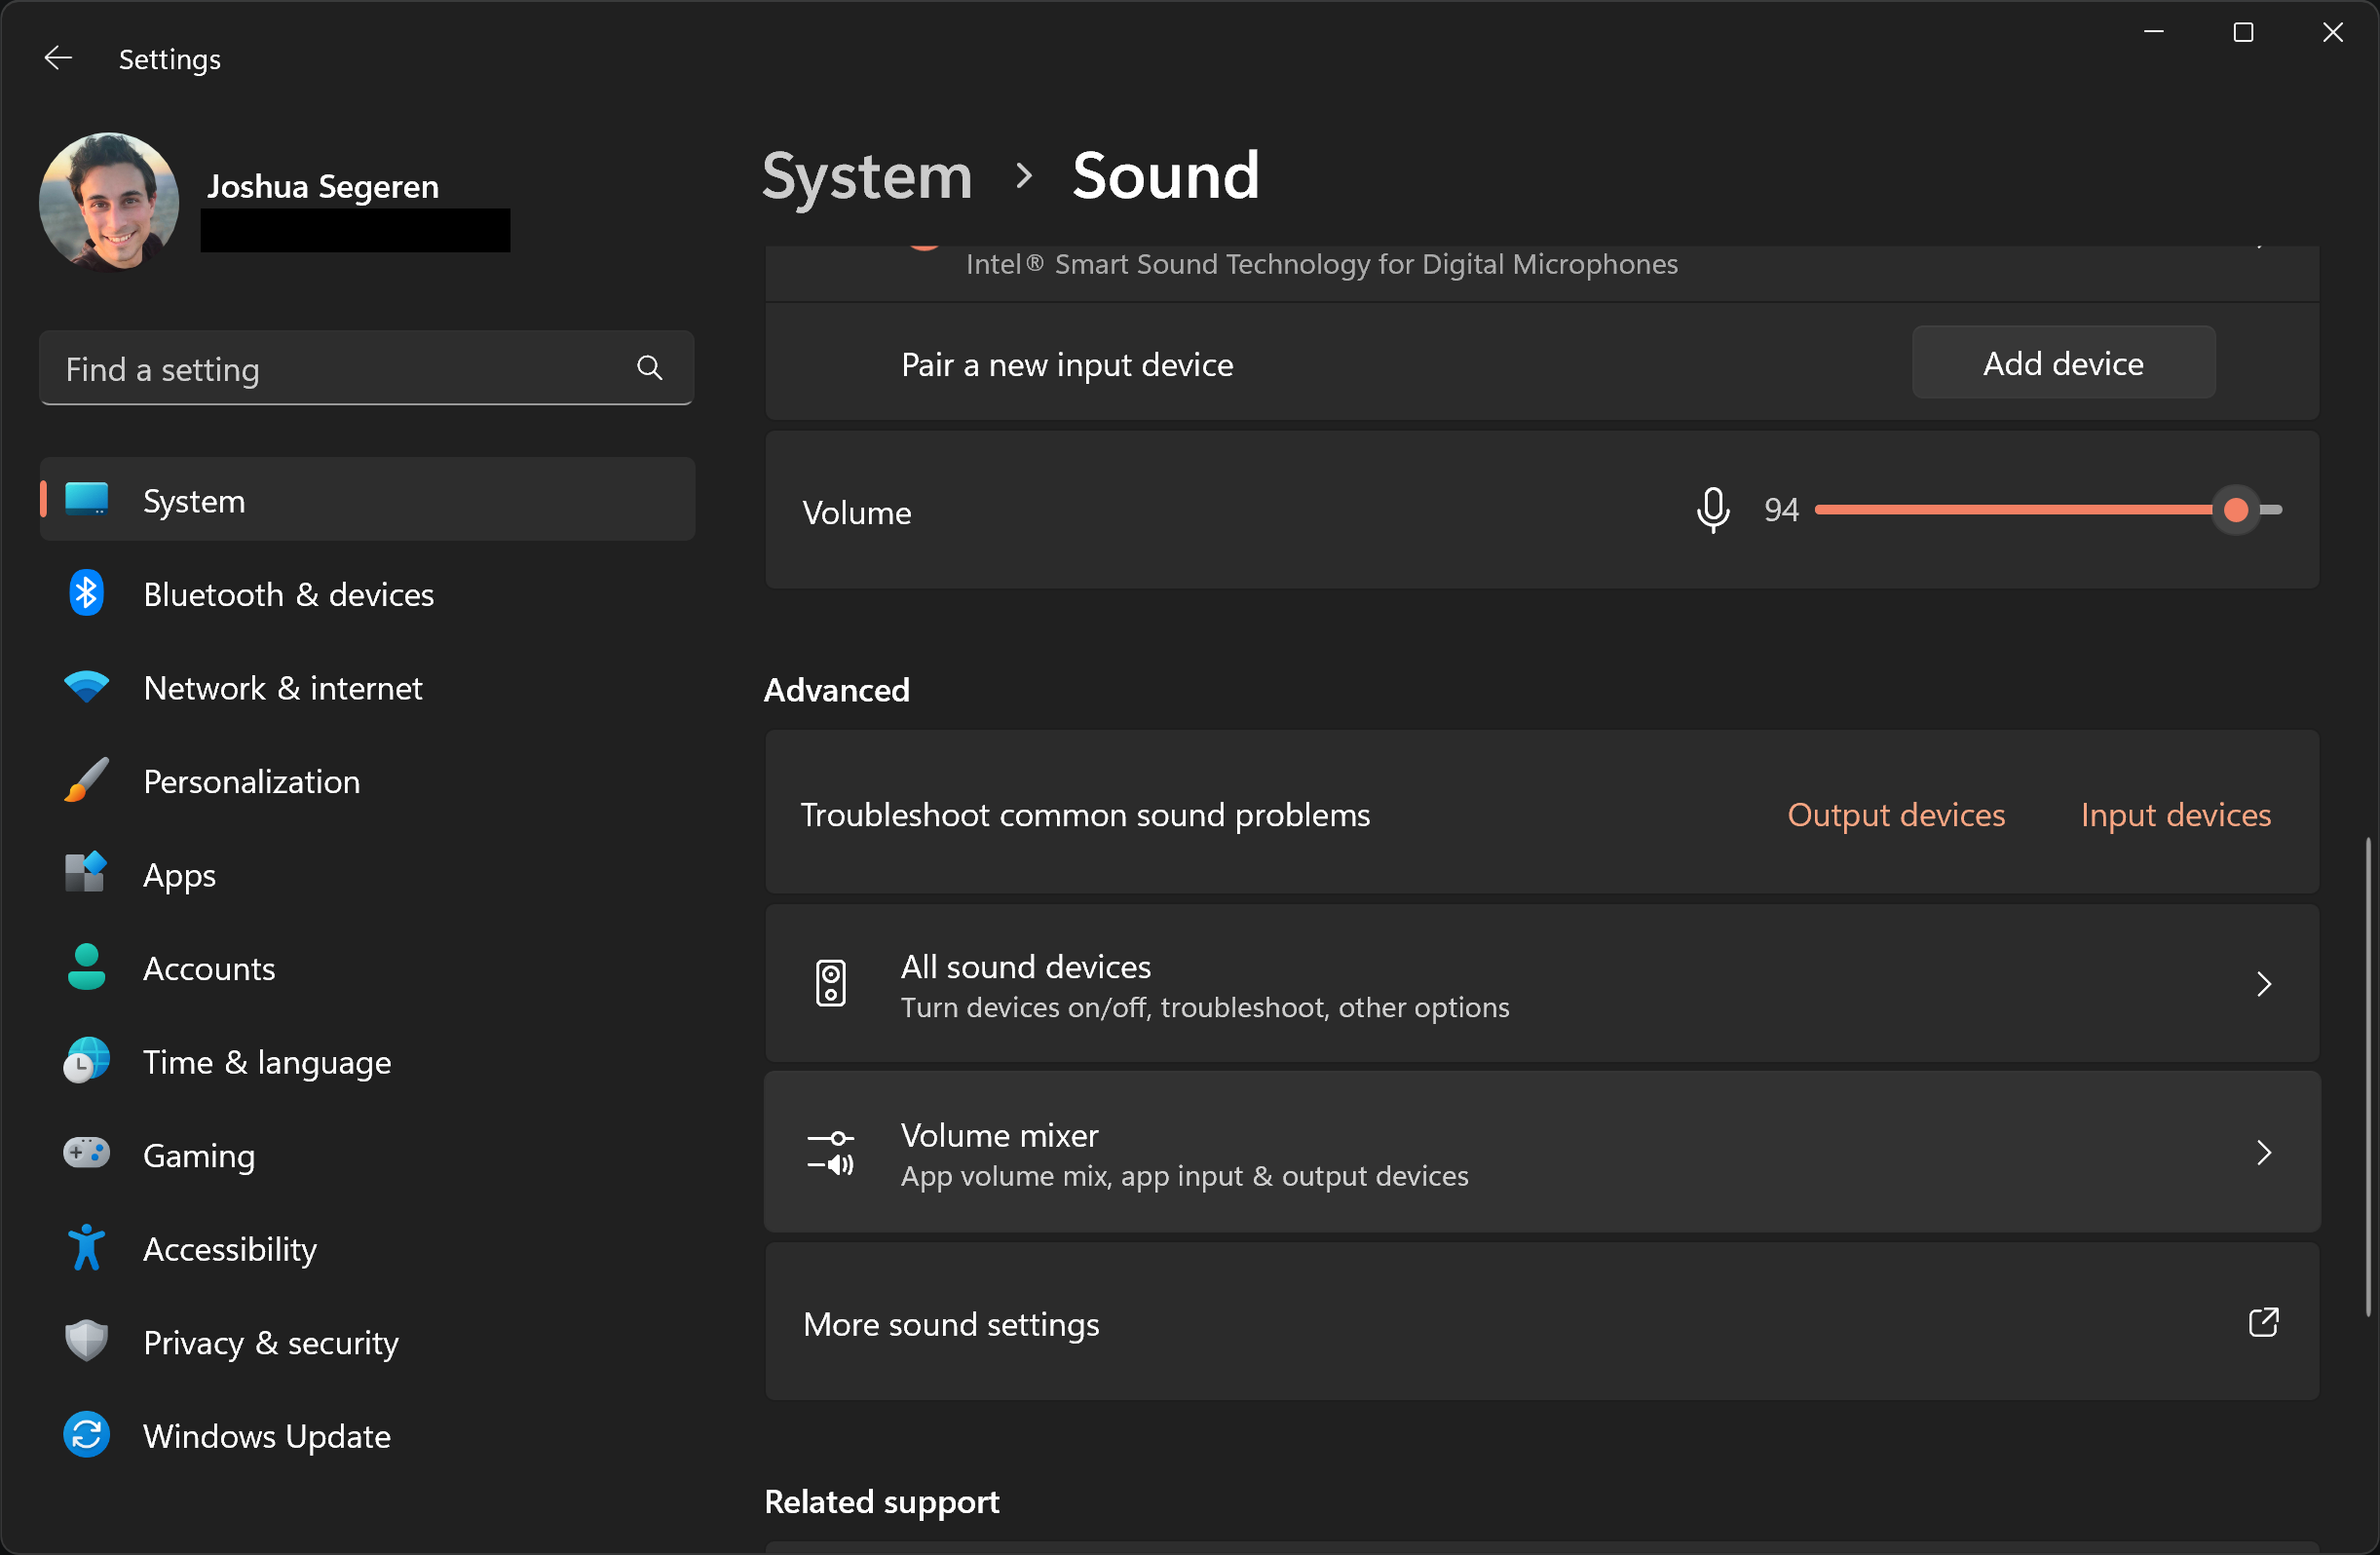
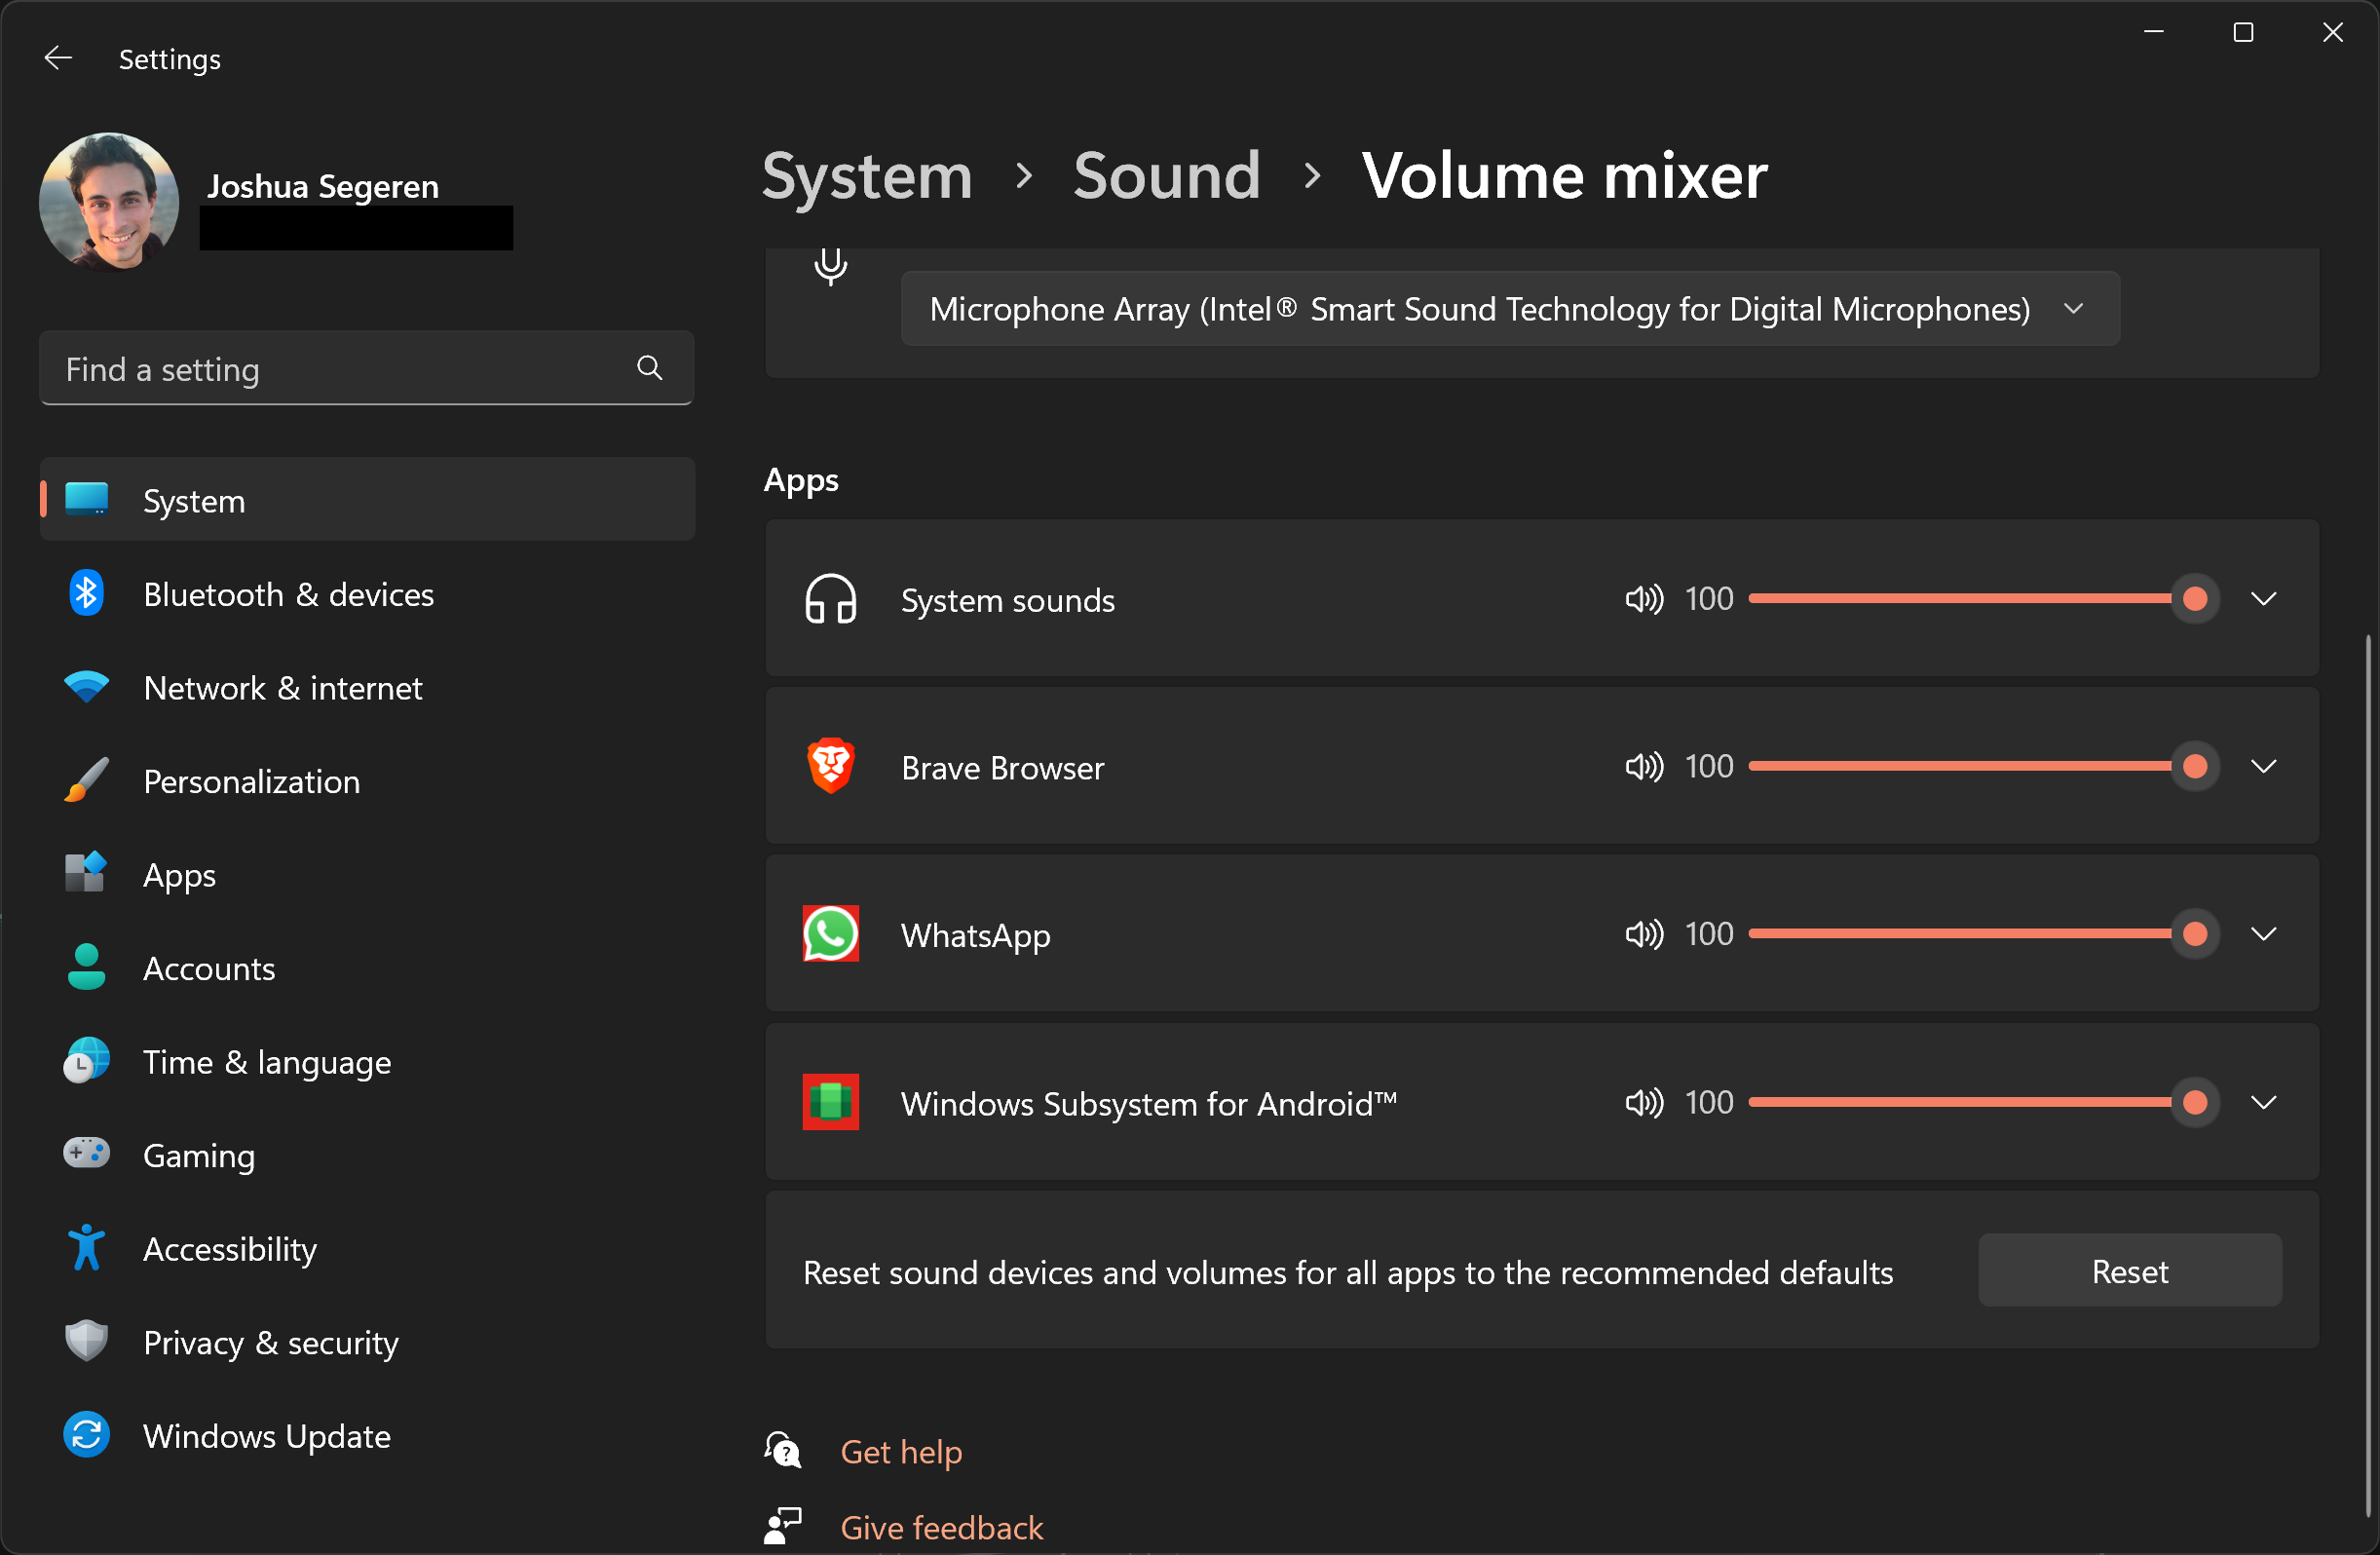
From Sound Settings, you can also double-check here that the correct audio output and devices are selected.
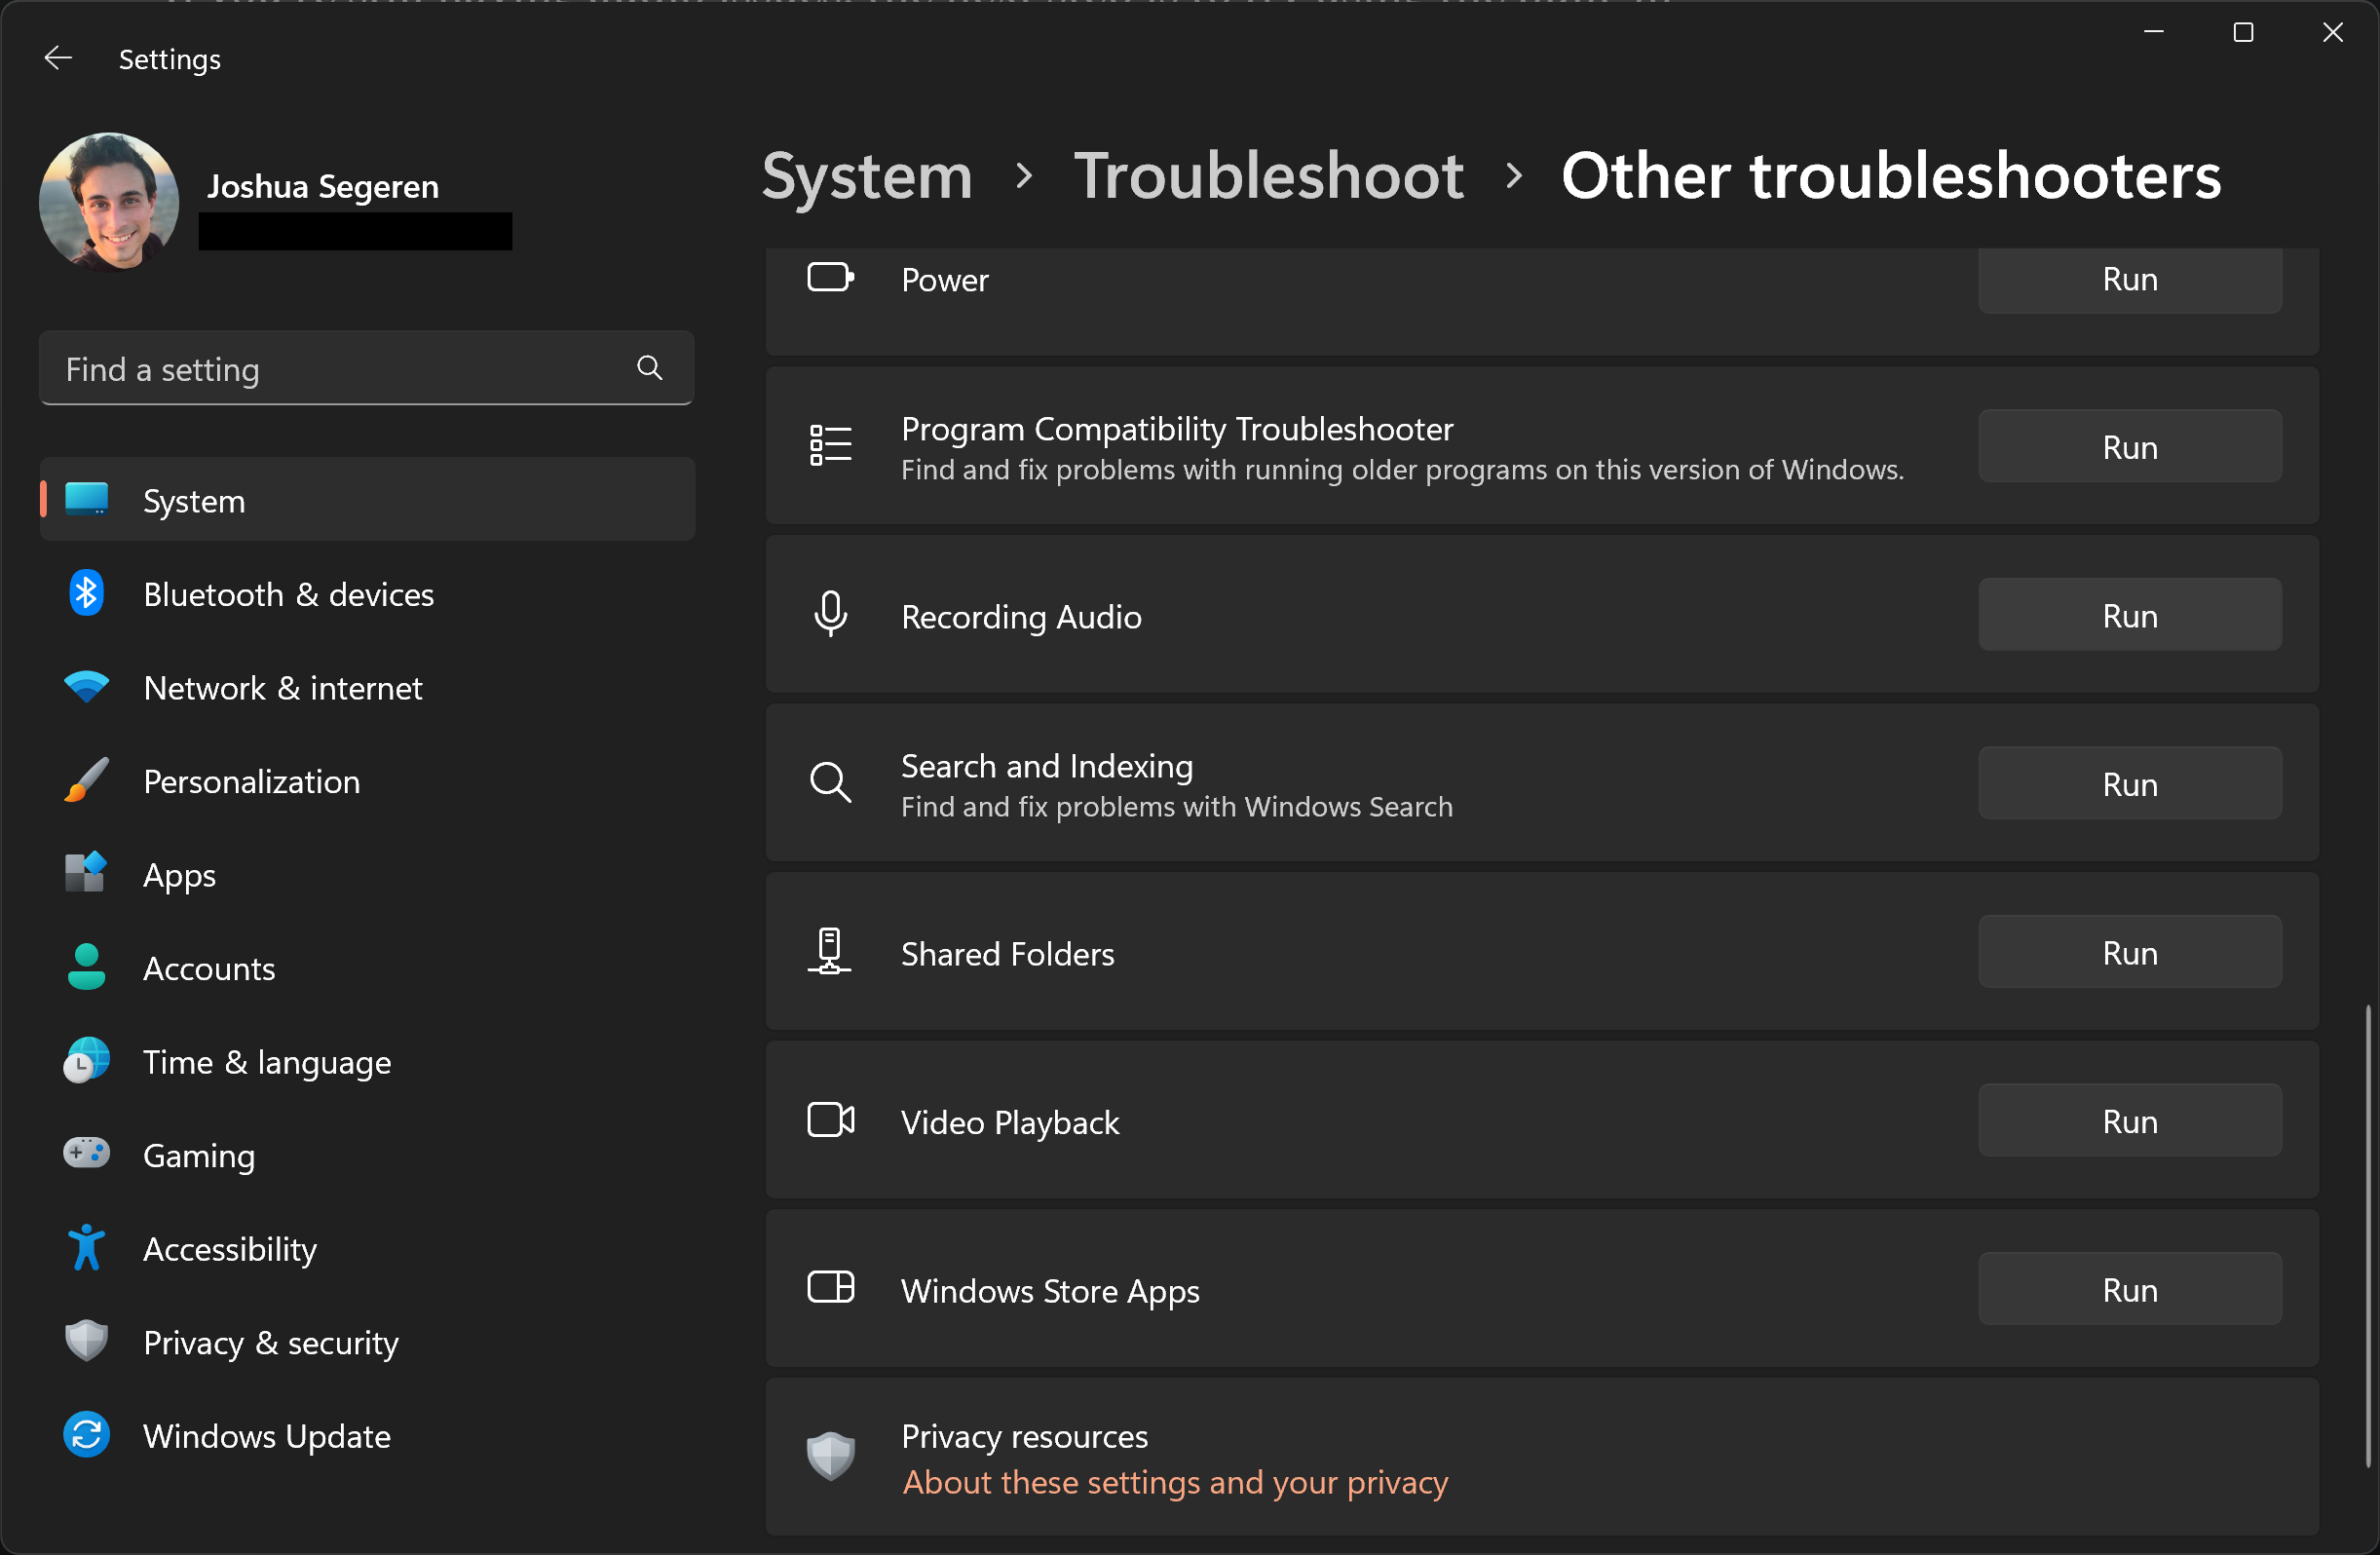
4. Use the Windows Sound/Audio Troubleshooter
If you're still having audio issues, the next step is to try using the built-in Windows Sound/Audio Troubleshooter.
This tool can help identify and fix common audio problems automatically. To access it:
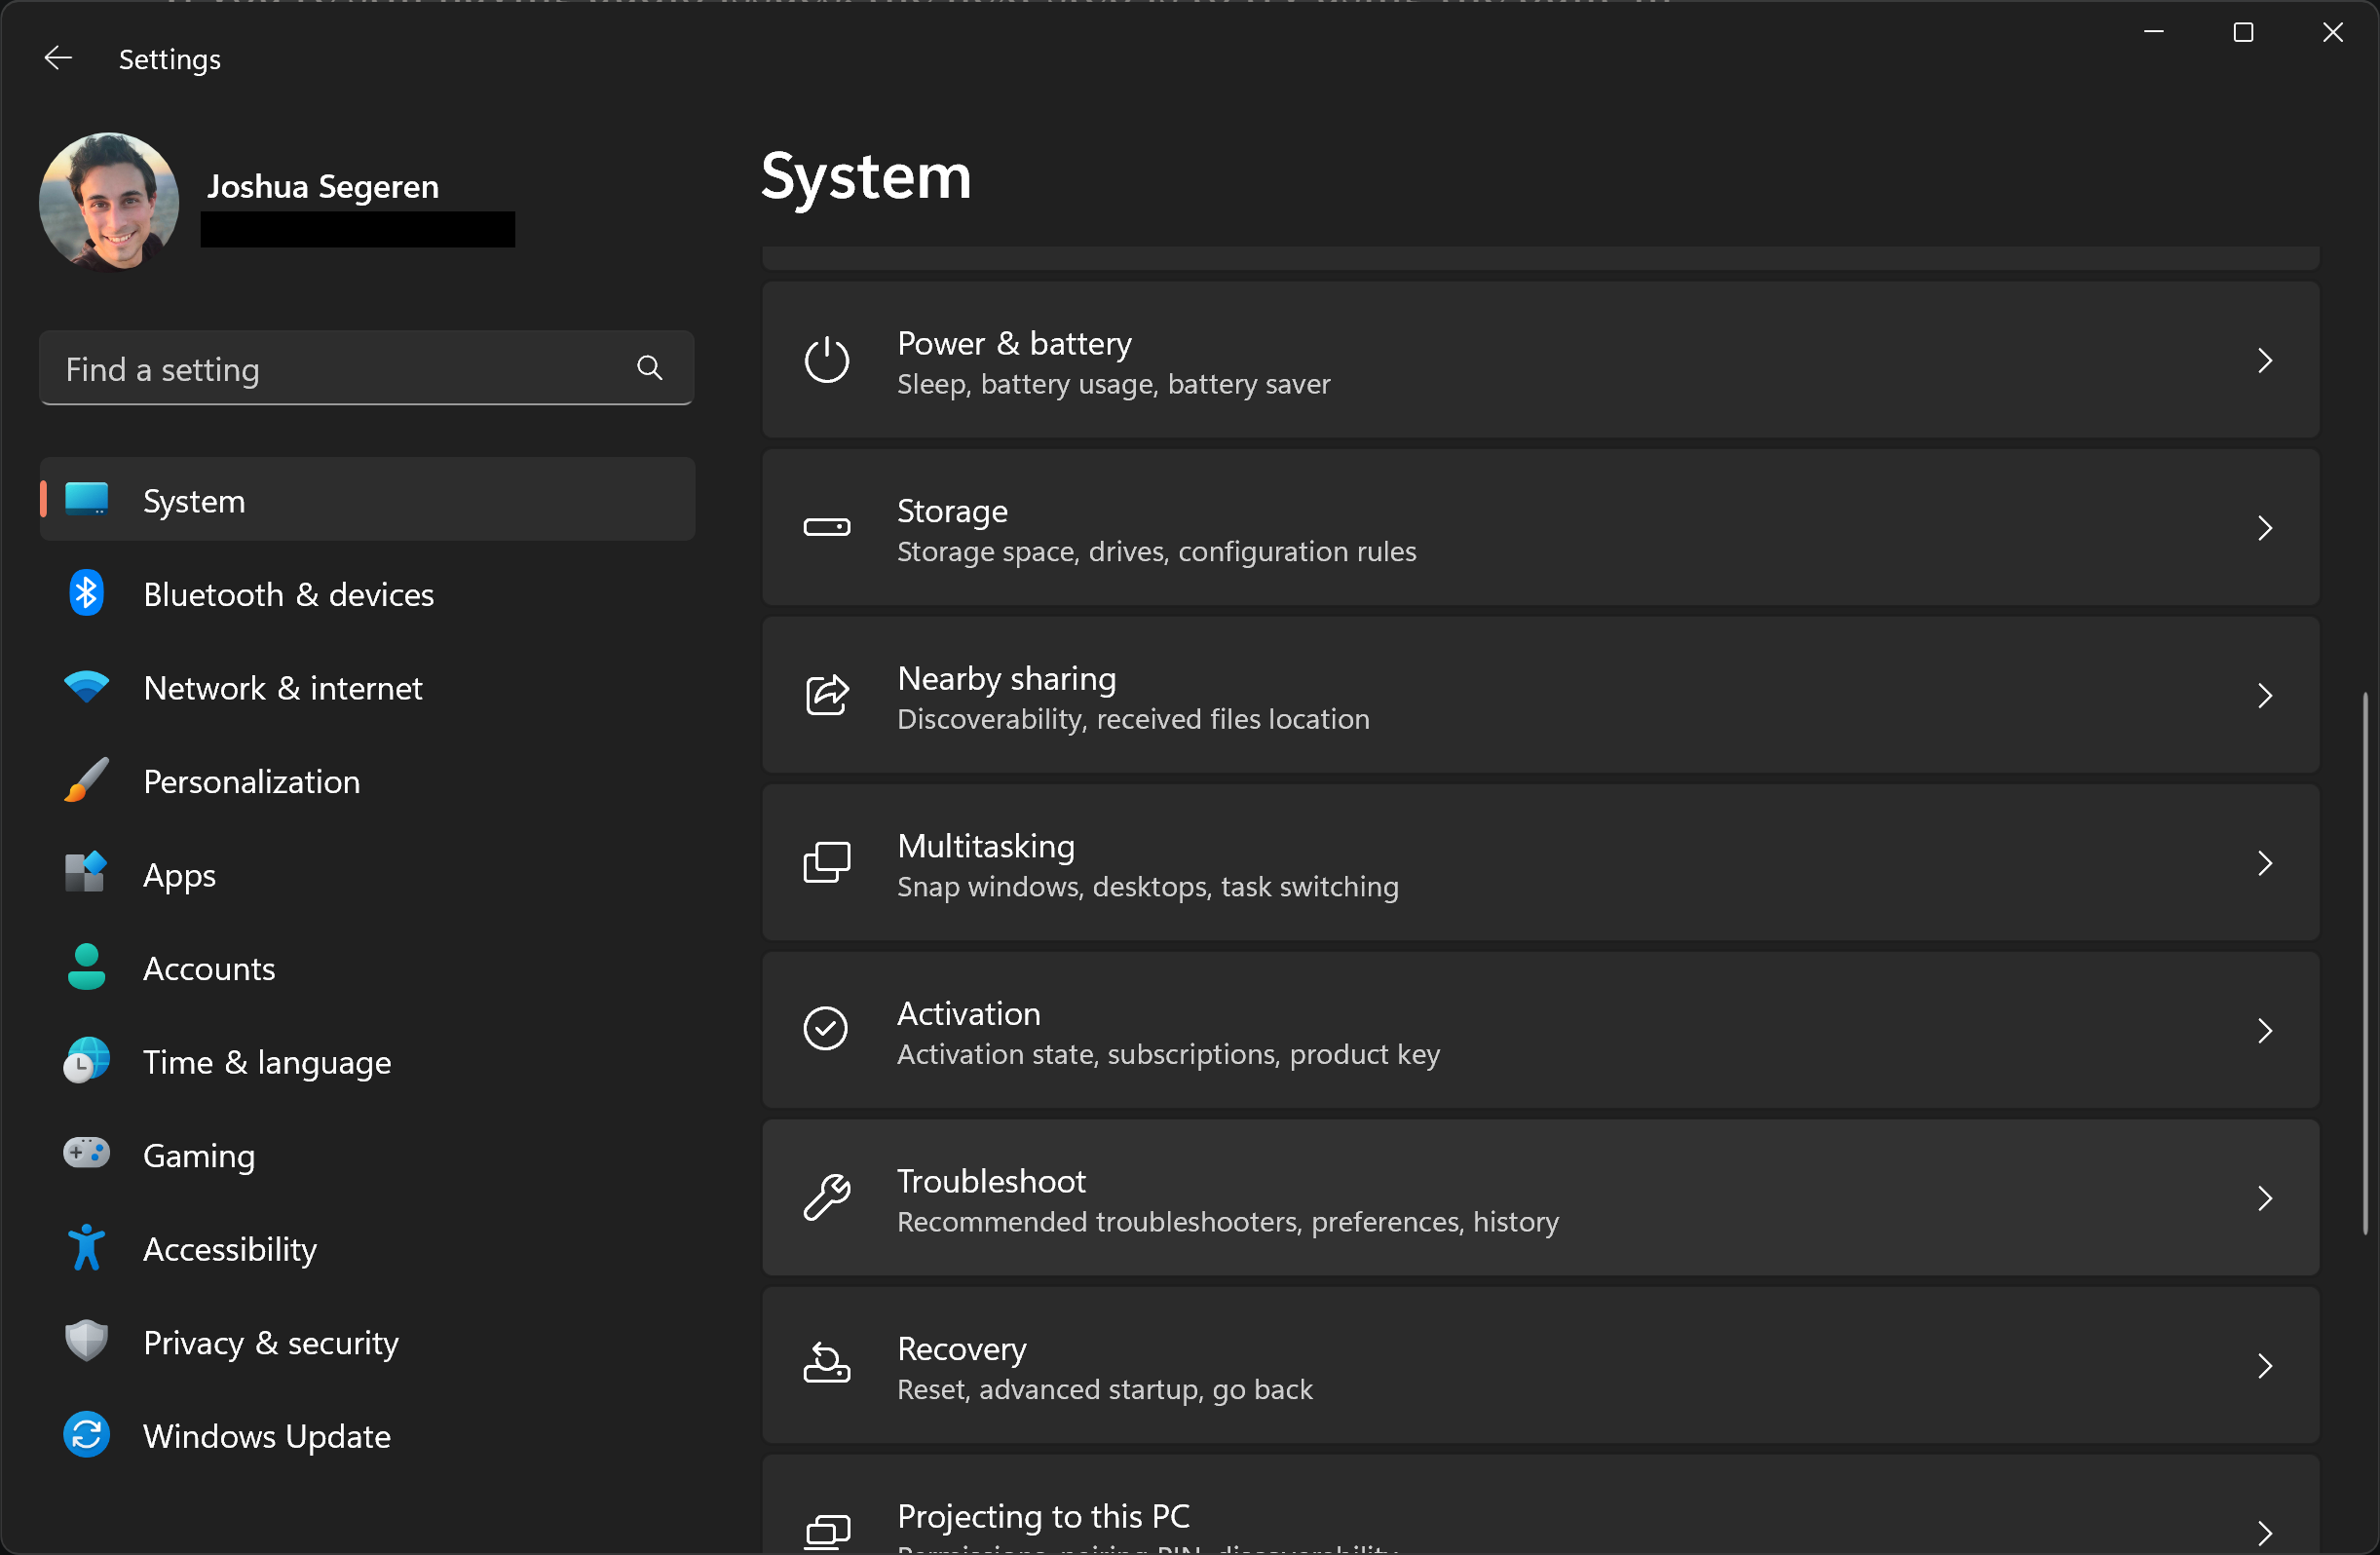
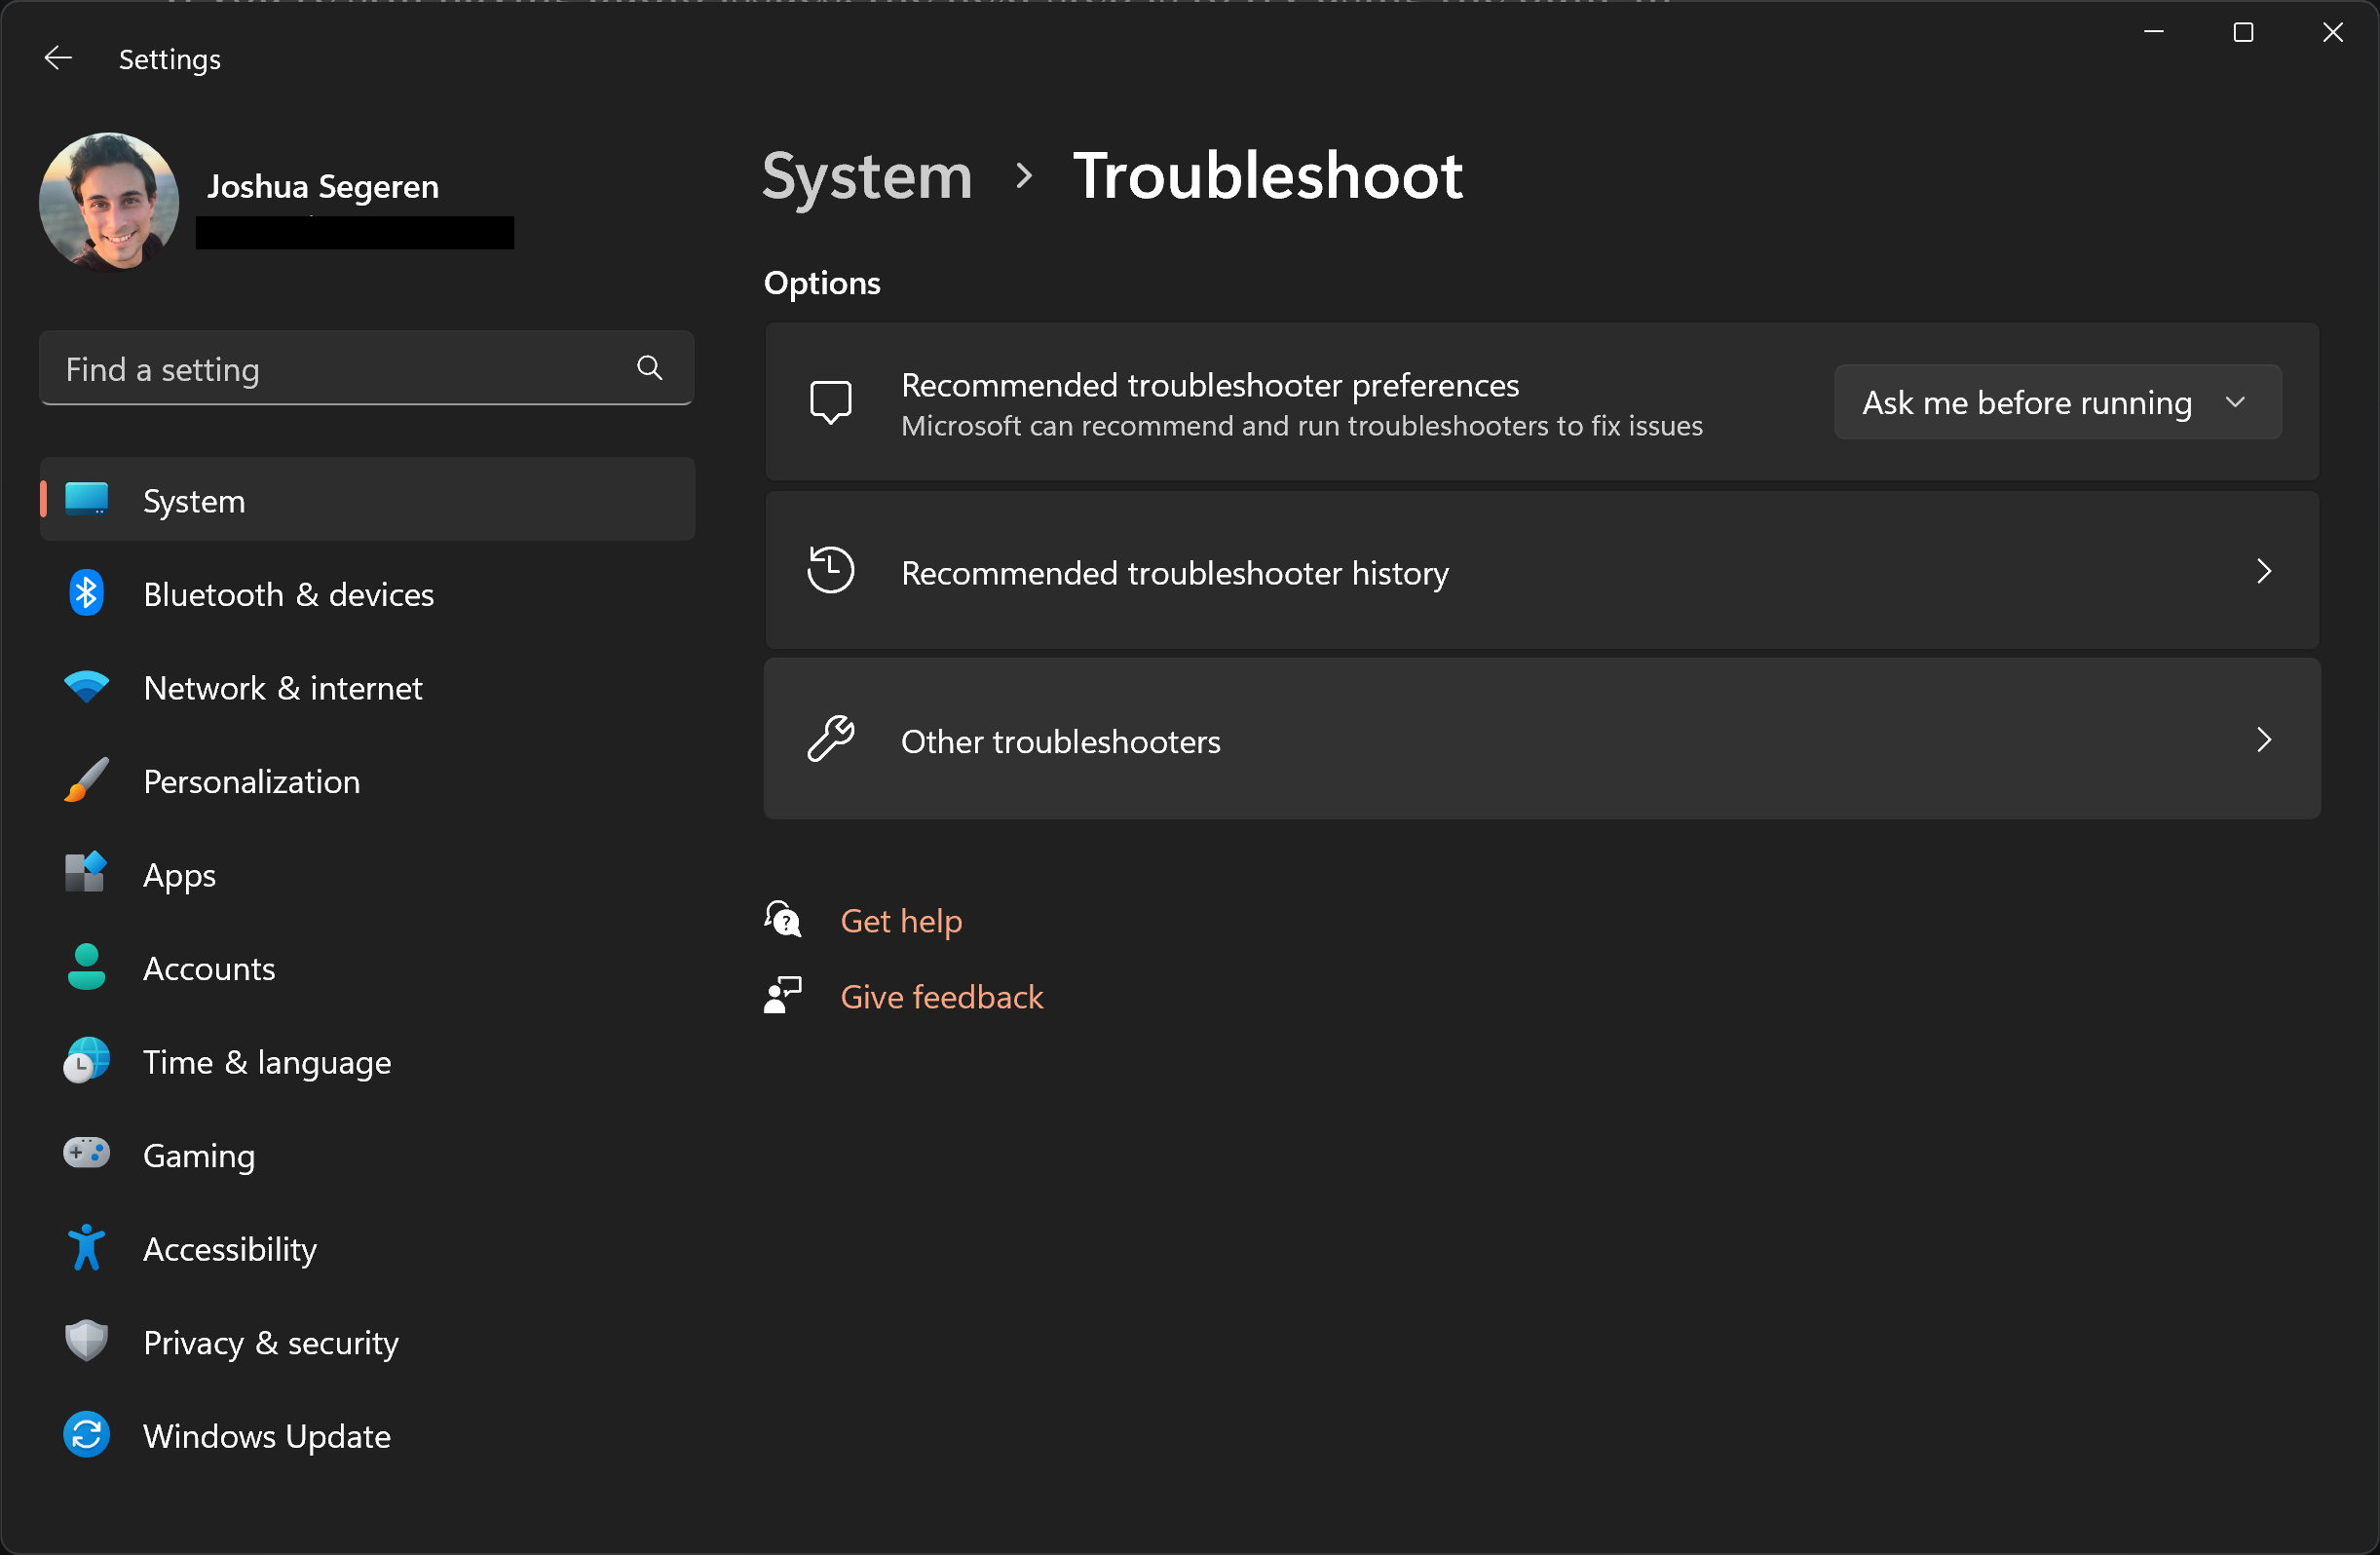
- Go to Windows Settings > System > Troubleshoot. (Shortcut: Windows key + I, search 'Troubleshoot'.)
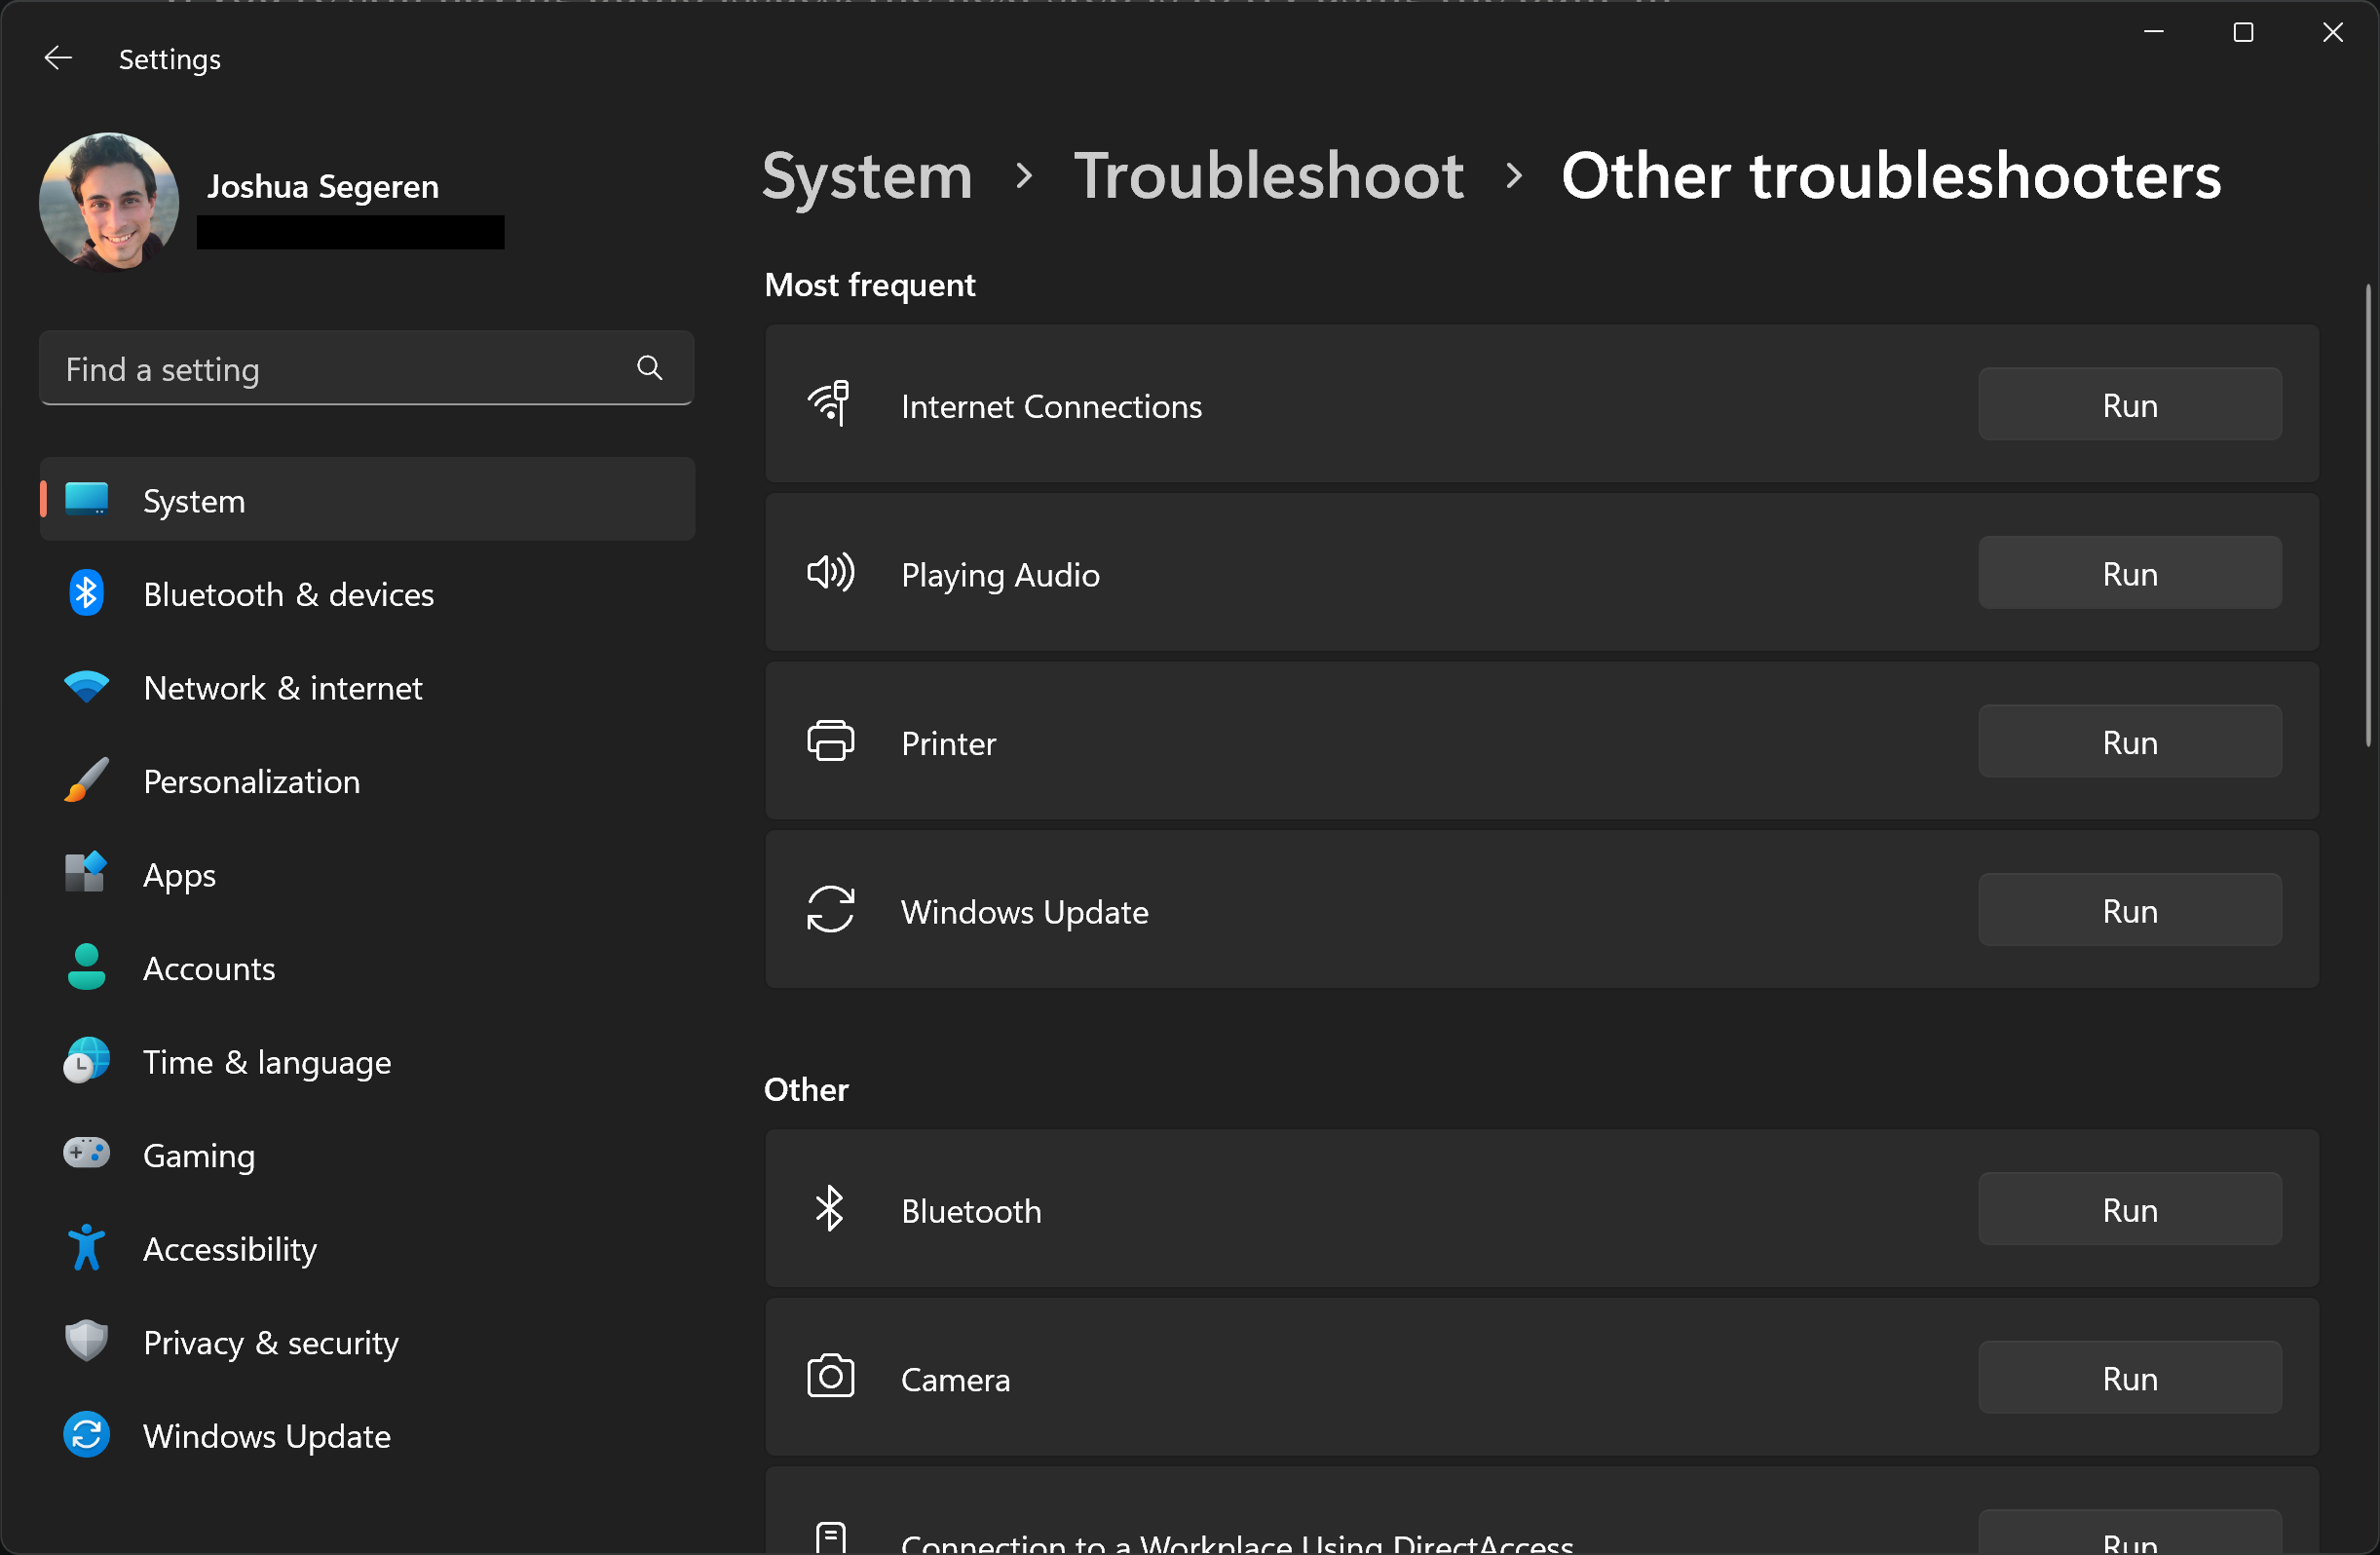
- Click on "Other troubleshooters".
- For issues playing audio (output), click the "Run" button on "Playing Audio". For issues recording audio (microphone / input), click the "Run" button on "Recording Audio".
- Follow the prompts to run the troubleshooter and see if it can resolve the issue.
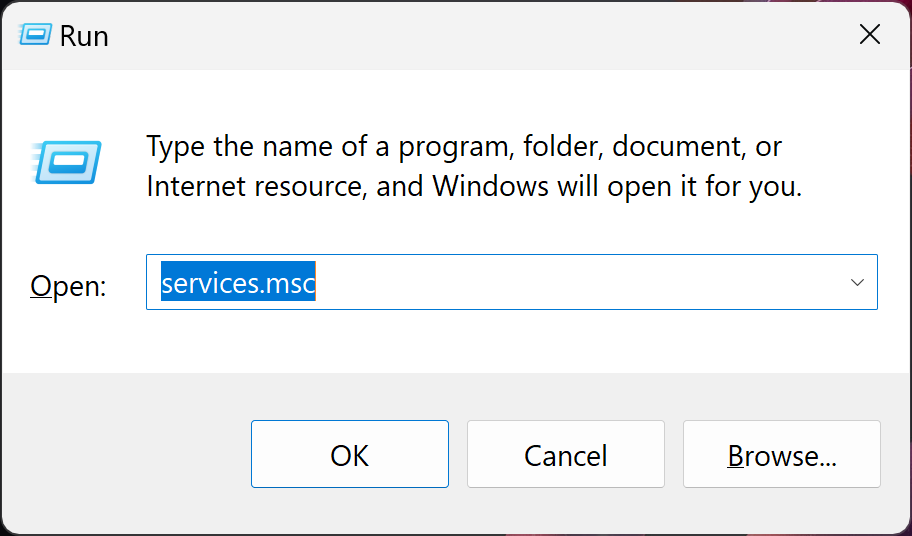
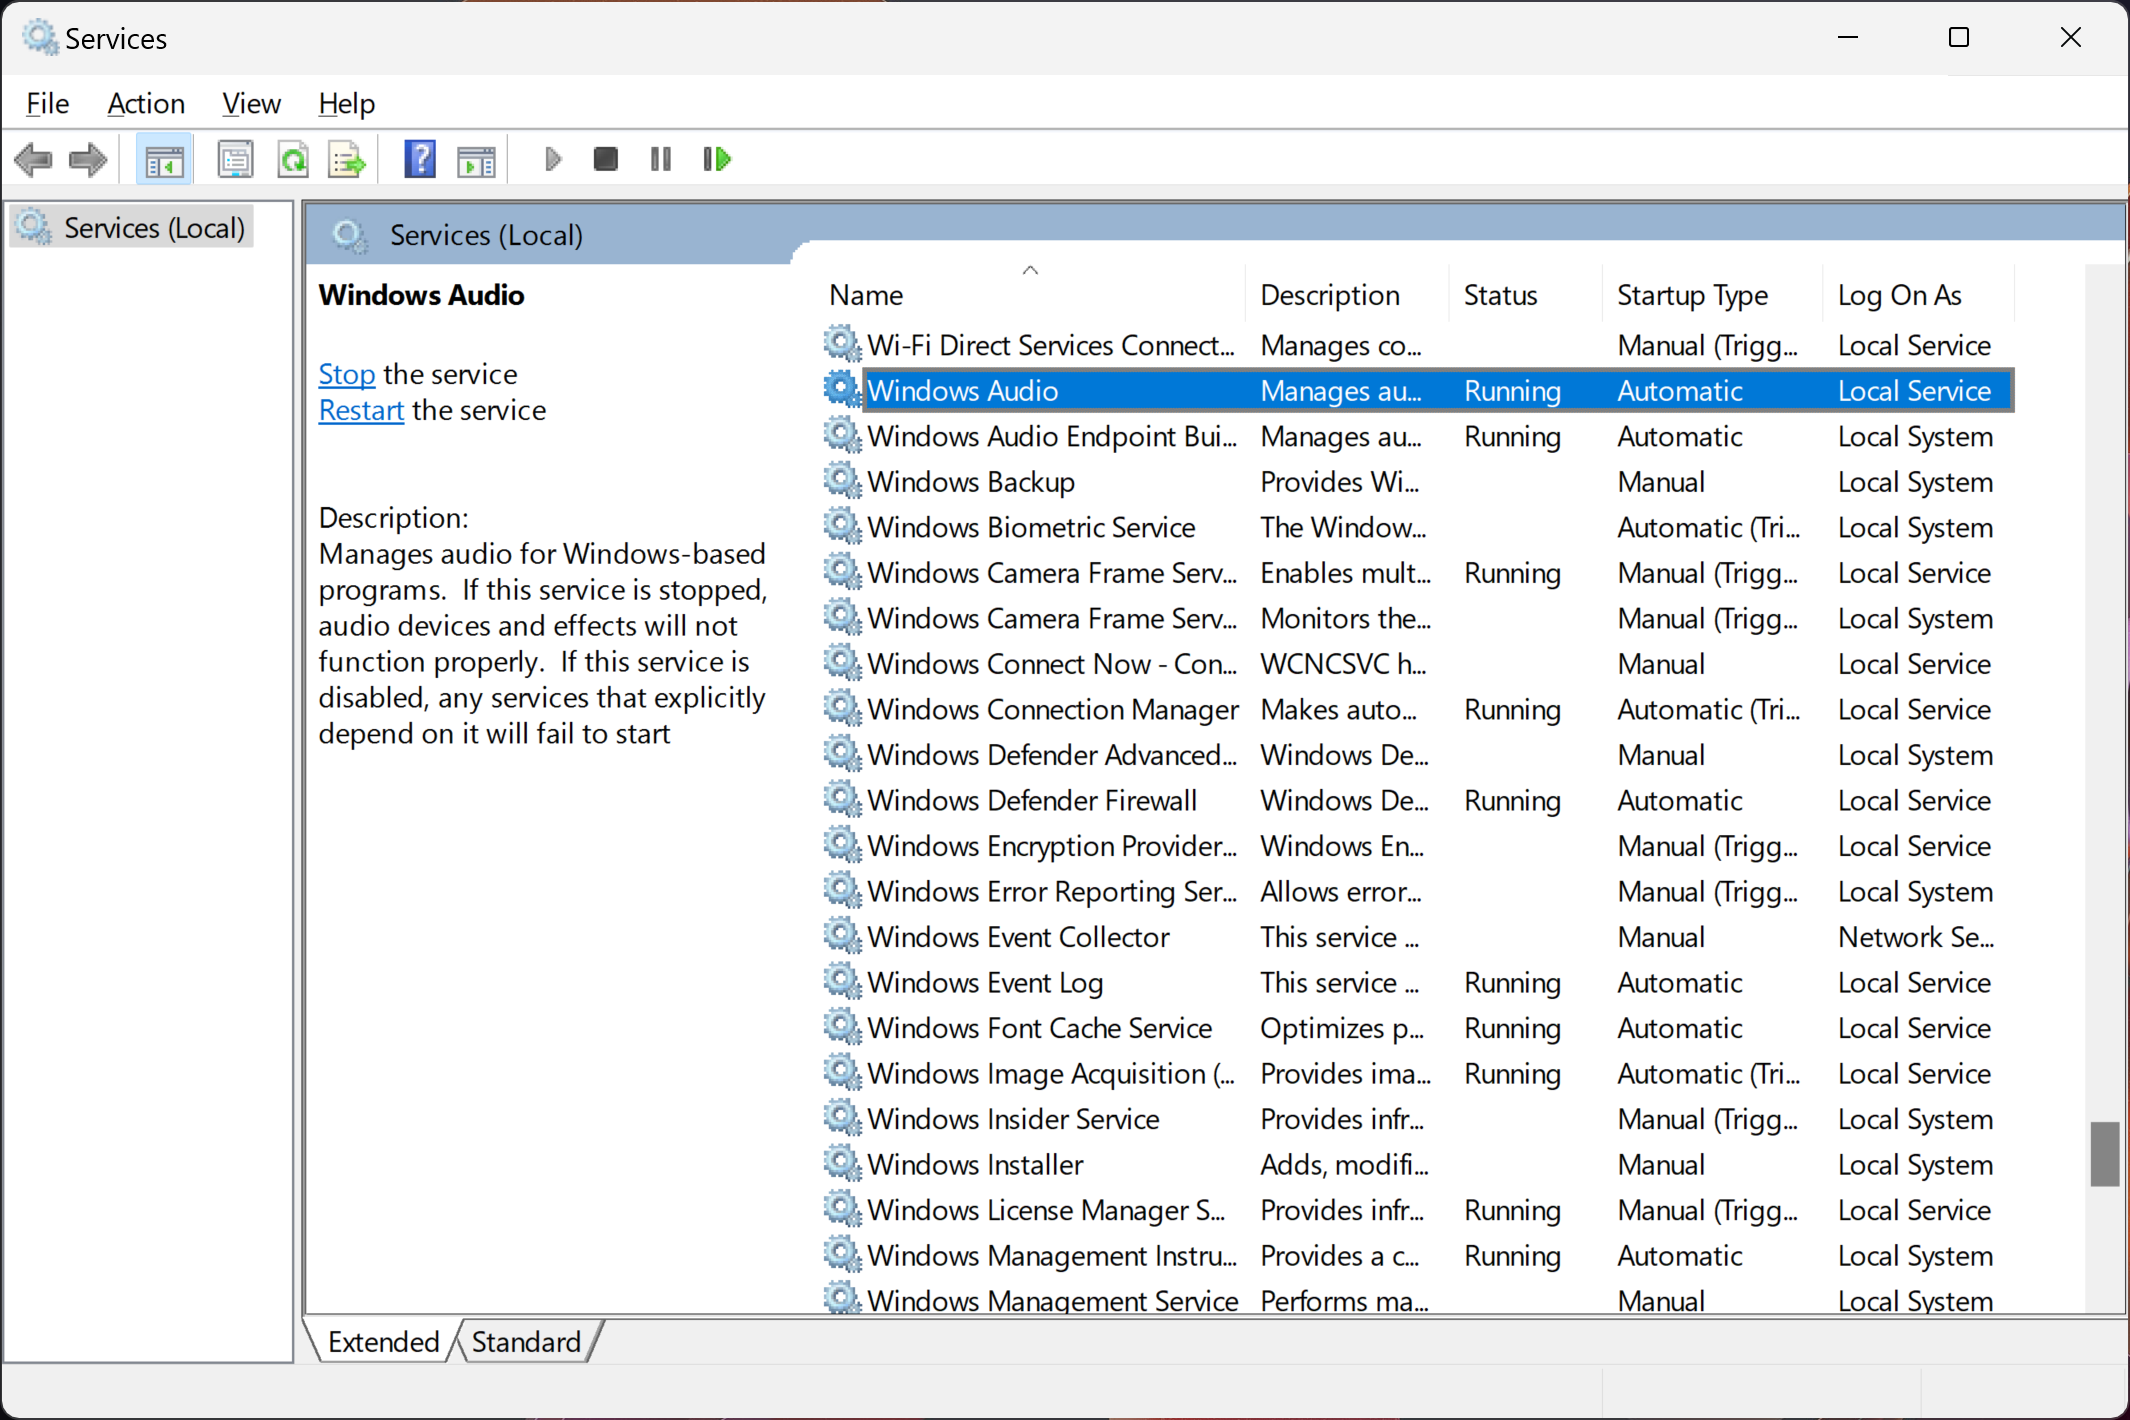
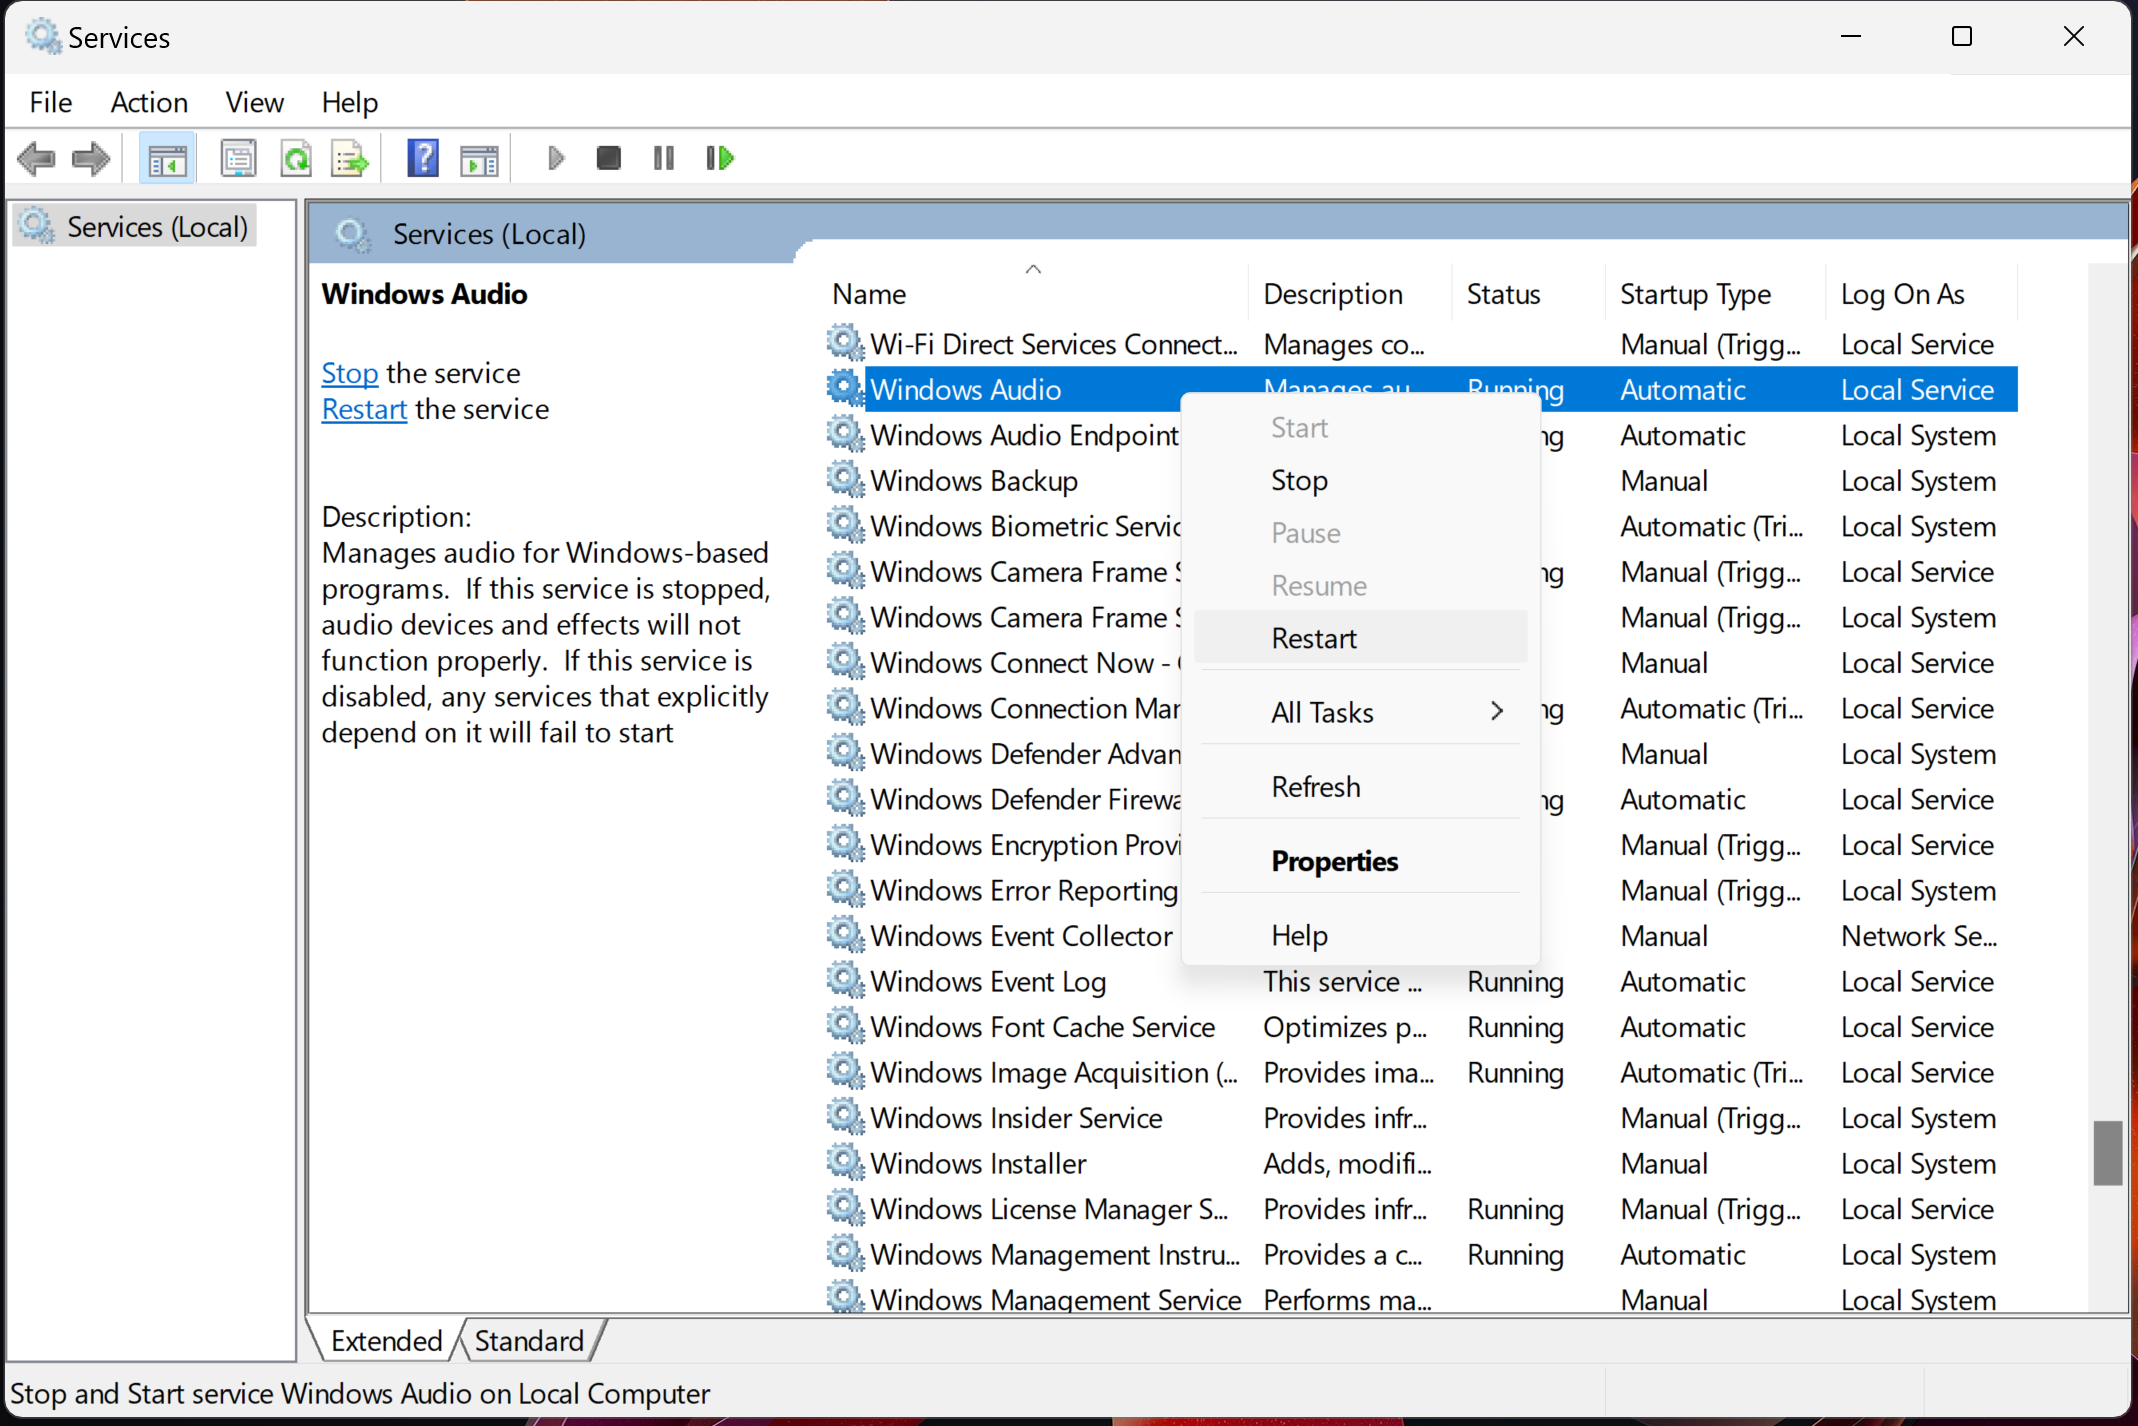
5. Restart the Windows Audio services
If the above steps—including the troubleshooter—doesn't fix the issue, you may need to restart the Windows Audio services. To do this:
- Press the Windows key + R to open the "Run" dialog box.
- Type "services.msc" into the box and press Enter. This will open the Windows Services window.
- Scroll down the list and look for the following services: "Windows Audio," "Windows Audio Endpoint Builder," and "Remote Procedure Call (RPC)".
- Right-click on each service and click "Restart."
6. Reset audio device settings to defaults
If all of the above steps haven't fixed the issue, you can try resetting your audio device settings to their default values. To do this:
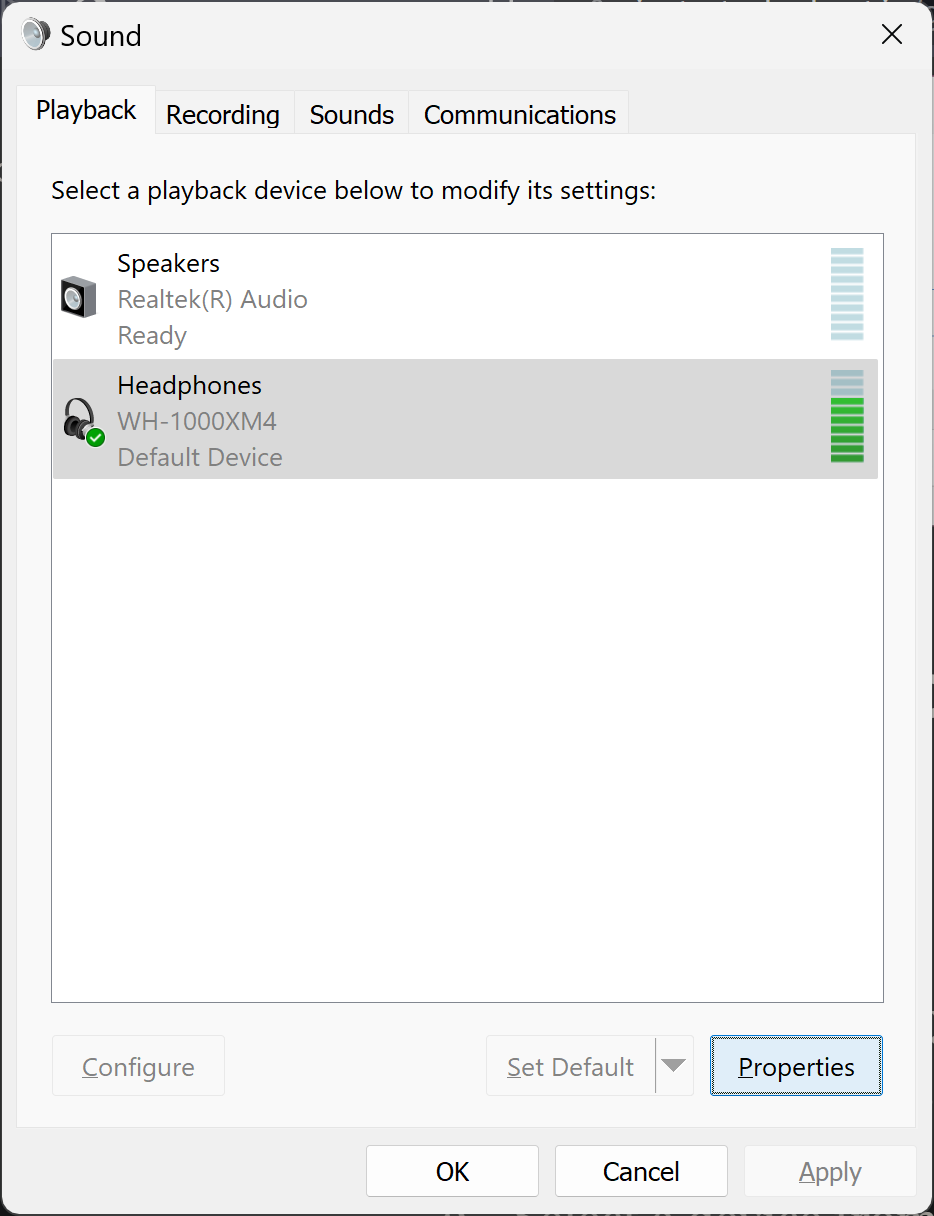
- Go to Settings > System > Sound.
- Under "Advanced", click "More Sound Settings".
- Select a device from the appropriate tab: Playback for audio output devices, or Recording for audio input devices.
- Click the Properties button.
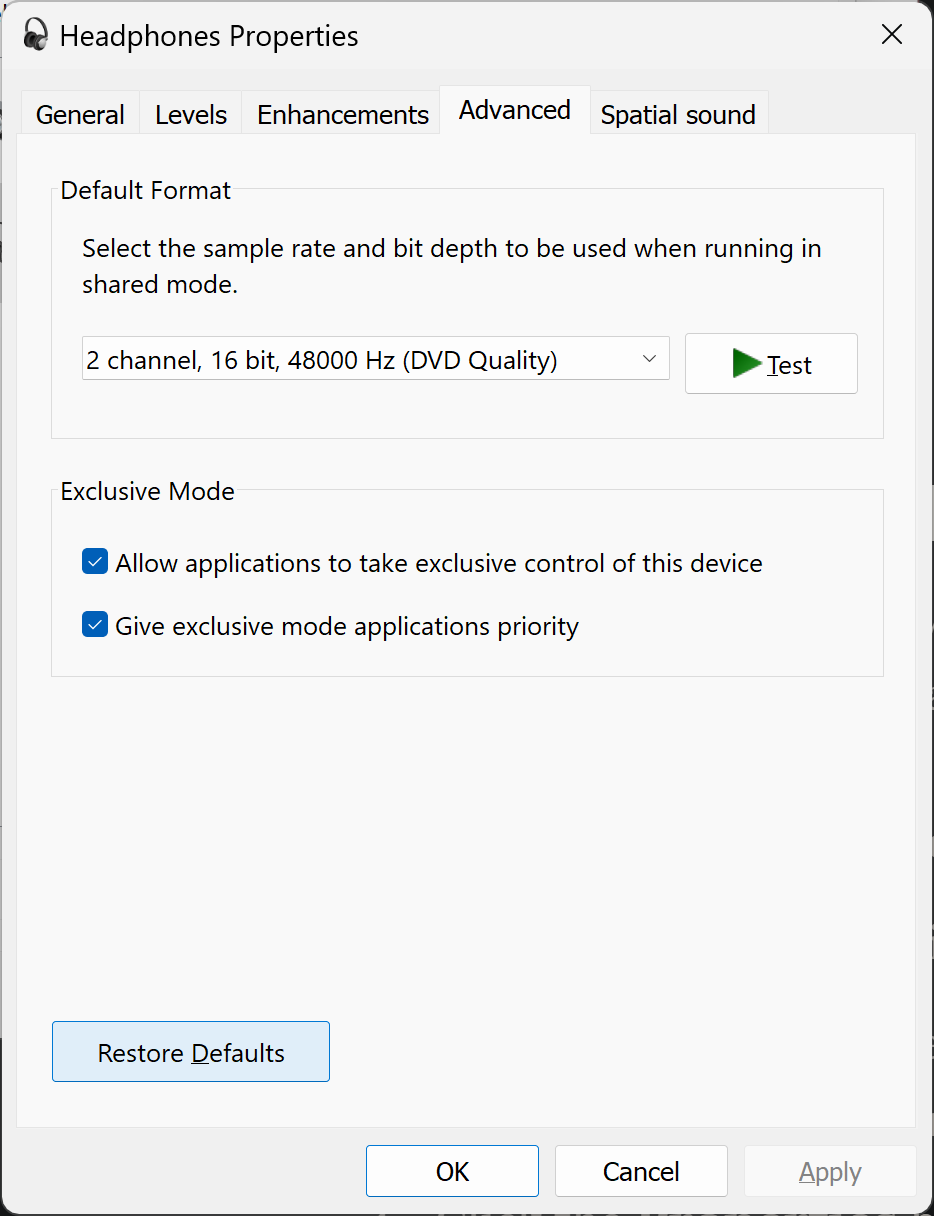
- Click on the "Advanced" tab.
- Click the "Restore defaults" button.
7. Update or reinstall audio drivers
If you're still having audio issues, the next step is to make sure you have the latest audio device drivers installed on your computer. You can do this by going to the manufacturer's website and downloading the latest drivers for your specific audio device.
If you already have the latest drivers installed and are still having issues, you may need to try reinstalling them. To do this:
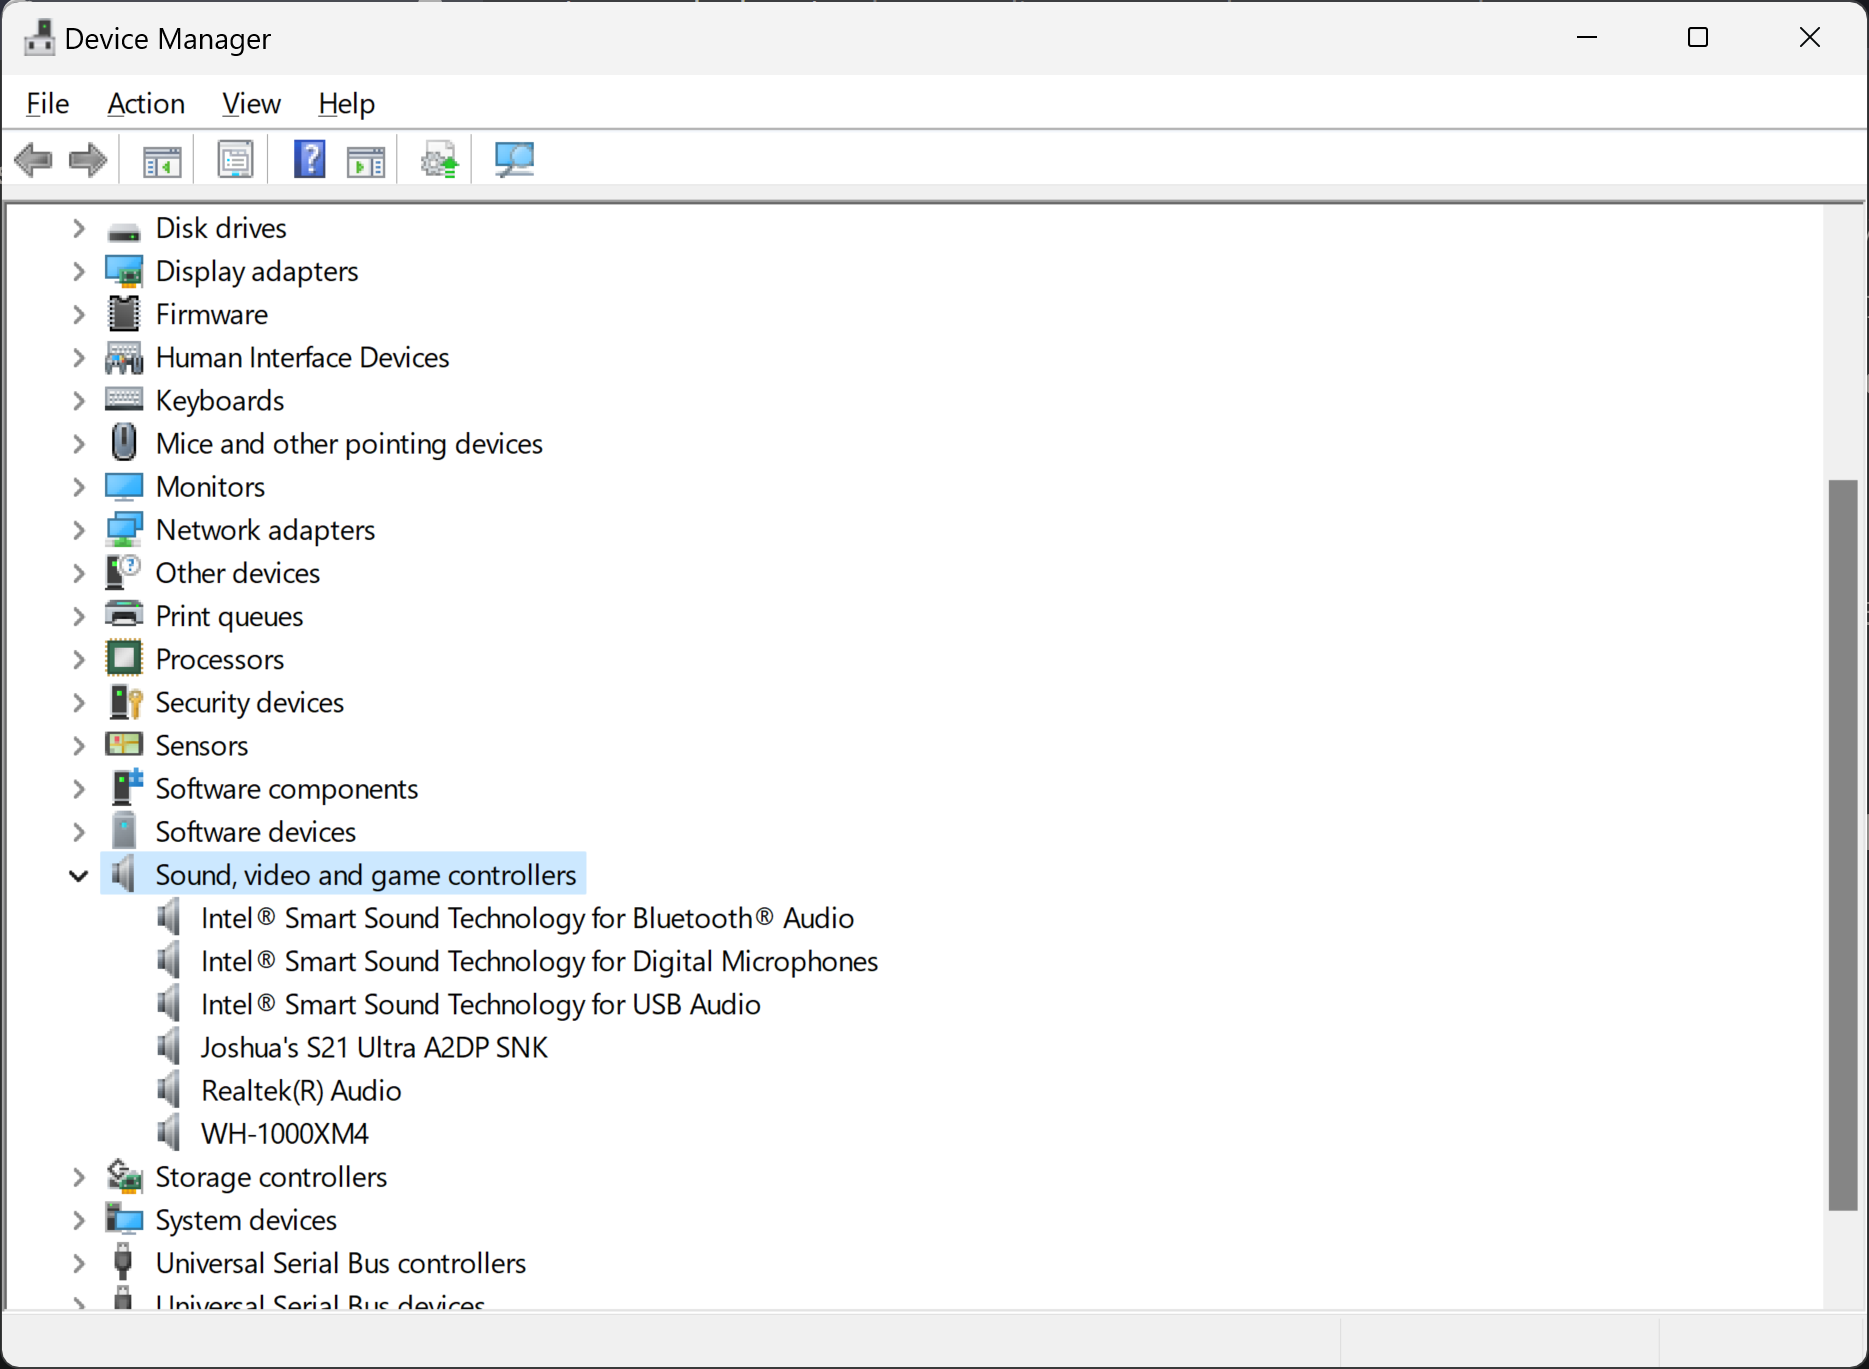
- Press the Windows key > type "Device Manager" in the search box.
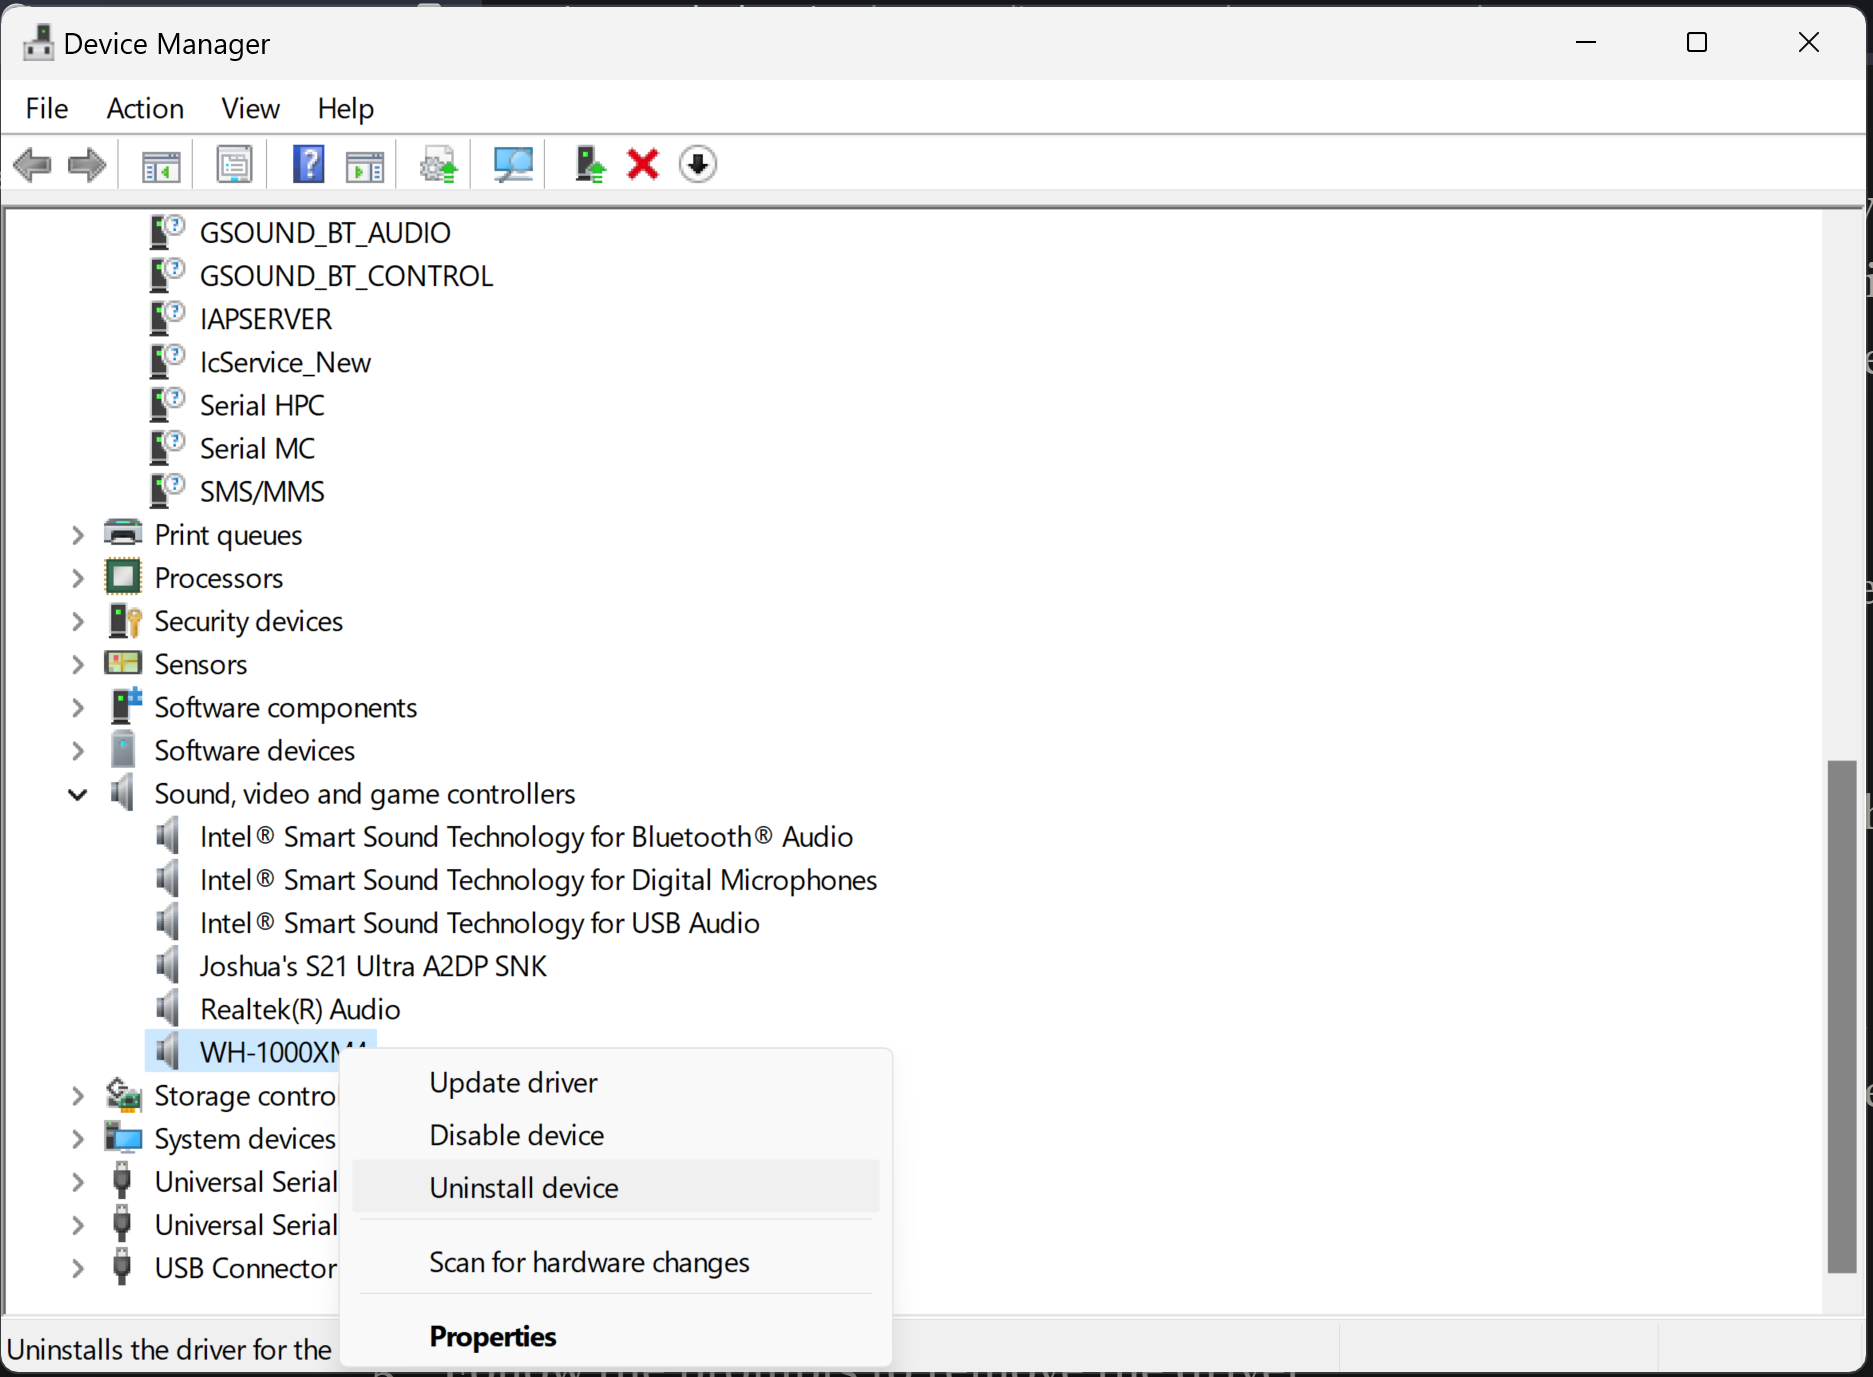
- Click on Device Manager to launch it.
- Expand the "Sound, video, and game controllers". (Note: you may also want to repeat this for the "Audio inputs and devices", "Audio Processing Objects", and "Other devices" groups.)
- Right-click on your audio device and select "Uninstall device".
- Follow the prompts to remove the driver.
- Restart your computer, and the driver should be automatically reinstalled.
8. Install Windows updates
Finally, if you've tried all of the above steps and are still having audio issues, it's worth checking to see if there are any updates available for your operating system and devices.
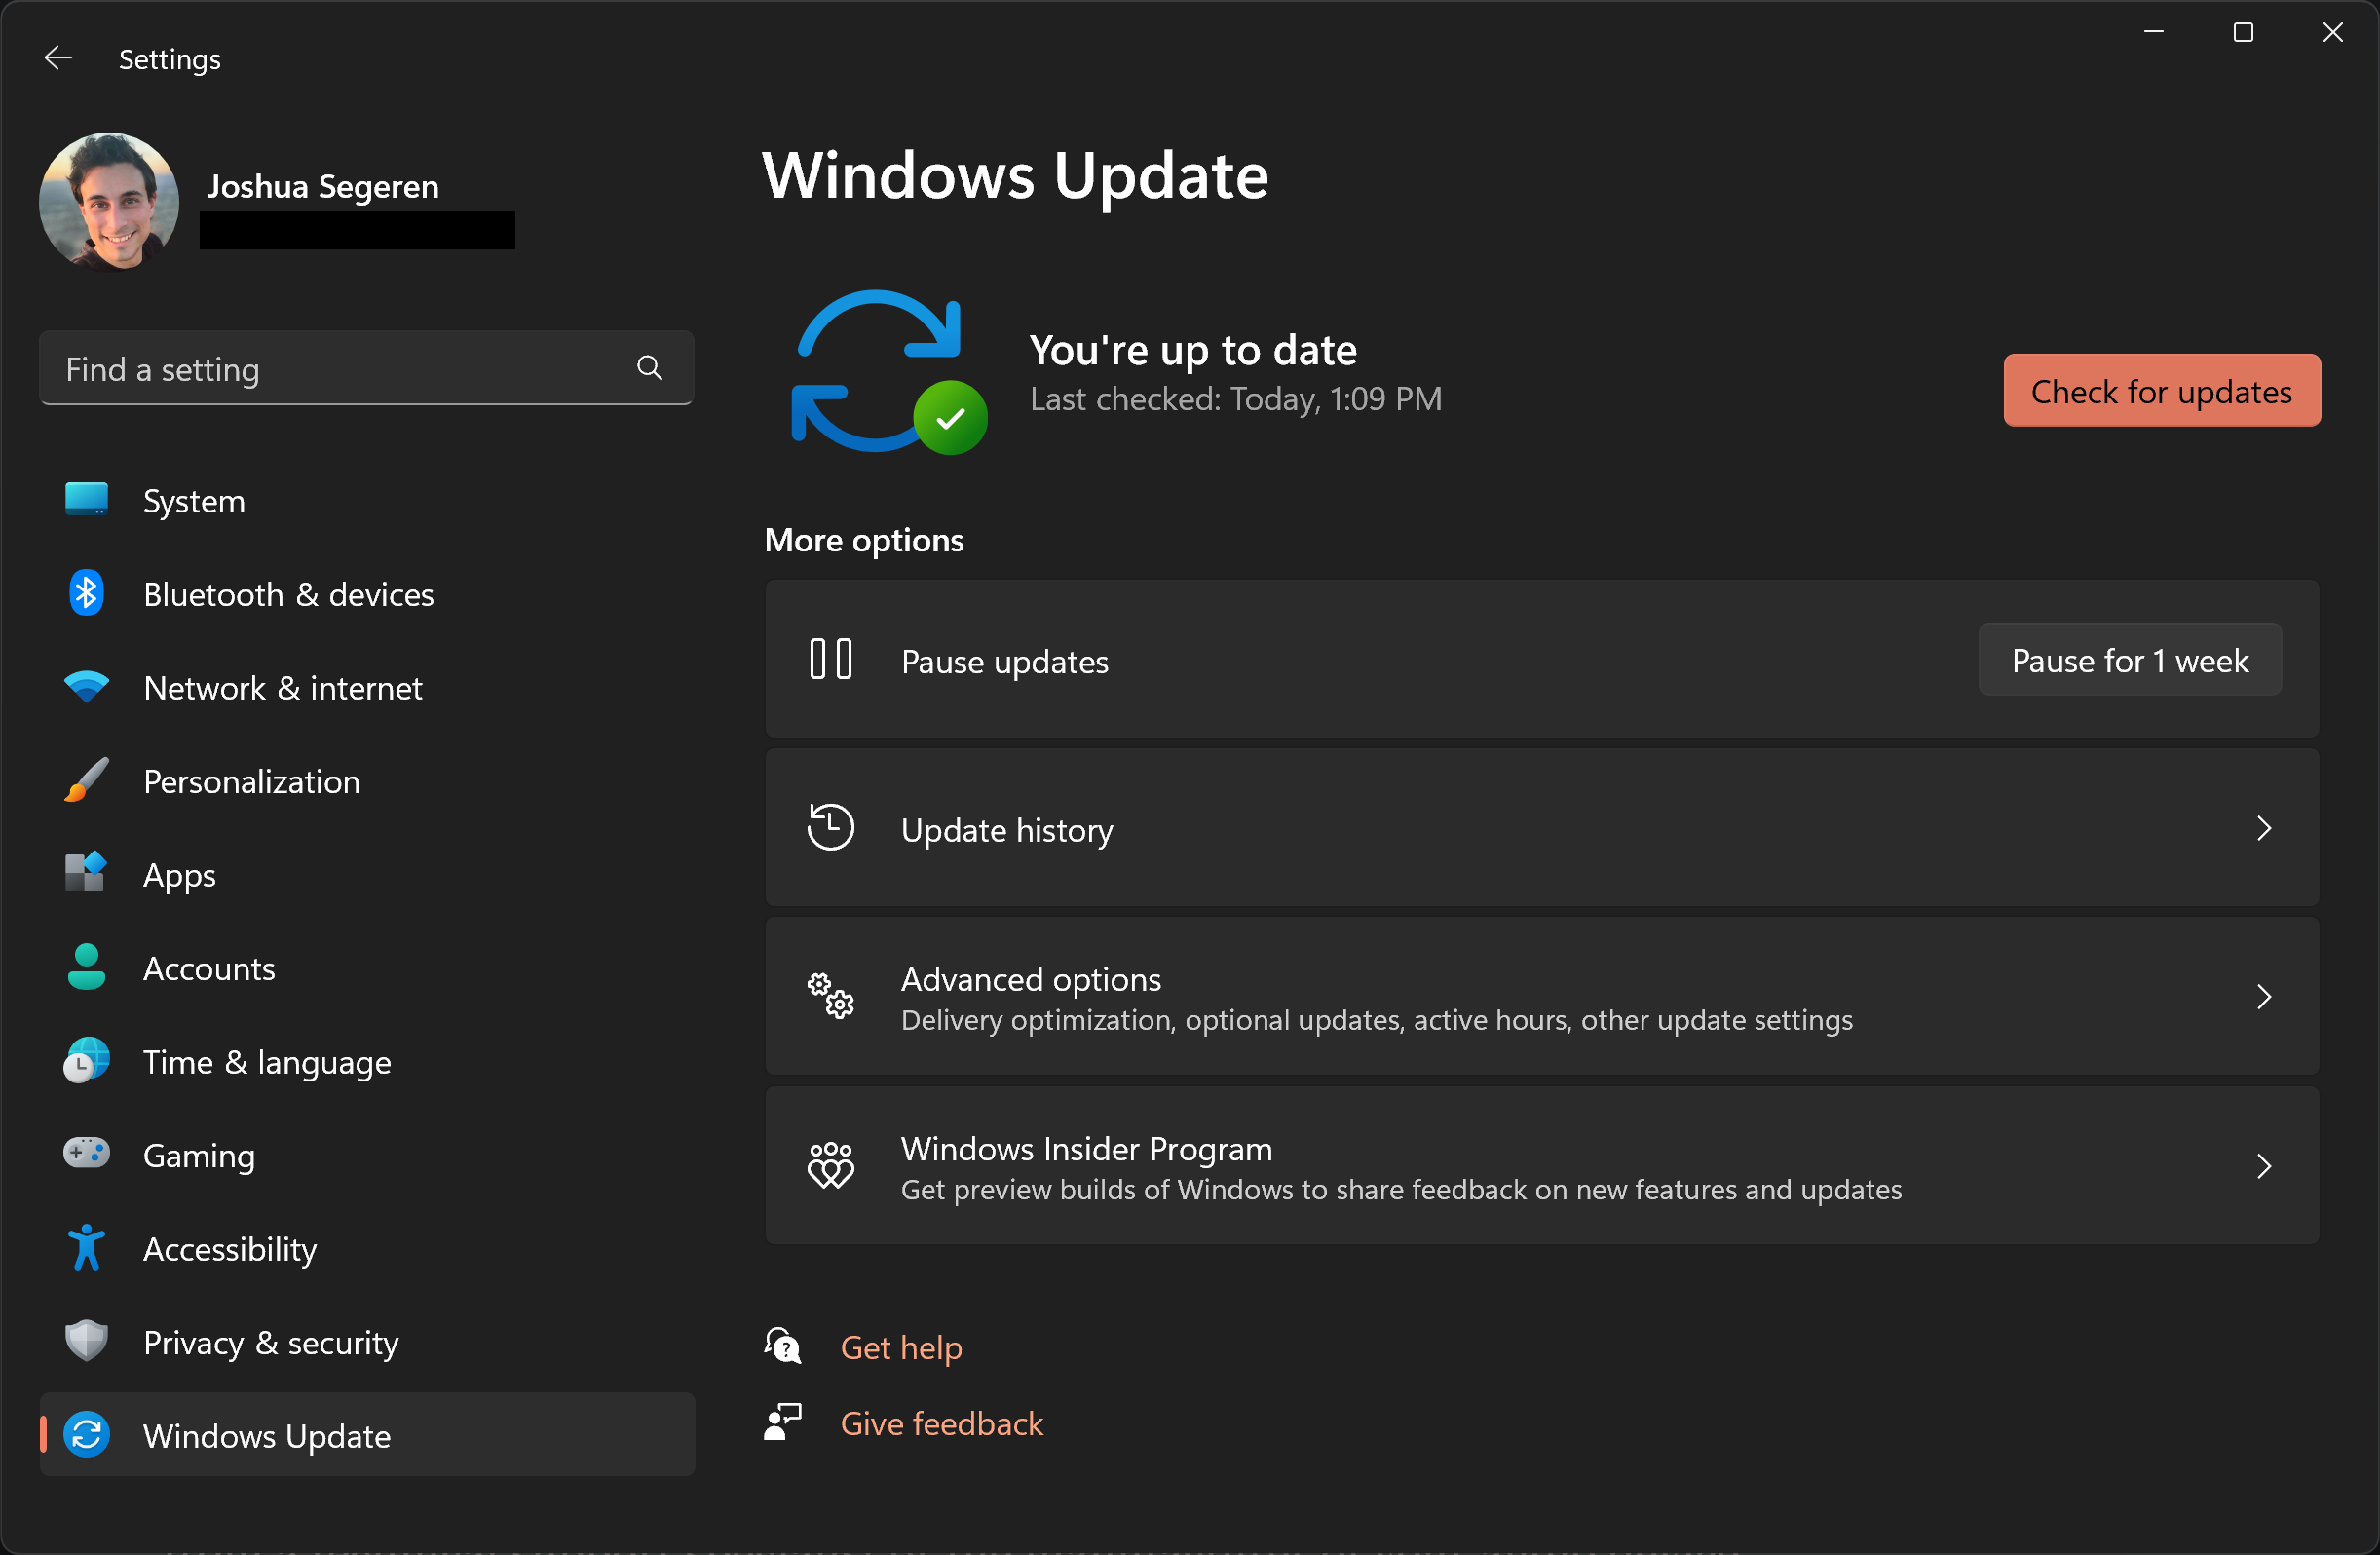
Windows updates can often include fixes for audio issues, so installing the latest updates may help resolve the problem. To check for updates:
- Go to Settings > Windows Update tab.
- Click on the "Check for updates" button.
- If any updates are available, follow the prompts to install them.
We hope these steps have helped you reset your audio settings and fix any audio issues you were experiencing on your Windows 11 computer. If you're still having problems after trying all of these steps, you may need to seek further assistance from a technical support specialist or the manufacturer of your audio device.