Take Control of Your Inbox with Filters and Labels
Transform your crowded inbox with filters and labels. Save hours of time with an automated system to organize your emails.

Do you feel overwhelmed by the constant influx of emails in your inbox? Does it take too long to find important messages buried among the clutter? If so, it's time to get organized with filters and labels.
Having a single inbox for personal and work email can get chaotic. But with some simple filtering rules and color-coded labels, you can transform your inbox into an efficient system for managing all your messages.
In this post, I'll explain:
- The benefits of using filters and labels
- How to set up filters in Gmail
- Tips for organizing your labels
- Advanced filtering strategies
- How to use filters and labels together
- Common inbox organization mistakes to avoid
- Answers to frequently asked questions
Read on to learn how filters and labels can help you take control of your inbox and boost productivity.
Why Use Filters and Labels
Filters and labels provide an automated way to categorize and organize incoming emails. Here are some key benefits:
Find Messages Quickly
Labels allow you to view just a subset of emails (e.g. only those labeled "Work"). No more endlessly scrolling and digging through hundreds of messages.
Never Miss Important Emails
Set up filters to automatically label key messages (like those from your boss) so they stand out. Never miss an urgent email again.
Reduce Anxiety
Visually separate different types of emails using color-coded labels so your inbox looks organized - not overwhelming.
Maintain Context When Switching Roles
Quickly pivot from personal to work emails since related messages will be grouped by labels. No need to log into separate accounts.
Automate Tidying Up
Filters run in the background to file emails away so you don't have to manually organize each message. Save hours of time!
Setting Up Filters in Gmail
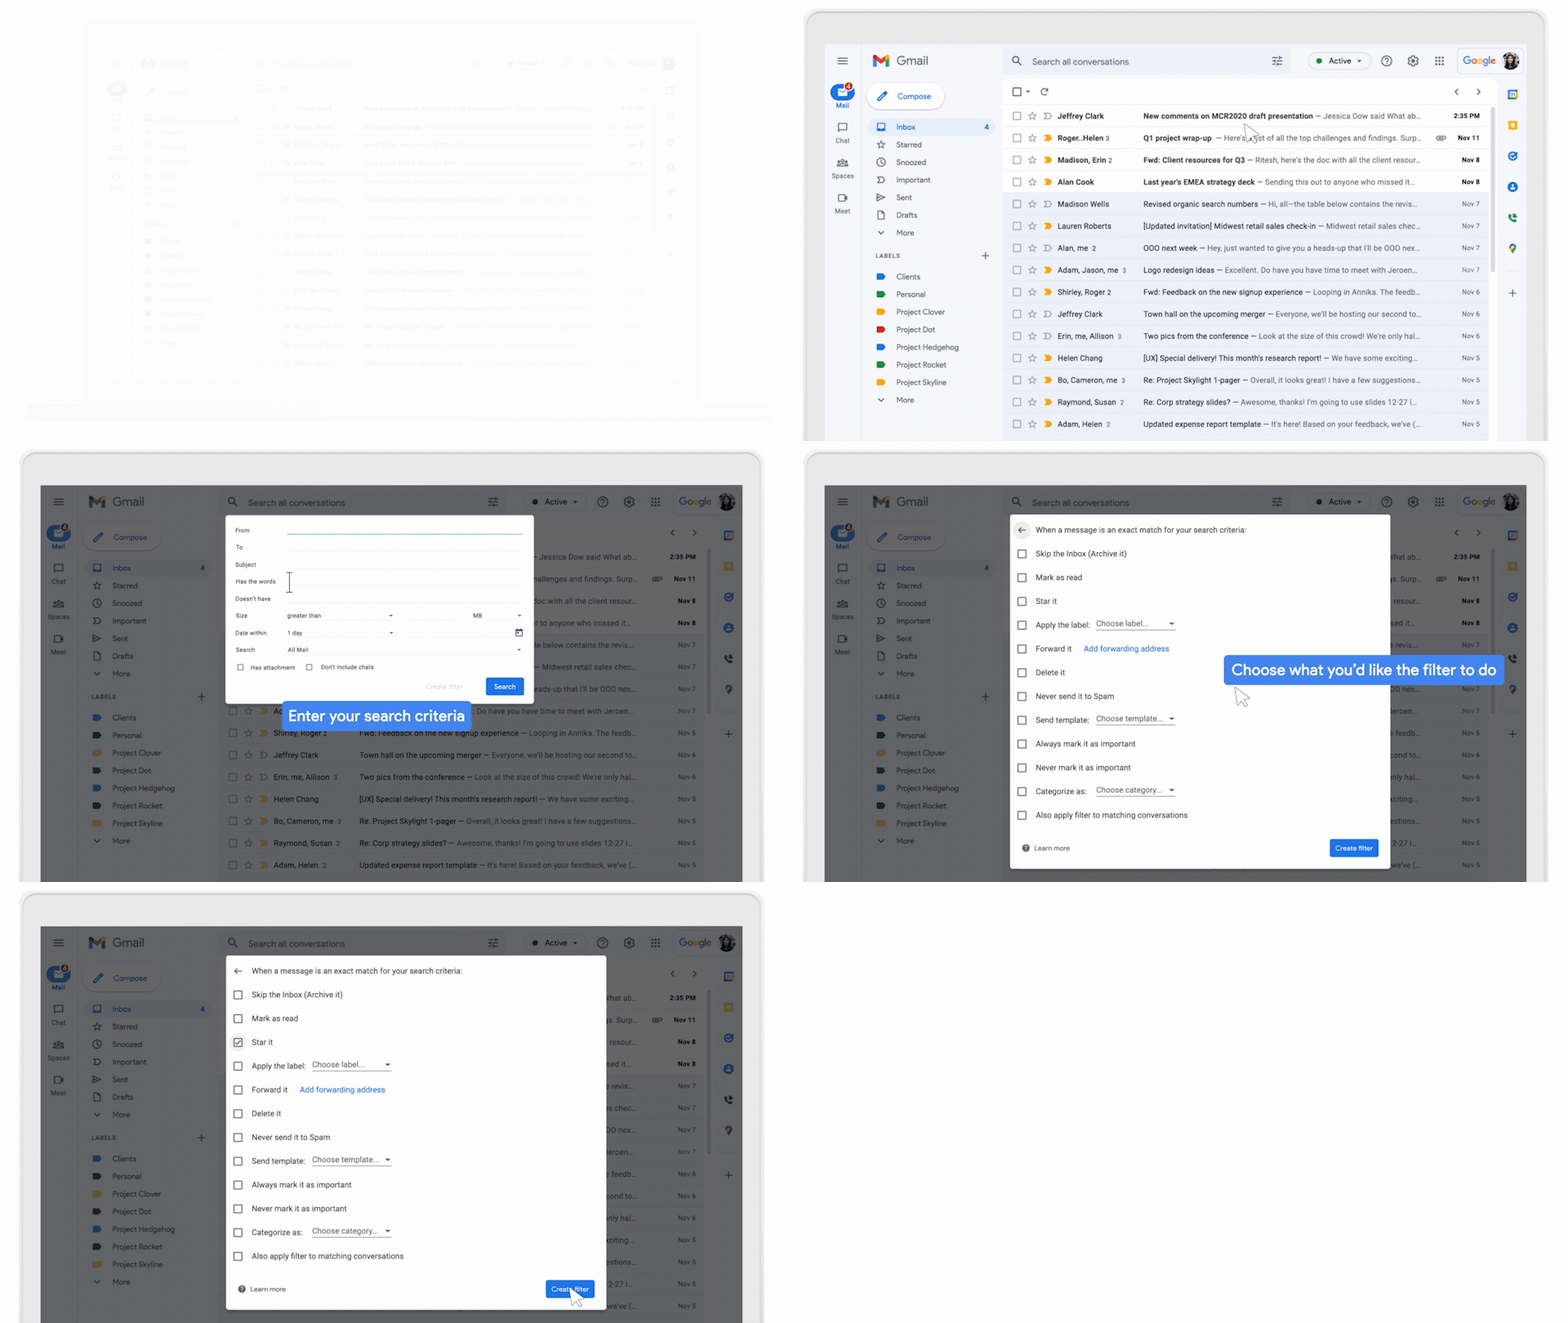
Filters automatically apply labels to incoming messages that meet your specified criteria. Here's how to create them:
- In Gmail, click the settings gear > See all settings > Filters and Blocked Addresses.
- Click Create a new filter.
- Enter filter criteria:
- Sender's email address
- Subject line keywords
- Words in the email body
- Size of email
- Has attachments, etc.
- Choose whether to apply a label to matching emails.
- Click Create filter.

Your filter will now auto-label new messages that get sent to your inbox based on your chosen criteria. Repeat these steps to make additional filters as needed. Gmail’s help center has more details on advanced filter criteria.
Organizing Your Labels
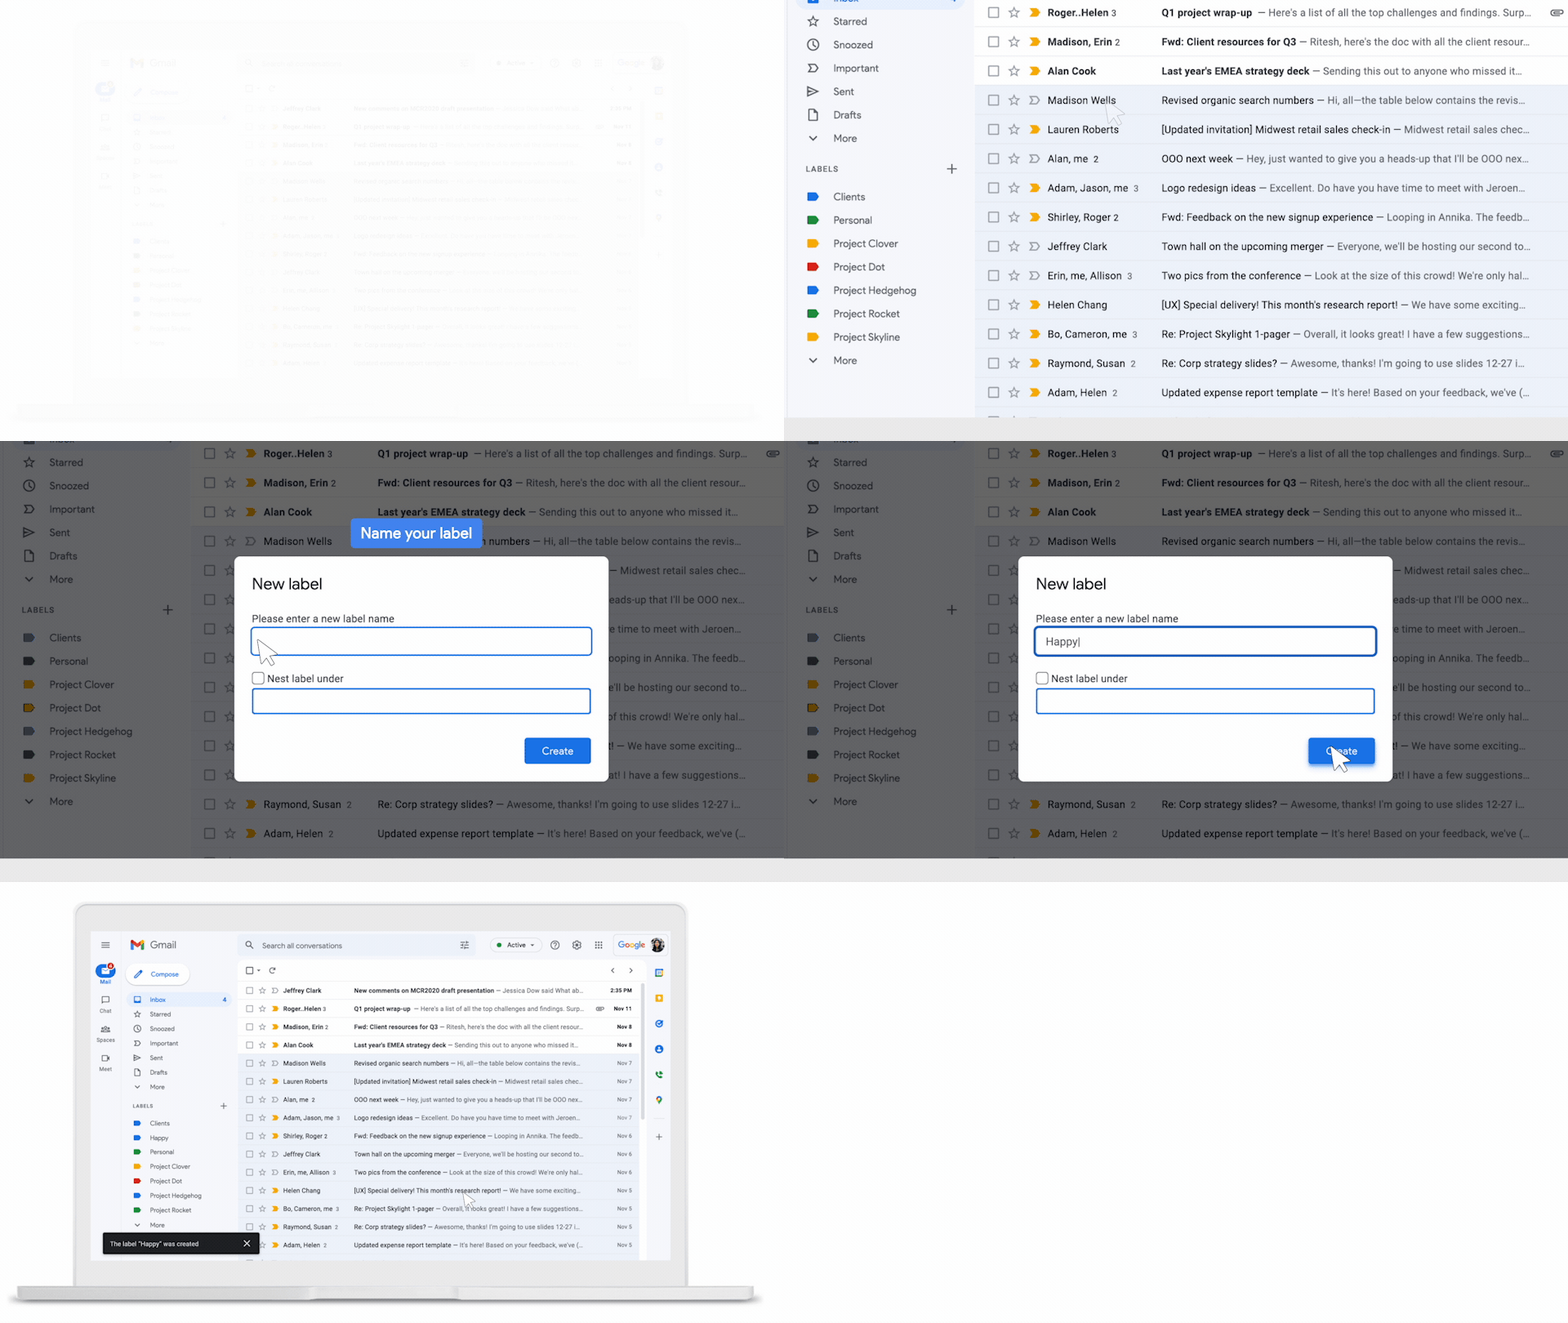
Once you've set up filters, it's time to add labels. Follow these tips for organizing your label system:
- Create labels for each major category like "Personal", "Work", "Clients".
- Nest labels in subcategories for more granularity when you have many (e.g. "Clients/Client A").
- Color code your labels to visually separate types of emails.
- Use keyboard shortcuts to quickly label messages as you process emails (e.g. "l" then "Enter" to apply label).
- Add icons to labels for even more visual organization.
- Create a "Follow Up" label for emails you need to revisit later.
- Use labels consistently so you know where to find messages.

With the right label structure in place, you can click labels to view just those types of emails - perfect for focusing!
Advanced Filtering Strategies
Here are some more advanced tips for setting up powerful filters:
- Filter based on whether an email is addressed TO you or just CC'd.
- Filter by date range to label emails from last week, month, etc.
- Label and skip the inbox for newsletters, notifications.
- Filter emails with certain attachments (pdfs, docs) into a label.
- Create filters for automatic archiving so old emails get labeled then trashed.
Get creative and make filters that suit your needs!
Using Filters and Labels Together
The real power comes when you use filters and labels together:
- Set up filters to auto-label incoming mail
- Create a logical label structure to categorize emails
- Click on labels to view just that type of message
This allows you to automatically organize emails as they come in, then segment them into specific categories you can toggle between.
Common Inbox Organization Mistakes
As you set up your filtering and labeling system, avoid these common mistakes:
- Creating too many labels that become overwhelming. Stick to a simple hierarchical structure.
- Forgetting to consistently apply labels to emails. Do this as you process messages.
- Not color coding labels to visually distinguish them. Use colors purposefully.
- Failing to review and refine your filters over time. Update them based on your evolving needs.
FAQ
Here are answers to some frequently asked questions about organizing your inbox with filters and labels:
How many labels should I have?
It depends on your needs, but aim for 4-8 top level categories, with nested sublabels if needed. Too many becomes unwieldy.
Should I delete emails or archive them?
Archive important messages that you may need later. Delete obvious clutter and newsletters you don't read.
Can I use filters on mobile?
Yes, Gmail filters work across web, iOS, and Android apps. Set them up on desktop for the easiest interface.
How do I re-label an email?
Open the email and click the Label icon to change or add new labels as needed.
When do filters apply labels?
Filters auto-label as soon as a matching email arrives in your inbox. Changes work retroactively too.
Conclusion
Email organization might seem daunting, but filters and color-coded labels provide a simple automated way to tame your inbox. By taking the time to set up rules and a thoughtful labeling system, you can significantly boost your productivity and focus.
The key is consistency - actually apply labels as you process emails so everything stays organized. Make a habit of regularly cleaning up your labels too.
It takes some trial and error, but once you get a handle on filters and labels, you'll wonder how you ever managed your inbox without them!


