How to Screen Record in Windows 11
Capture a screen recording in Windows 11 for a video tutorial, demo, game, or livestream - with Xbox Game Bar, PowerPoint, or OBS.

There are plenty of situations where you might need to capture a screen recording in Windows 11 (or 10), on either a laptop or desktop. You might be putting together a video tutorial, demo, game, or livestream.
Fortunately, there are many screen recording tools available that make the process quick and easy. Here are the three best screen recording tools for Windows 11.
This table captures the key differences between these screen recording tools, to help you decide which will best suit your needs:
| Xbox Game Bar | PowerPoint | OBS | |
|---|---|---|---|
| Included in Windows (built-in) | Yes | Requires license | No |
| Record app (or game) | Yes | Somewhat | Yes |
| Record full screen | No | Yes | Yes |
| Record specific area | No | Yes | Yes |
| Record audio | Yes | No | Yes |
| Record voice (microphone) | Yes | Yes | Yes |
| Record long videos | Yes (max 4 hrs) | Yes (no limit) | Yes (no limit) |
| Livestream (YouTube, Twitch) | No | No | Yes |
We've prepared step-by-step guides on how to use each. Feel free to jump ahead to your tool of choice. Let's get started!
Xbox Game Bar
The Xbox Game Bar is a feature included in Windows 11 (and 10). It's the quickest & easiest option to record your screen in Windows since it's a built-in tool.
- Although originally designed for capturing in-game recordings, you can use it to record any app.
- It will only record the most recent/active app window! (If you need to record multiple apps or the full screen, check out the PowerPoint or OBS guides.)
- By default, it'll capture your mouse cursor & system audio (if a sound is playing). If you'd like you can capture your voice (microphone) as well.
To start, open the Game Bar by pressing ⊞ Win + G. (Or, open the Start menu with the Windows key, then type "Game Bar" and press Enter.)
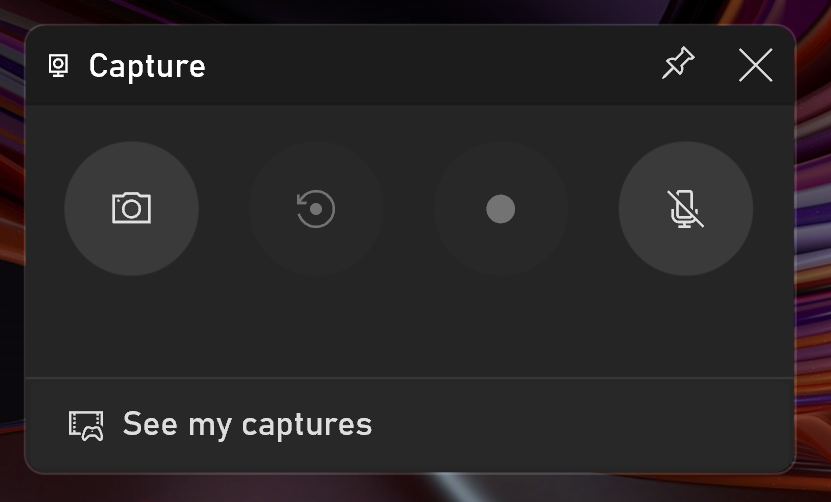
A few mini windows will appear. One will be the "Capture" window, with 4 buttons:
- Take a screenshot (image): ⊞ Win + Alt + PrtScrn
- Capture the 'last 30 seconds': ⊞ Win + Alt + G
- Start/stop recording: ⊞ Win + Alt + R
- Toggle on/off microphone capture: ⊞ Win + Alt + M
You can use any of these shortcuts even if the Game Bar isn't open. i.e. Start/stop a screen recording of your current app anytime by pressing ⊞ Win + Alt + R.
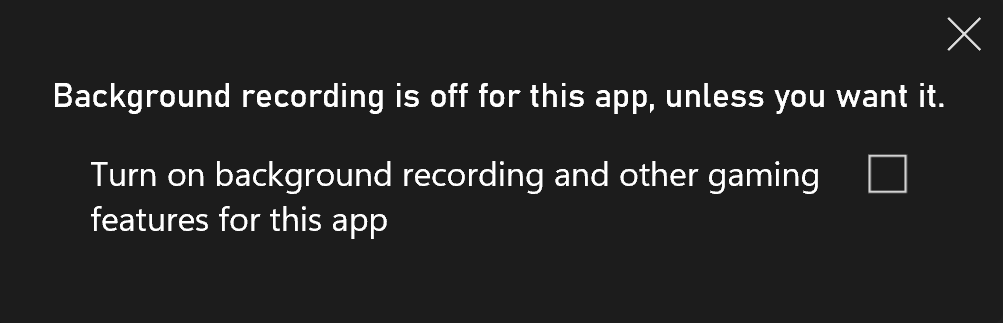
The ability to capture the "last 30 seconds" is a great feature–like an instant replay! This is useful if e.g. something cool just happened in a game, you just stumbled upon an app bug, etc. (Note that you'll likely be prompted to allow "background recording and gaming features" before this will work.)
With the microphone capture option, what's nice is that you can toggle it on/off during the recording, e.g. if you only need to include a voiceover for part of it, not the whole duration.
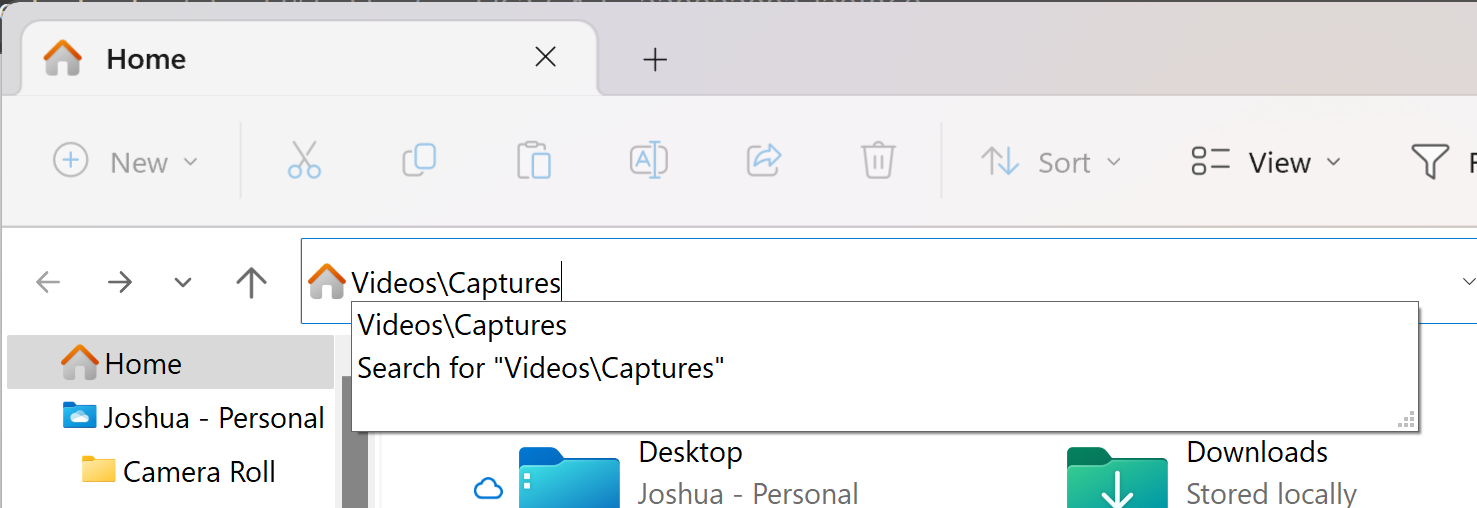
When the screen recording is finished (stopped), it will be saved by default to your local < Videos\Captures > folder as an MP4 file. Launch File Explorer (⊞ Win + E), then type that path in the top address bar & press Enter.
Note that you can also access recordings from the Gallery window when Game Bar is open. From there, you can click "Copy Link" to get a link for a video that you can share with others (note that this will auto-upload the video to the Xbox cloud).
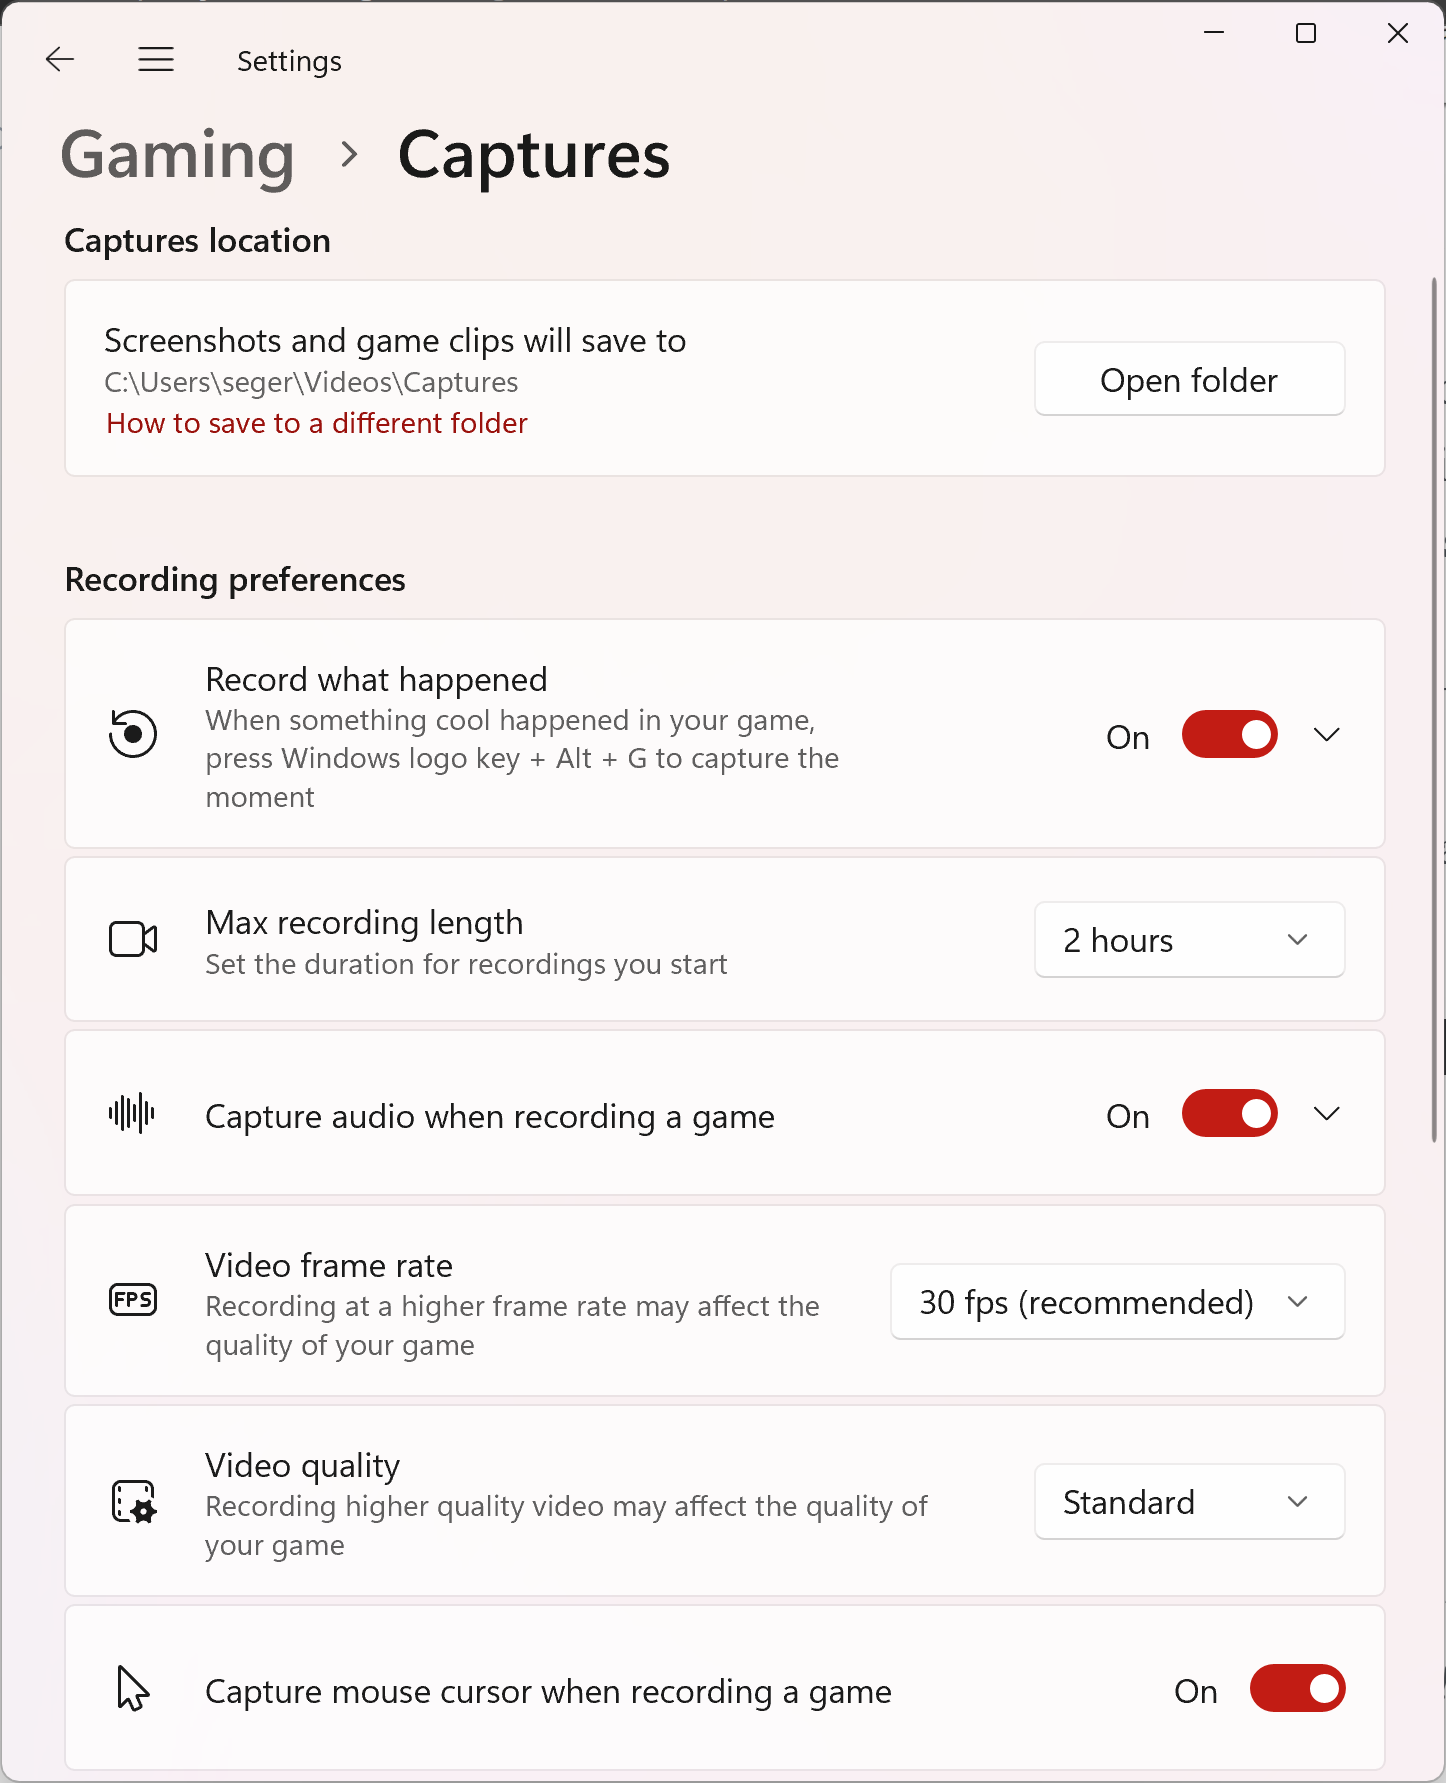
One last thing! If you want to adjust recording settings, you can by going to Windows Settings > Gaming > Captures. A quick shortcut is via ⊞ Win > type 'Captures'. From here you can adjust the default save path, the max recording duration, framerate (30 | 60 FPS), video quality (standard | high), and whether the mouse cursor should be captured.
PowerPoint for Windows
The tool that I use most is a feature in PowerPoint for Windows, aptly called "Screen Recording".
- Although it was designed for adding recordings to PPT presentations, it works quite well as a general tool–since you can easily export the video from PowerPoint (as MP4).
- I especially like it because it's built into PPT, is simple, and you can capture your whole screen or a selected (cropped) area–super helpful when showing an activity that spans multiple apps.
- You can capture your voice (microphone) as well.
- A couple of downsides are that it won't capture system sounds, and there's no shortcut key to enter Screen Recording–although once there, there are shortcuts to start/stop, etc.
First, open the PowerPoint app.
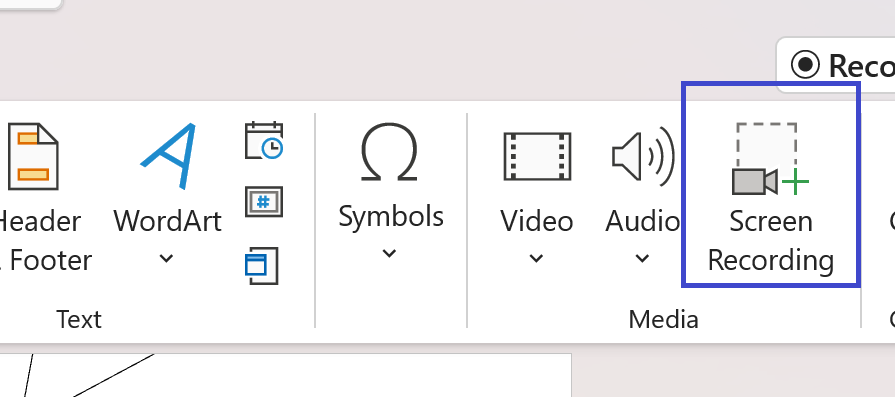
On the Ribbon (top bar), go to the Insert tab > Screen Recording (usually on the far side, in the Media group). (Note that you can also jump to any command by typing it in the Search bar, above the Ribbon.)
When you click it, PowerPoint will minimize itself, your screen will fade, and the recording menu will appear.
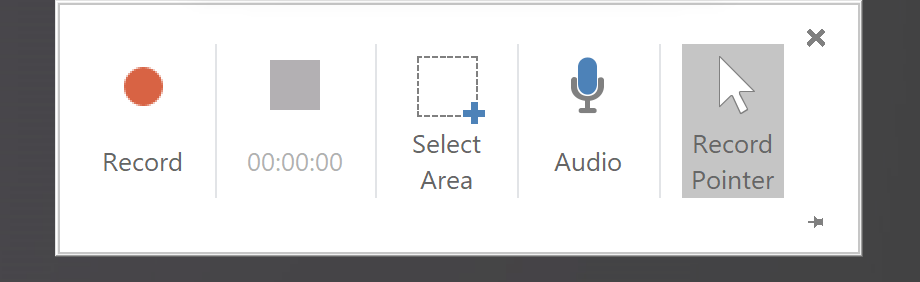
From here, you can select the specific part (area) of the screen you want to record, via click-and-drag to make a rectangular selection.
- The area you've selected will be "unfaded" as a preview.
- You can modify/fix the selection by clicking the "Select Area" button again.
- If you want to capture the entire screen, select it, or use the shortcut ⊞ Win + Shift + F.
To start the recording, click the Record button, i.e. the red circle. (Or, press ⊞ Win + Shift + R).
- A 3-second countdown window will appear, then the recording will start.
- Everything & anything shown in the selected area of your screen (i.e. even if you switch apps, move windows, etc.) will be captured.
To end the recording, press ⊞ Win + Shift + Q. (Or, move your cursor to the center-top of the screen to reveal the menu, and press the Stop button, i.e. the square.)
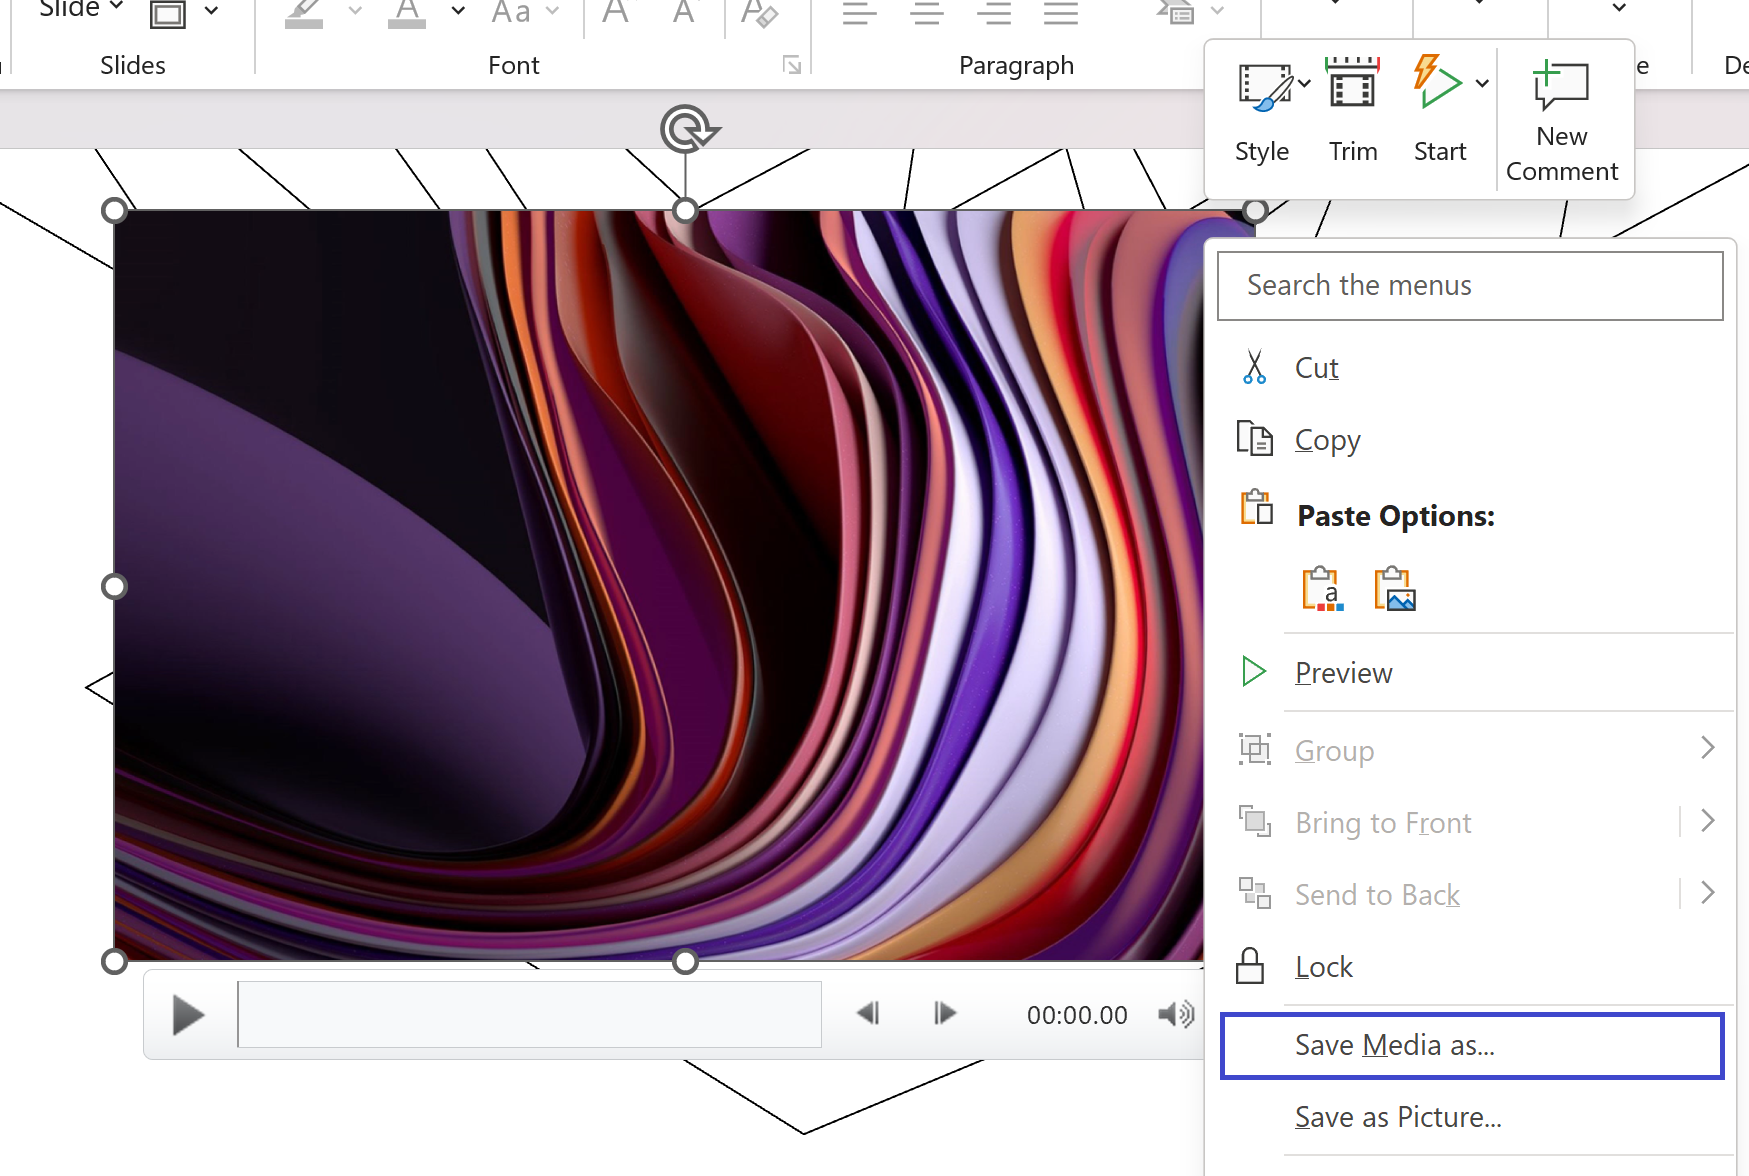
- The recording video will be 'inserted' into the current slide in PowerPoint.
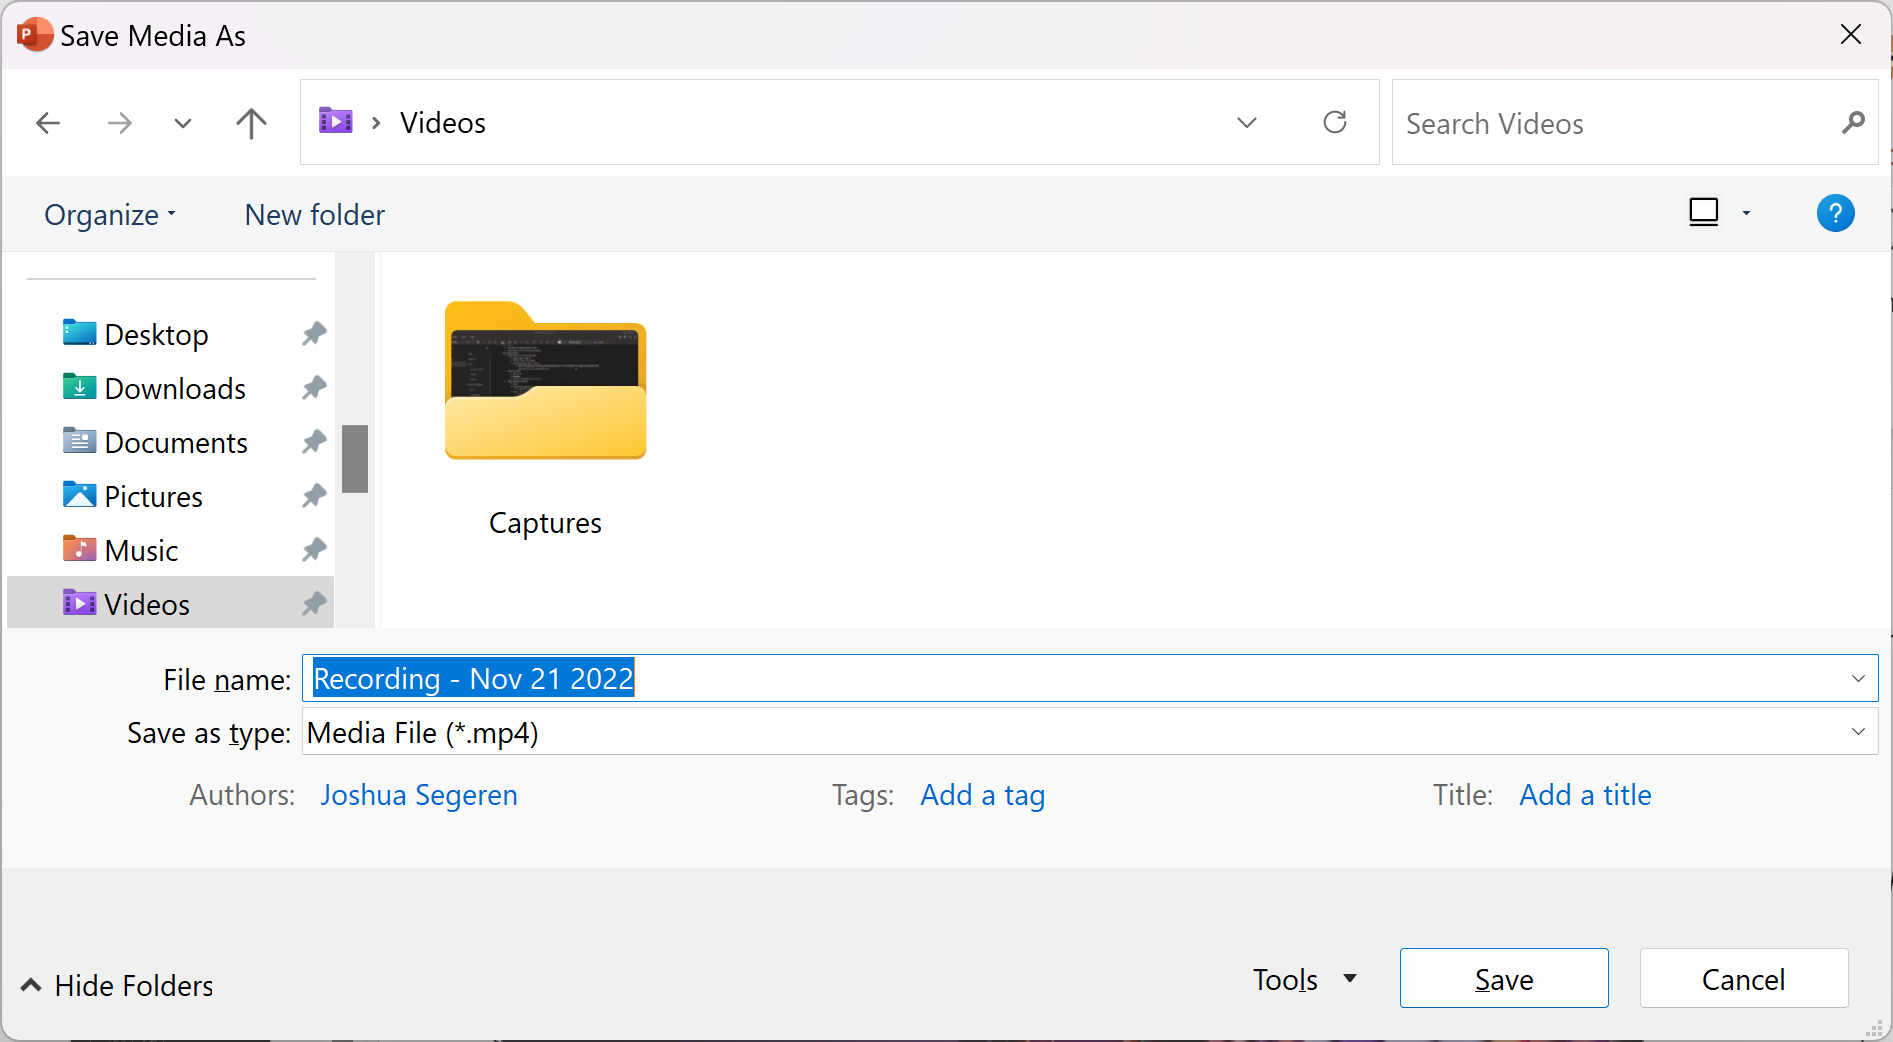
- But! You can easily save/export as a standard video (MP4) to a folder on your PC. Right-click the video container to open the context menu > click "Save Media as...". Then in the Save window, navigate to & pick a folder, set a filename, then press Save.
A couple more quick tips:
- You can toggle on/off microphone capture before OR during recording, by using the shortcut ⊞ Win + Shift + U. This is great if you only want to narrate part of the video.
- You can toggle on/off mouse cursor capture before OR during recording, by using the shortcut ⊞ Win + Shift + O.
OBS
OBS Studio, aka Open Broadcaster Software, is a popular tool, used broadly by social media creators, game streamers, and beyond. Despite being very powerful–supporting recordings, broadcasts (livestreams), and lots of customizations–it's available as free & open-source software (of course, donations are welcomed).
The learning curve is a bit higher than the other screen recording tools we've introduced here, but it's still fairly straightforward once you get going.
First, go to the official OBS website (https://obsproject.com/) > click "Windows", to start the download.
Once the download finishes, open it (i.e. the installer: OBS-Studio*.exe), and follow the installation instructions.
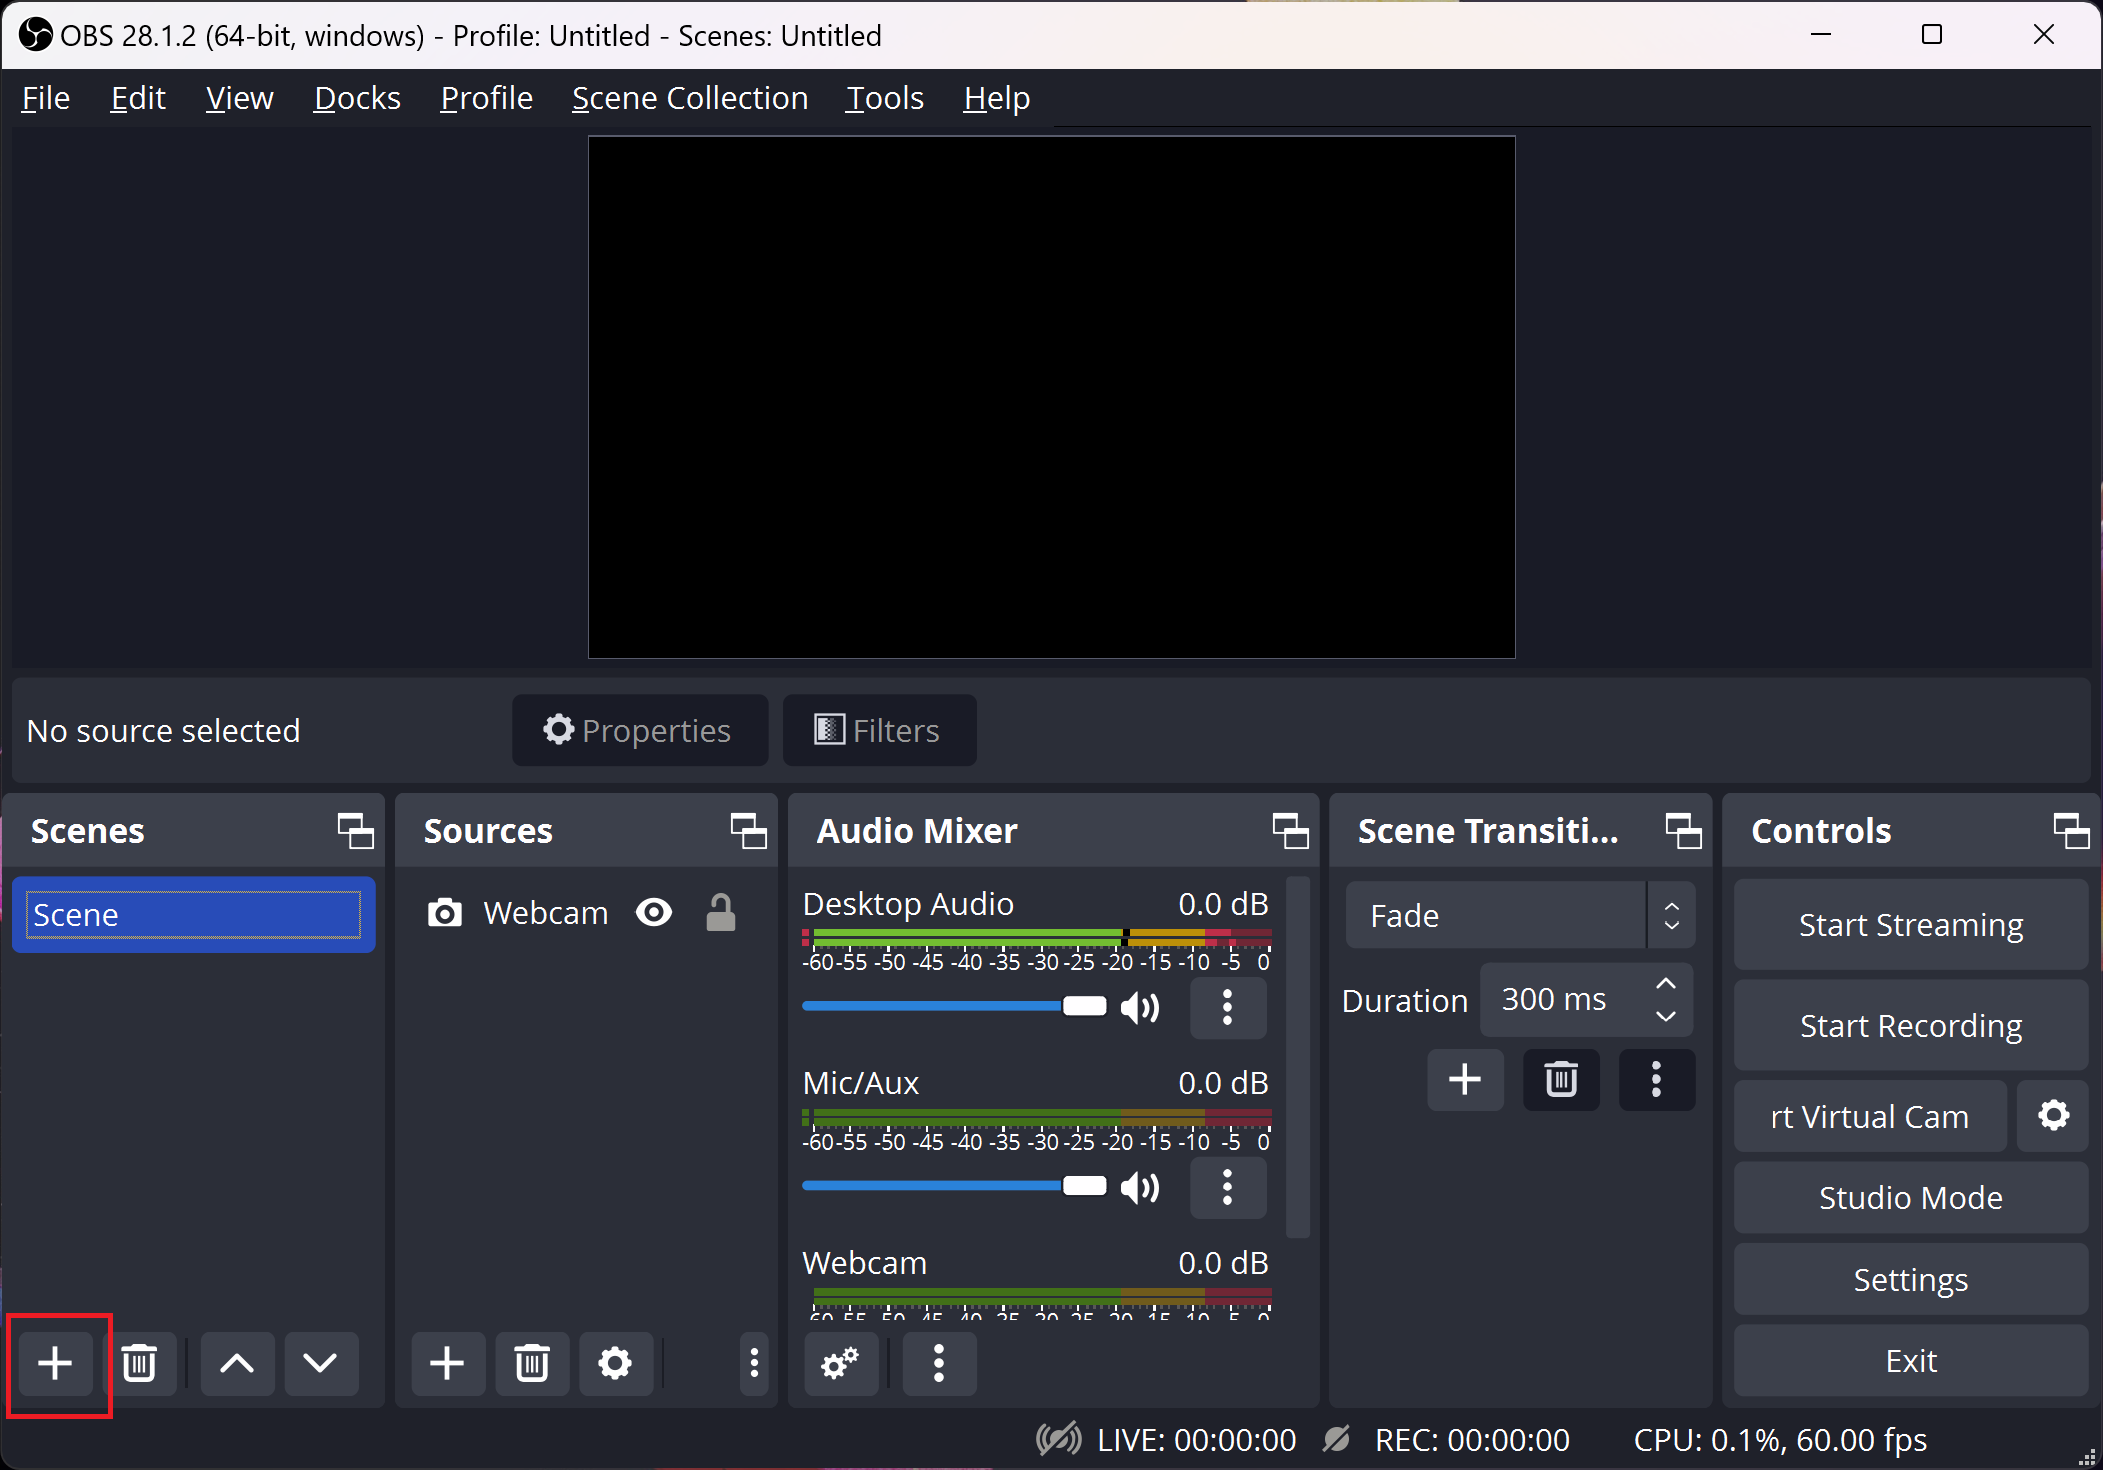
Then, open the OBS Studio app. Usually, a "scene" will be created automatically. Otherwise, click the "+" button under Scenes in the lower corner of the window. A modal window will appear: choose a name, then click "OK" to create it.
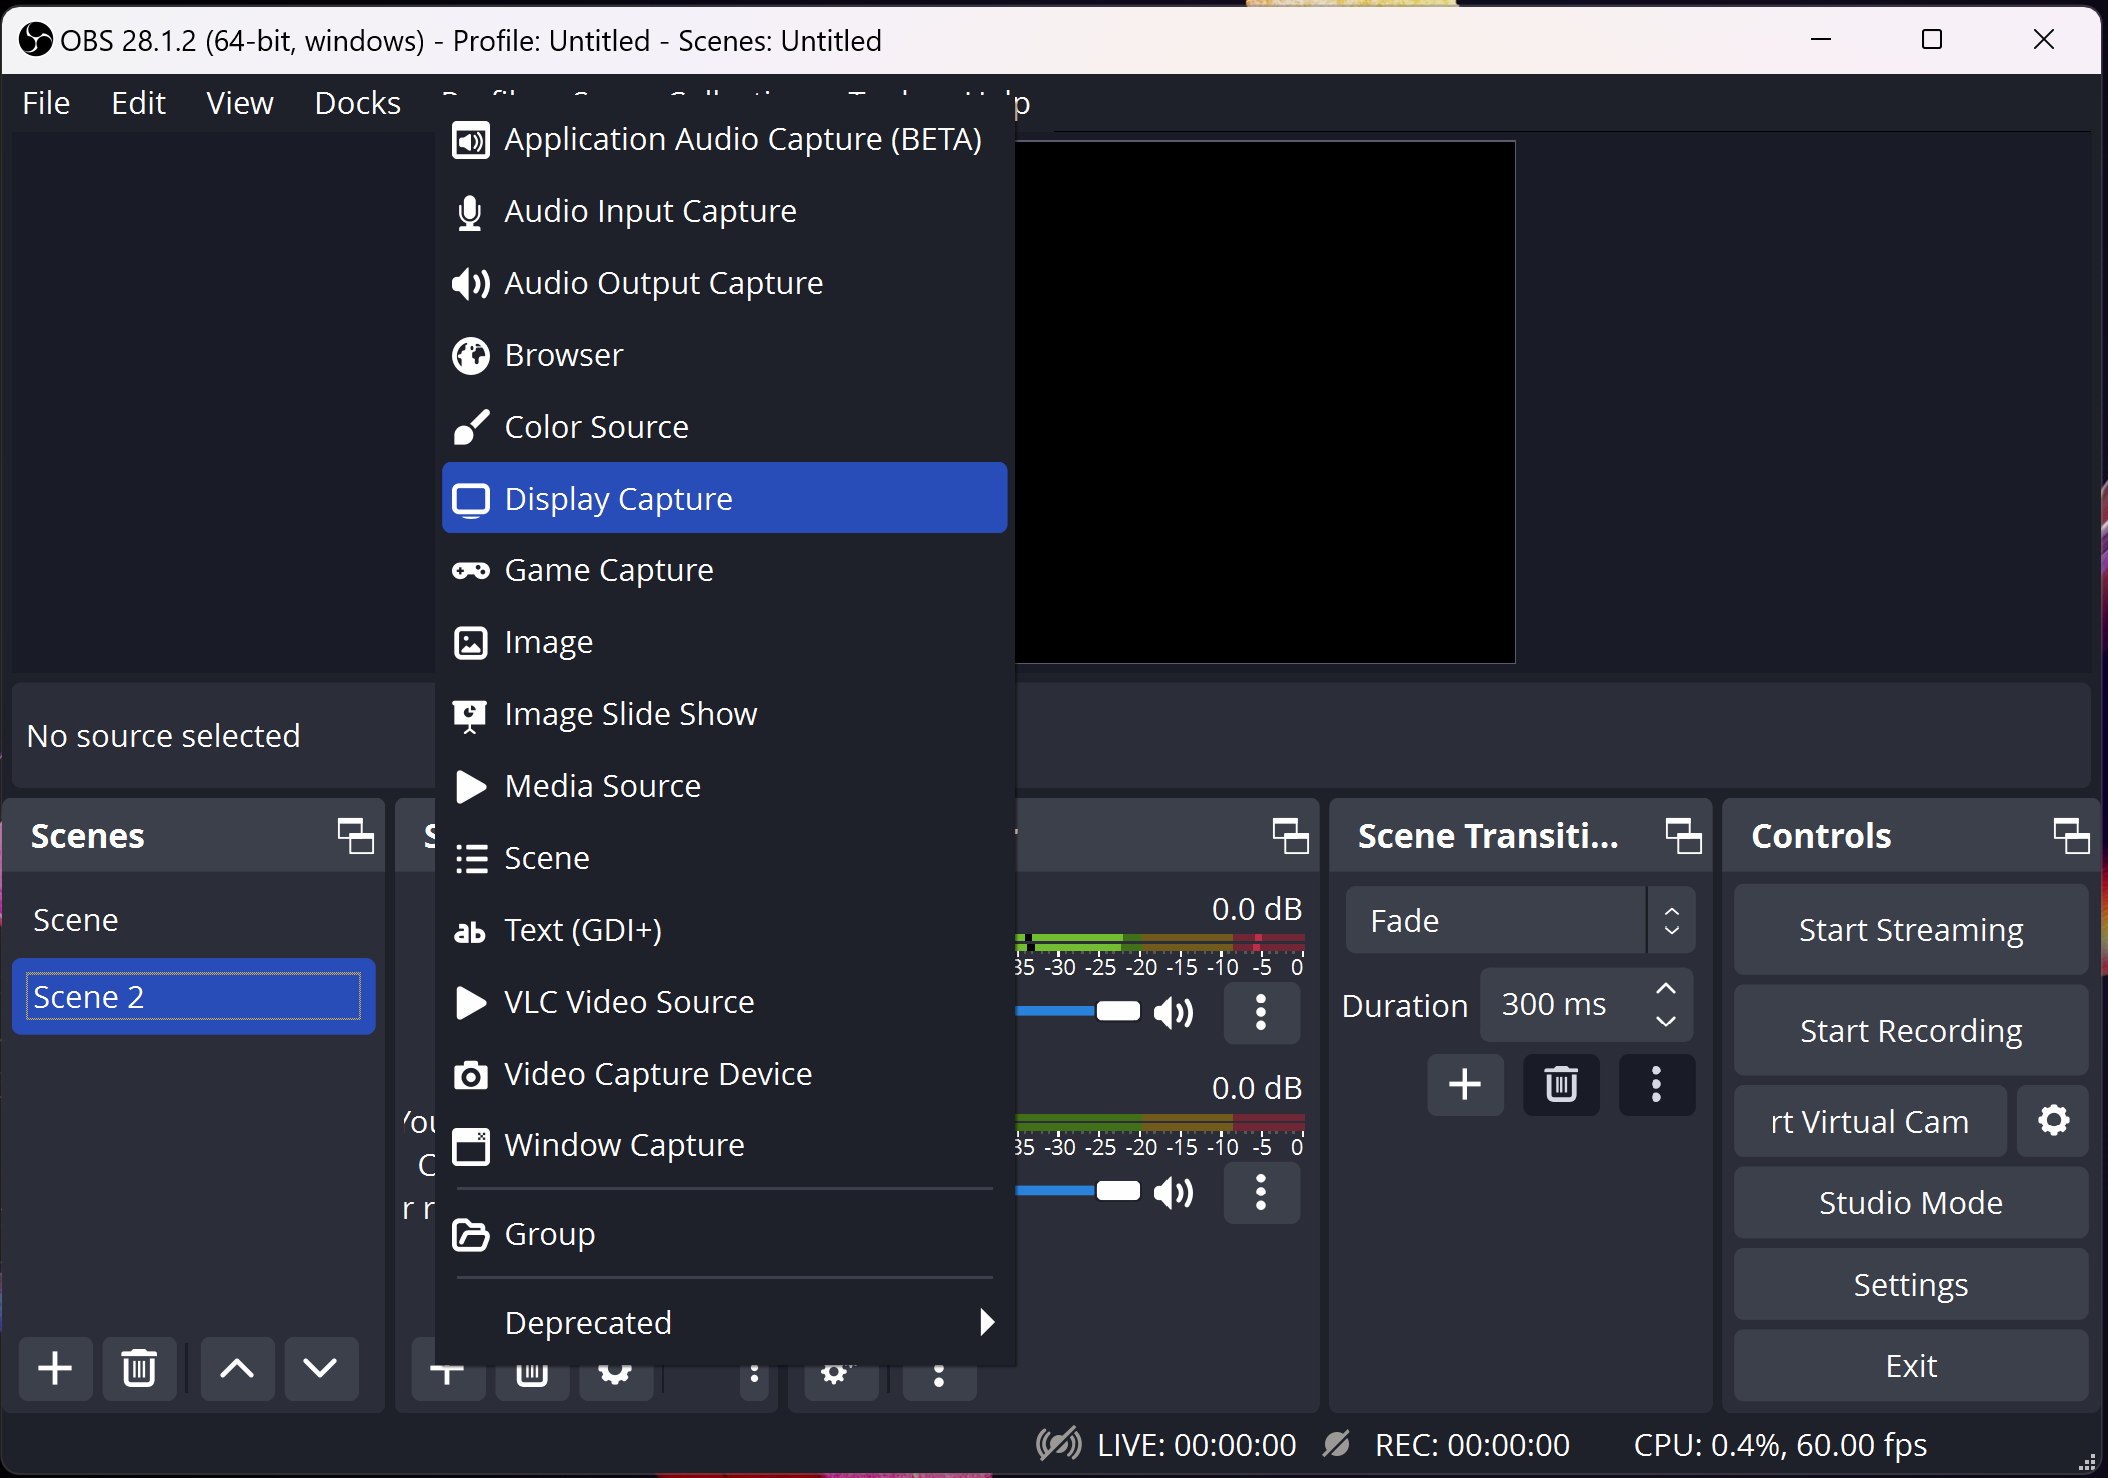
Next, you need to choose a "video source". Click the "+" button under Sources (next to Scenes), and choose "Display Capture".
- Note: if you only want to screen record a specific app/window, instead, choose "Window Capture".
A modal window will appear: choose a name, then click "OK" to create it.
Another modal window will appear. If you have multiple monitors, click on the Display picker/dropdown, choose the display you want to capture, then click "OK".
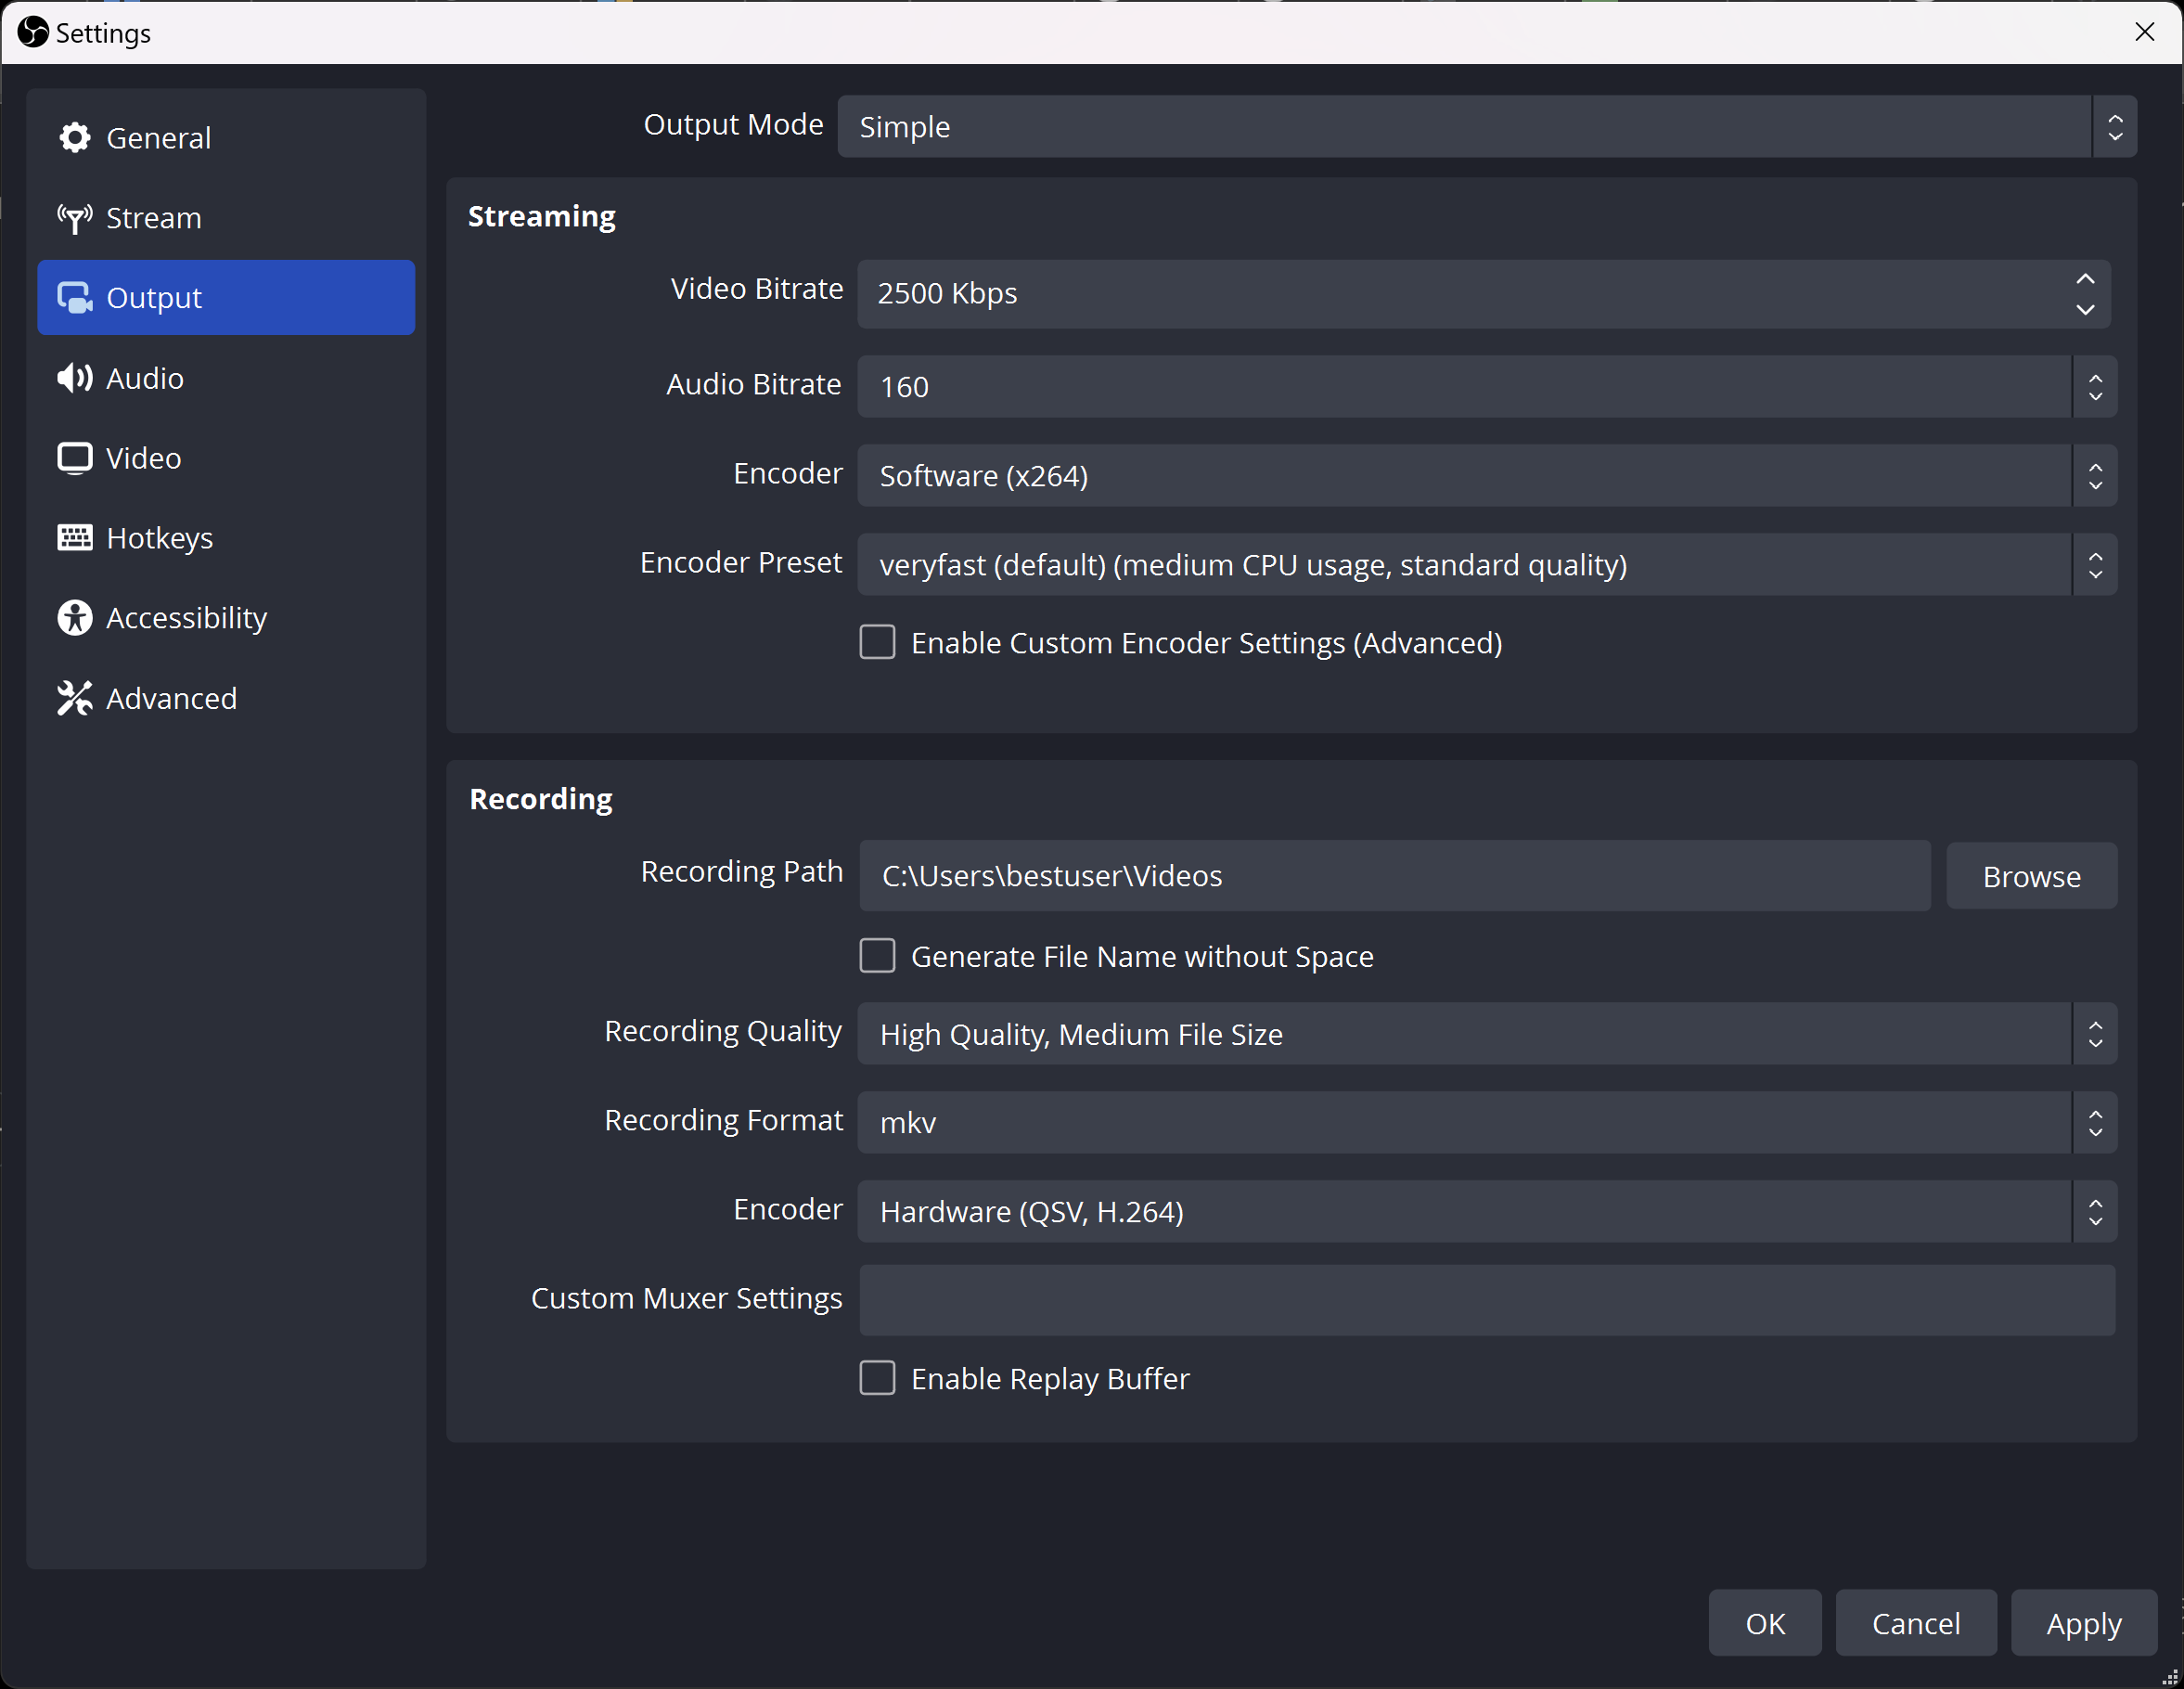
Almost there! You can adjust or confirm some preferences for the output recording video. Go to "Settings" under Controls. A Settings window will appear.
On the "Output", from the navigation sidebar:
- You can see/change the output folder–where the video will be saved–for "Recording Path", type the desired path, or click "Browse" and navigate to it.
- You can also adjust the "Recording Quality" (i.e. better quality = bigger file), "Recording Format" (MKV, MP4, MOV, FLV, etc.), and/or the "Encoder" that's used to generate the video file ("Hardware" is usually best, but it'll use the GPU, so if you're recording a GPU-intensive app like a Game, you'll probably want to choose "Software").
On the "Video" tab:
- You can change the "Base Resolution" (capture input), and/or the "Output Resolution". Both will usually default to 1080p (1920 x 1080)– but you may want larger (native) if you're creating a professional video, or smaller if you want something easier to share.
- You can adjust the Framerate (FPS) as well–the default is 60, but 30 is good enough for most cases and will also decrease the size of the output file.
- Note that Output Resolution must be <= Base Resolution (upscaling isn't supported).
Finally, you can similarly adjust Audio capture settings.
- On the "Audio" tab of the Settings window, you can adjust quality (i.e. sample rate, and # of channels).
- Exiting out of Settings, in the main OBS window, under "Audio Mixer", you can adjust volume levels for both (A) system/app audio, and (B) microphone. You can fully mute either/both this way as well.
To Start Recording - click the "Start Recording" button under Controls. Click the button again to "Stop Recording". While recording, you can click the ⏸ button to Pause / Unpause as well.
Once finished, the video will be saved to the chosen Output folder (the default is < \Videos >).

As a final tip, you may find it more convenient to control your recording (start, stop, etc.) using keyboard shortcuts. To do this, go to Settings > Hotkeys and set them there.
Wrap-up
Windows 11 screen recording just got a whole lot easier – and more fun! With the Xbox Game Bar, PowerPoint, and OBS at your fingertips, you can easily capture your screen and create high-quality videos for presentations, tutorials, or even video editing—without the need for expensive software. Give it a try, and see the difference it can make for your content.
Voilà! We hope that you found this guide helpful. As always, please drop questions, feedback, and more tips in the comments. Thanks!
- Josta Tech