How to Clean Up Pictures Part 1: Upscaling & Sharpening
Get crystal clear & sharp images with free, AI-powered tools like ClipDrop and Upscayl. Instantly fix low-res or blurry photos - no Photoshop skills required.
Do you have an old, cherished photo that’s blurry and grainy? Did you capture a precious moment with your child on camera—only for it to be ruined by a lurking photobomber? Are you looking to update your profile picture, but want to make sure it’s perfect?
For each of these scenarios (and more), we'll show you how to clean up & improve your pictures using incredibly simple-but-powerful AI tools available right now, in December 2022. And the best part? Our favorite tools are 100% free.
Part 1: How to make pictures clearer and sharper
- Upscaling. Improve the quality of a low-resolution/pixelated picture, or make an image larger.
- Sharpening. Make a blurry picture clear, and improve the definition of edges and fine details.
Part 3 (coming soon): How to restore old or damaged photos, including people & portraits, or even add color to them
Part 4 (coming soon): How to organize, share, protect and preserve your photos
You might be thinking: “But don’t I need Photoshop? And professional skills? Isn’t this tedious and time-consuming?” Well, it used to be. It was since the start of digital photography. But in the last couple of years, AI has become unbelievably good at many tasks—from describing and modifying images, to even creating them.
How is AI so good? In a nutshell:
- Traditional (non-AI) tools see photos as a collection of pixels. Images are processed with complex algorithms (math, formulas, and patterned rules).
- AI tools, on the other hand, “understand” the physical meaning of photos—they look past raw pixels, and “see” the content behind them. It's fundamentally much closer to how we as people see photos.
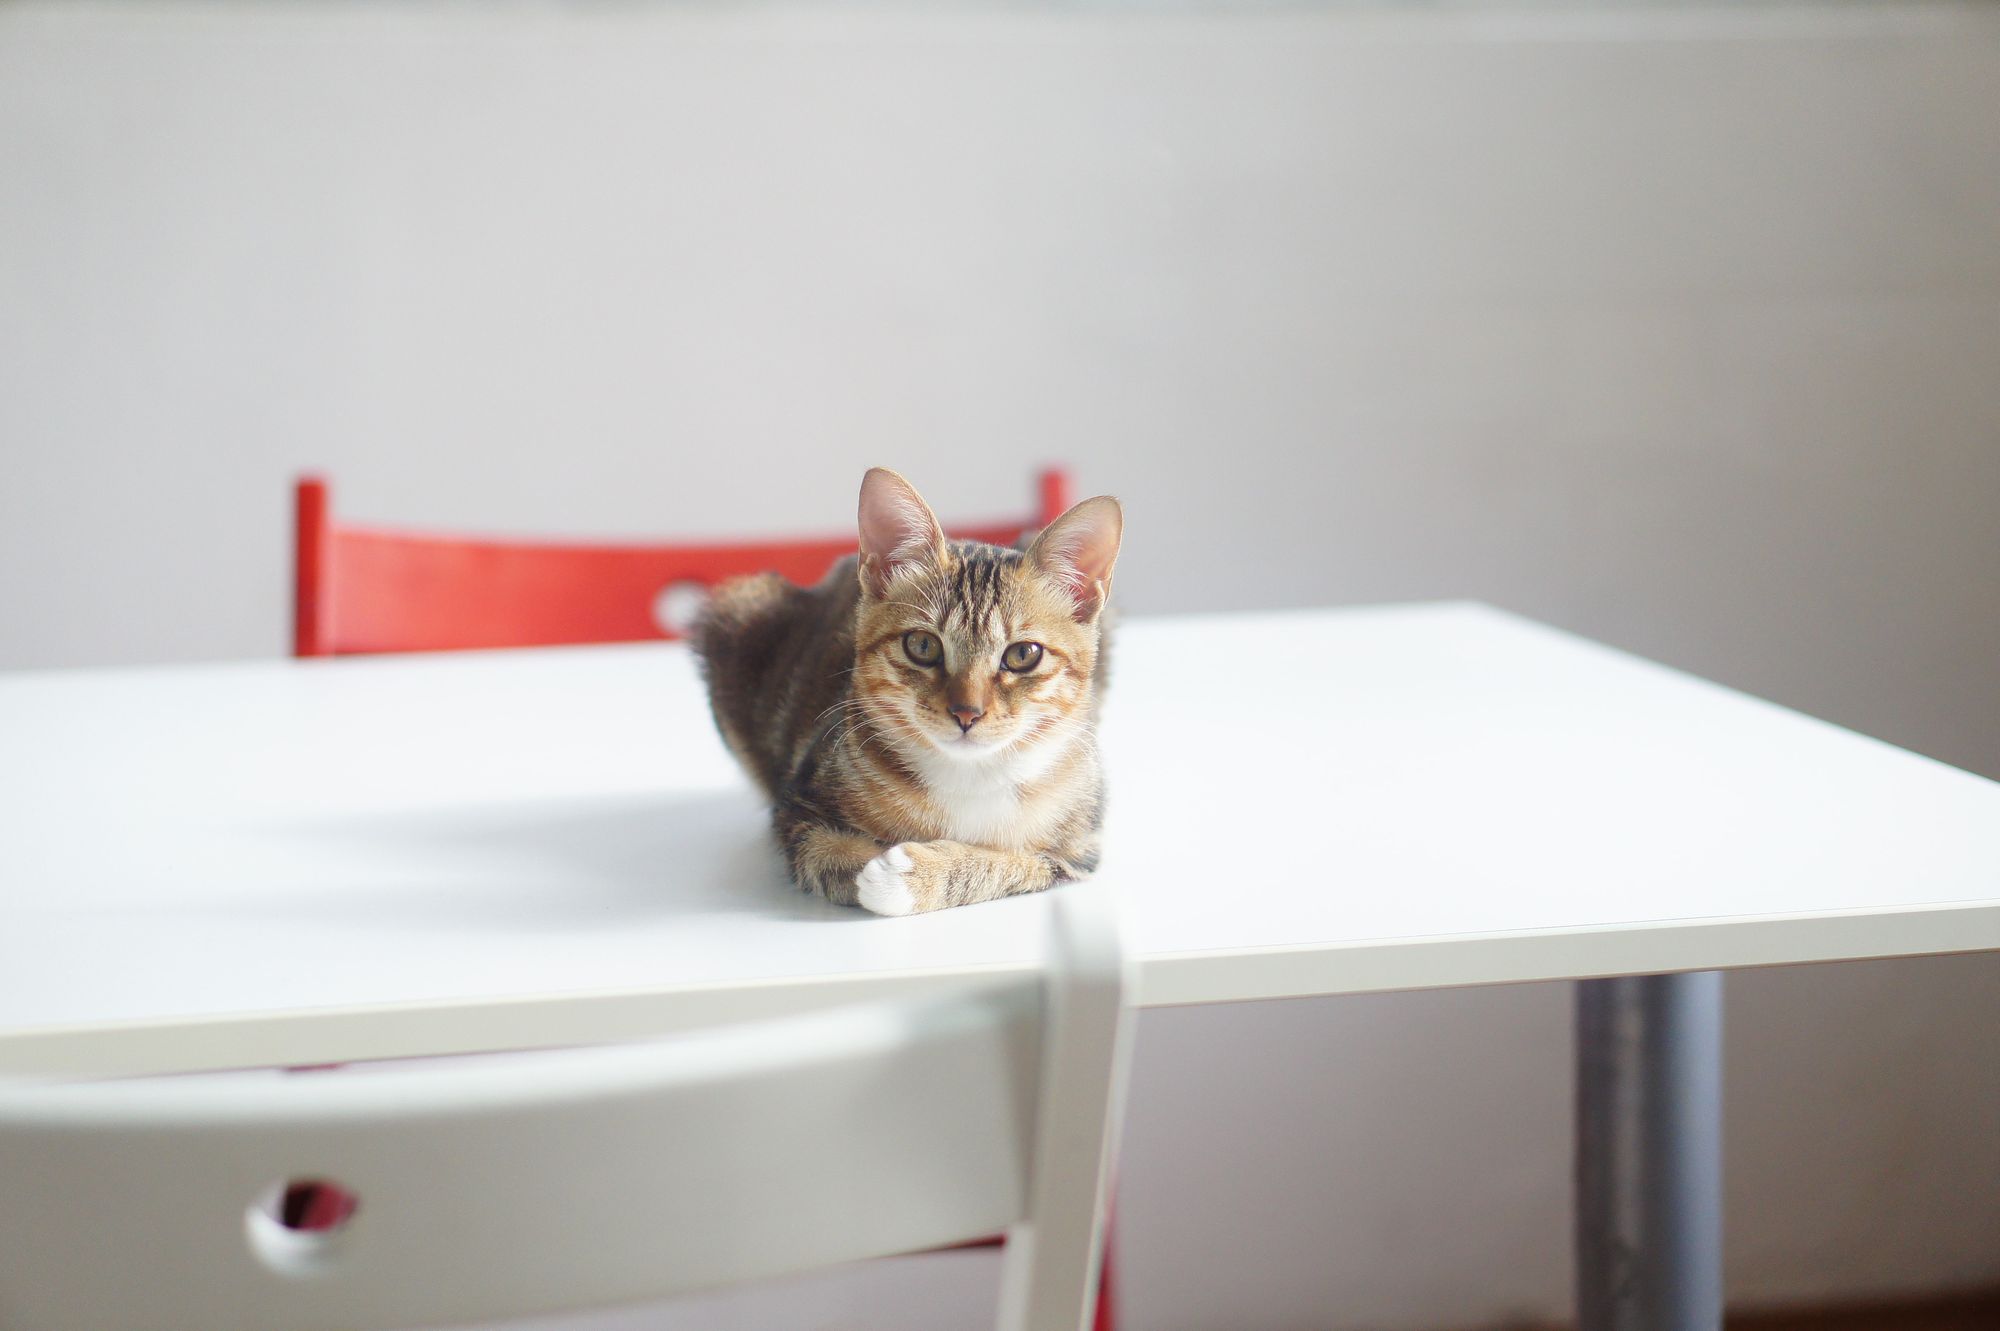
In this photo, AI understands that:
- The cat in the scene is really a cat. (It’s seen plenty of cats before.)
- The cat occupies a physical space in the scene - which just so happens to be contained by certain pixels.
- The cat is sitting on a table.
- Therefore, what’s behind the cat, is simply, ‘more table’.
So, when you ask an AI model to remove the cat from the picture, it gives you what it “imagines” (predicts) the scene would look like without the cat.
The AI learned how to understand the semantics of images by being shown (trained with) a massive number of images—often 10s or 100s of millions—with guidance like labels or feedback (or by competing with another AI!).
How to make pictures clearer and sharper
I'll show you (1) ClipDrop, a simple online tool, and (2) Upscayl, a more powerful desktop tool.
Best for ease & small projects: ClipDrop
A browser-based (web) app solution like ClipDrop is the best way to go if:
- You want a quick & simple solution.
- You only need to process a few images at a time (not 10s or more).
- You’re OK with using a free service that has some limits (e.g. a cap on max resolution)—or you’re willing to pay for a subscription to remove those limits.
- You’re not super concerned about the privacy & security of your images.
After trying and comparing all of the most popular apps out there, my top pick is ClipDrop’s Image Upscaler, sometimes also called Super Resolution. (Shout-out to PicWish, a solid runner-up.)
Here’s how to get going with it:
Step 1. Go to clipdrop.co/image-upscaler from your PC, tablet, or phone browser.
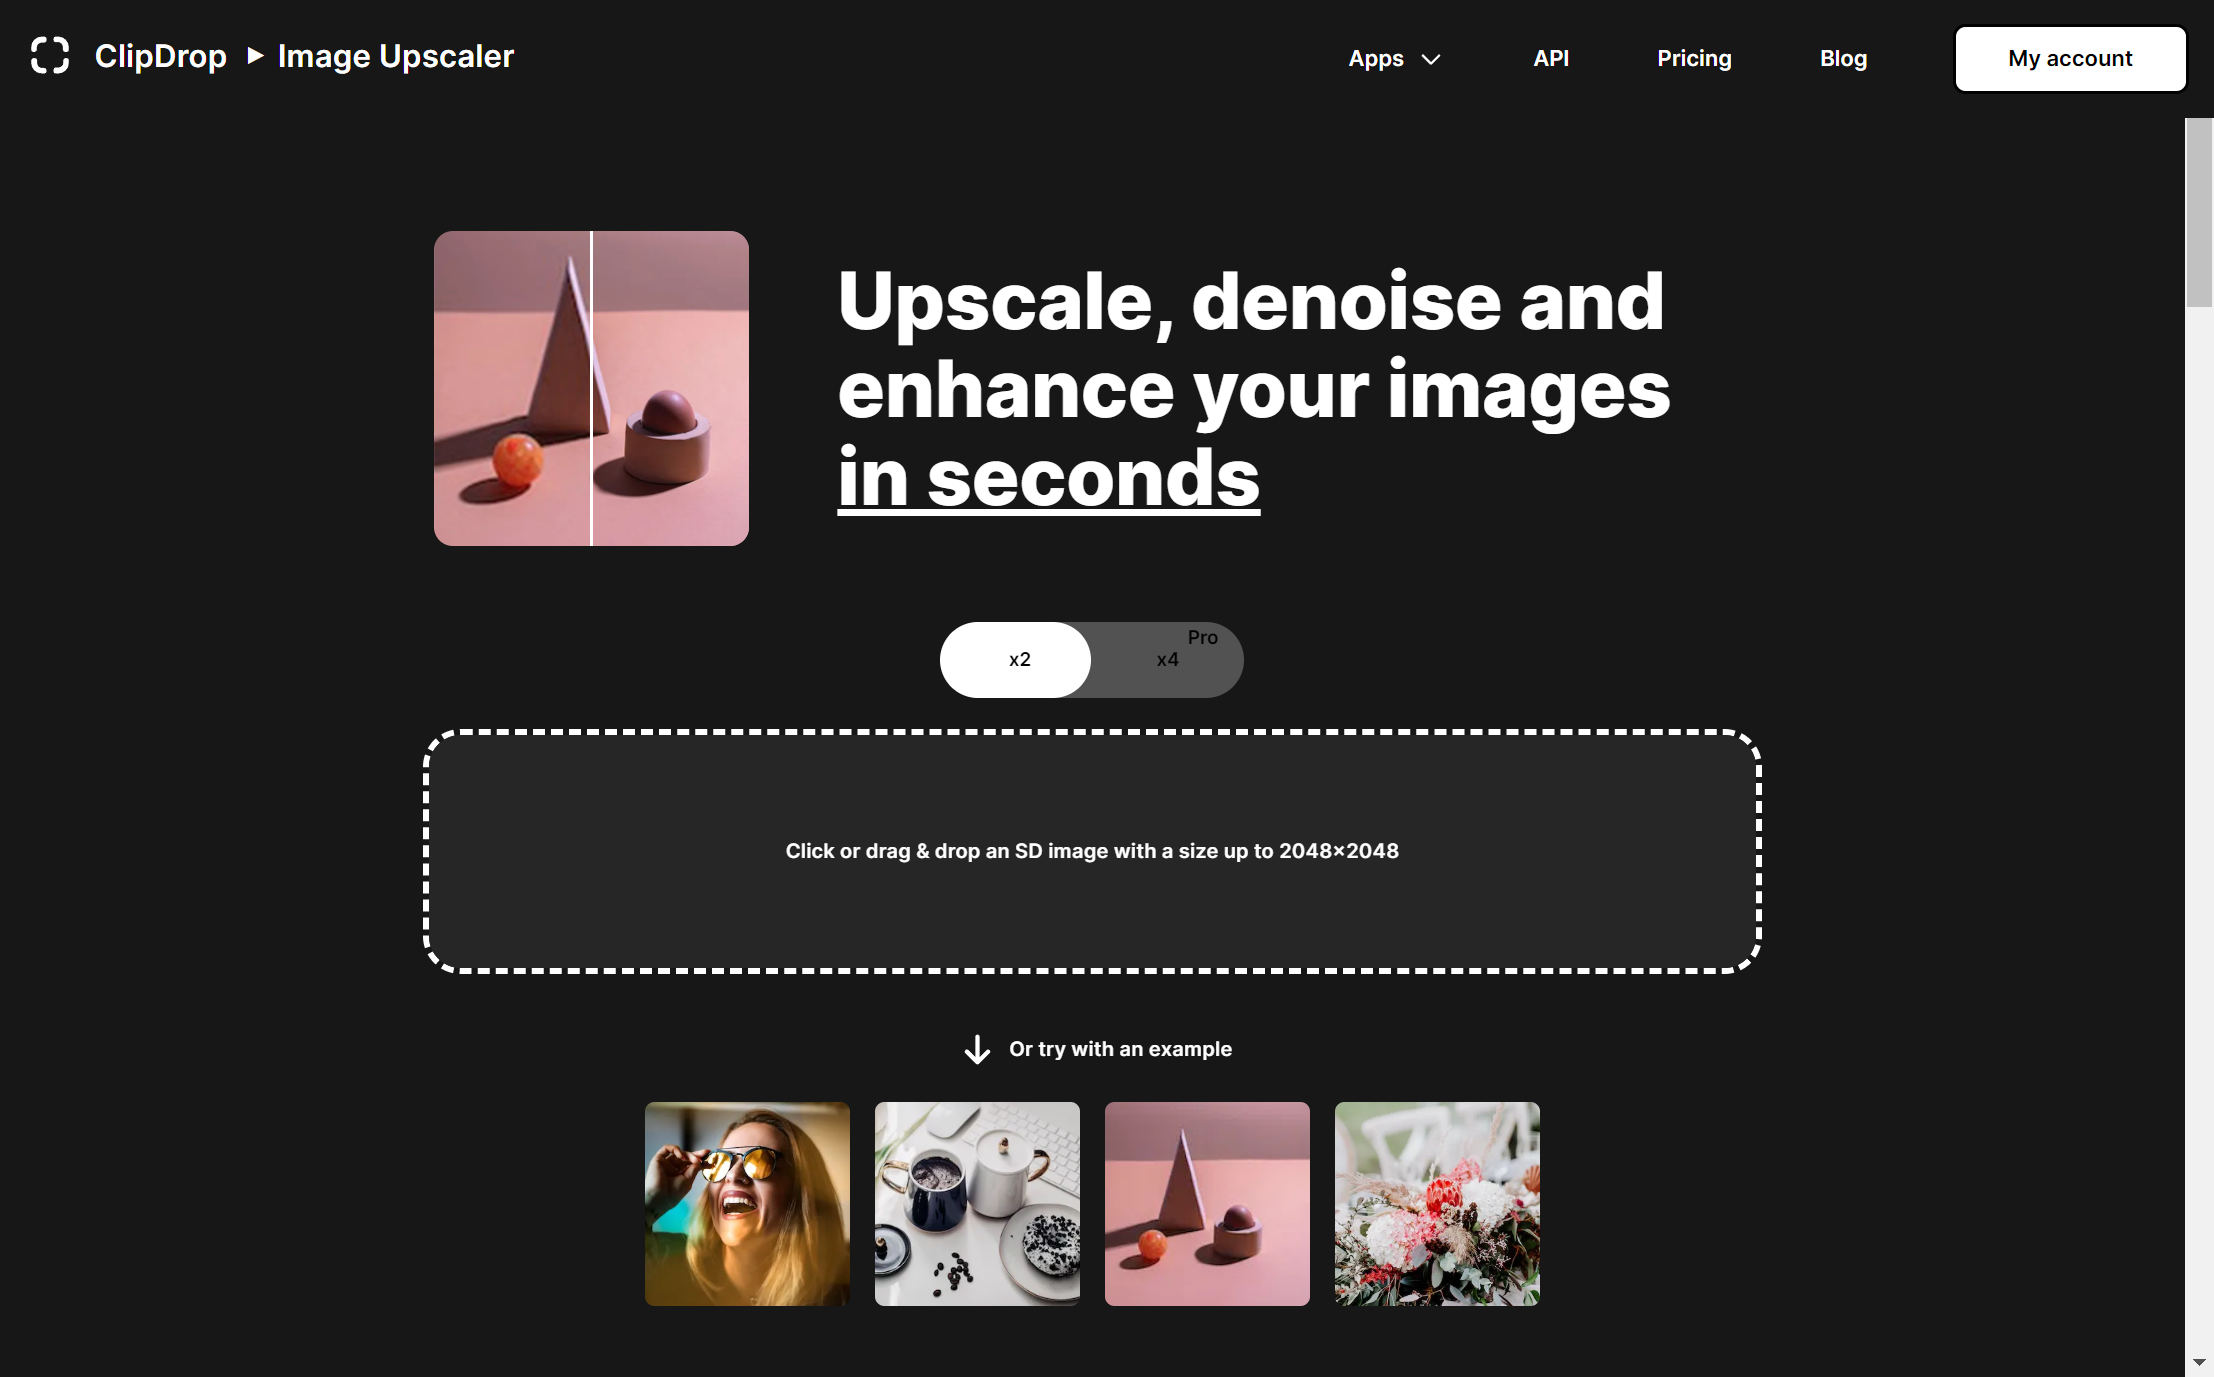
Step 2. Click in the container (which has the text “Click or drag…”) to launch a file picker. Choose the picture you want to upscale or sharpen.
- PNG, JPG, or WEBP images are supported.
- The free tier limits uploaded images to a maximum of 2048×2048 pixels, and limits upscaling to 2X (i.e. double the pixels along each dimension).
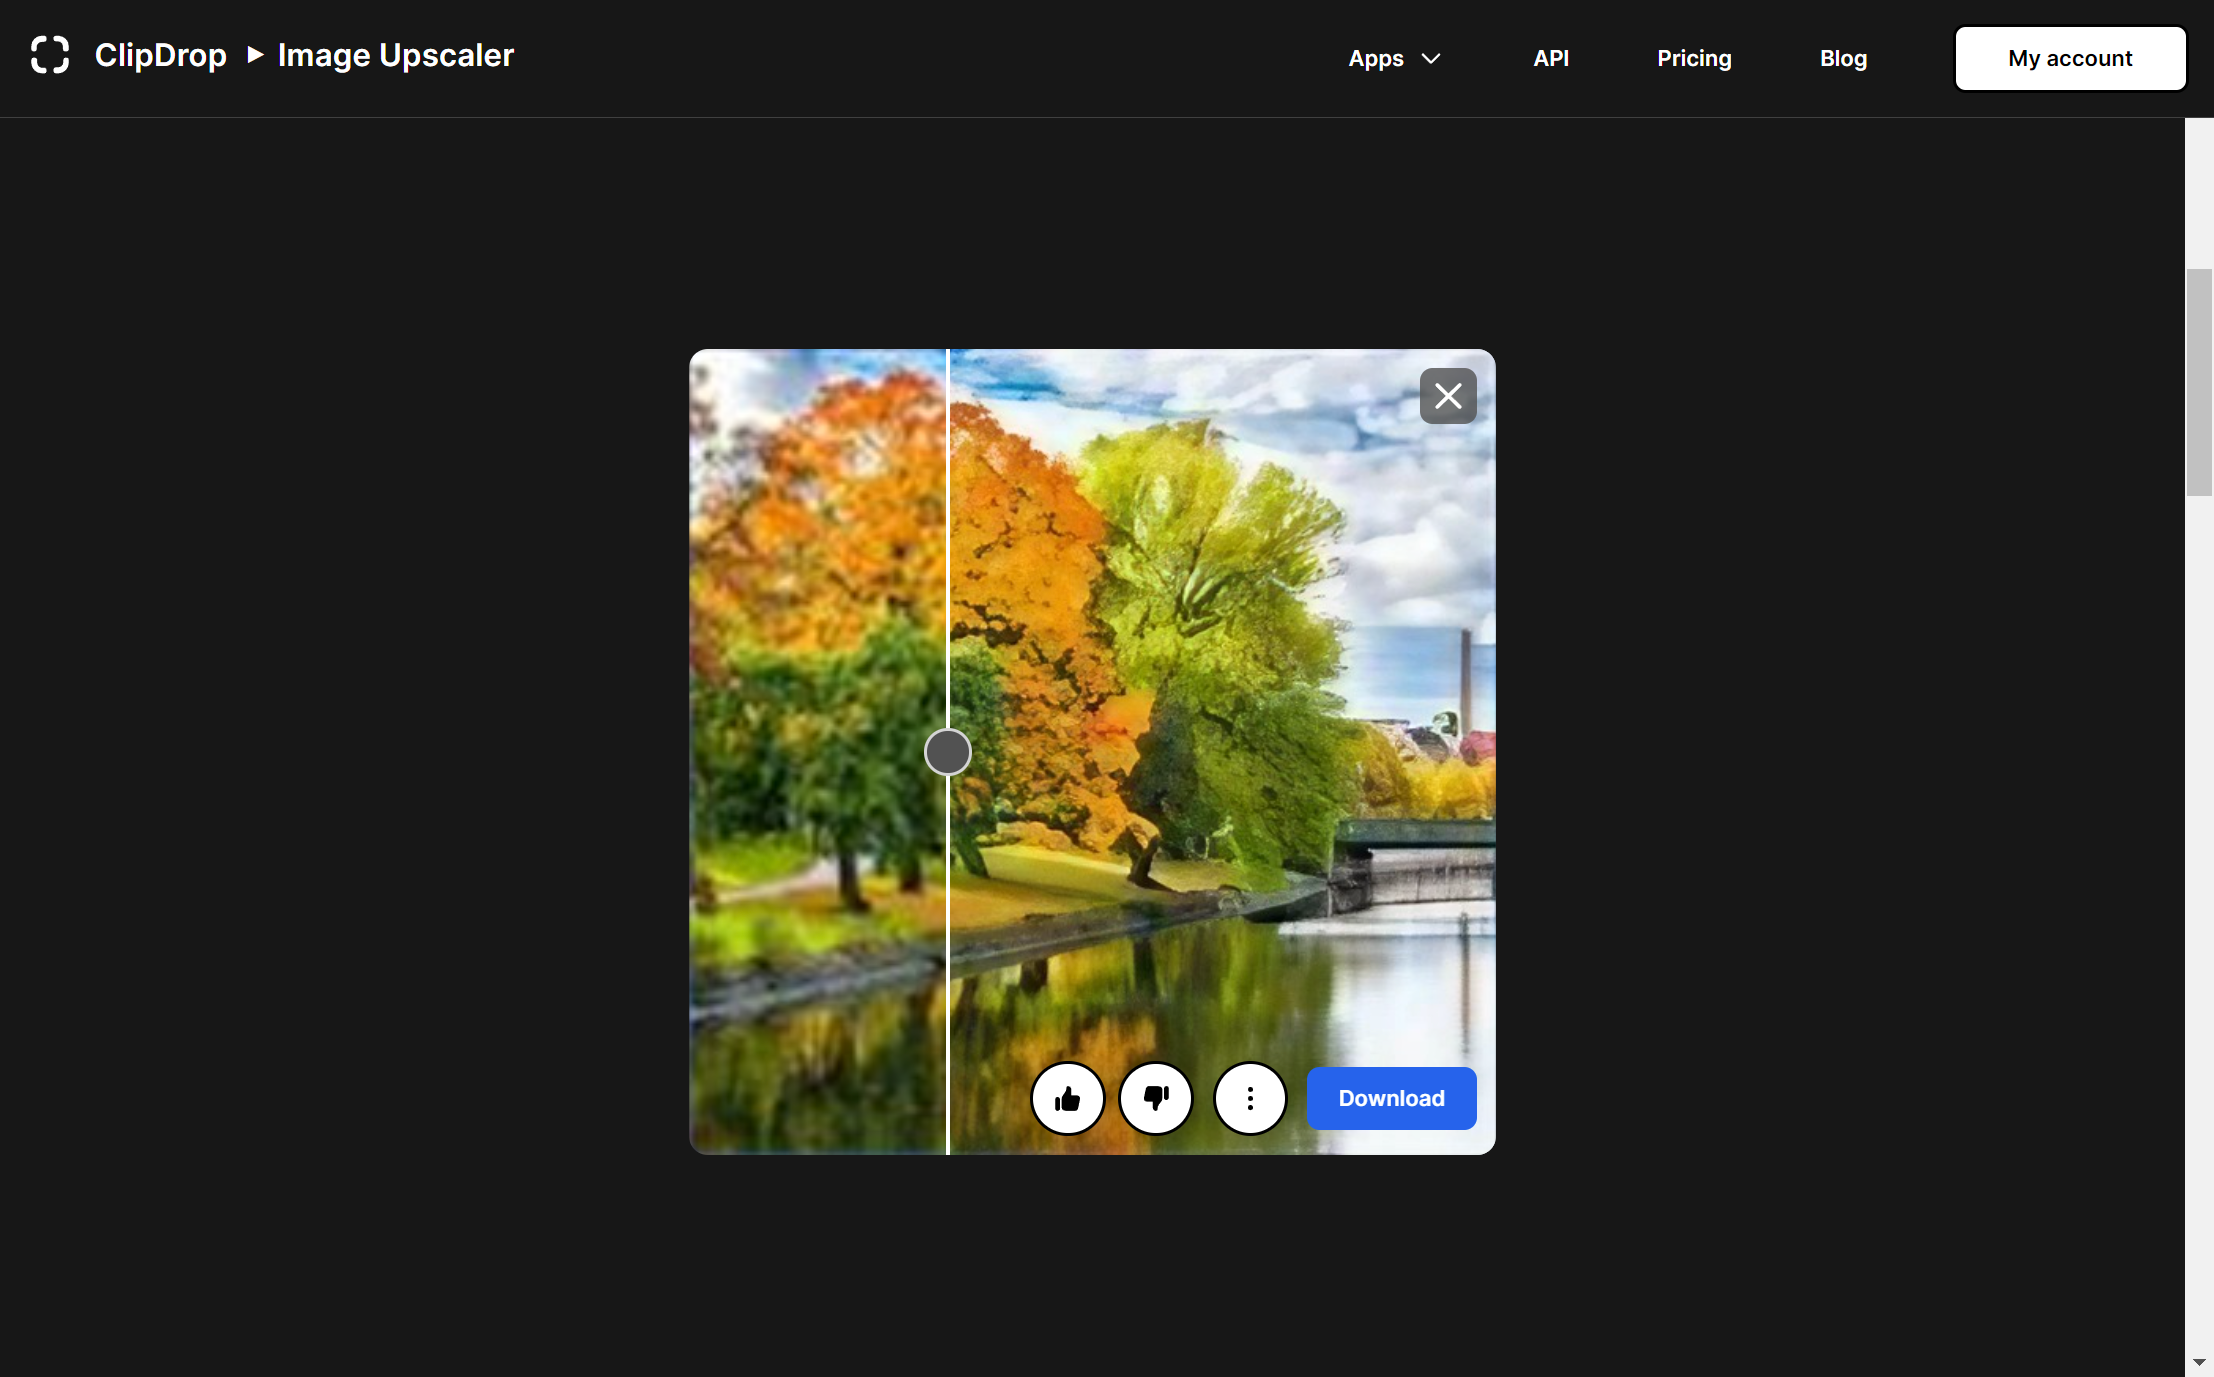
You’ll see the output image very quickly (almost instantly sometimes). There is even a slider that you can drag horizontally to see the “before vs after” of your picture, inline.
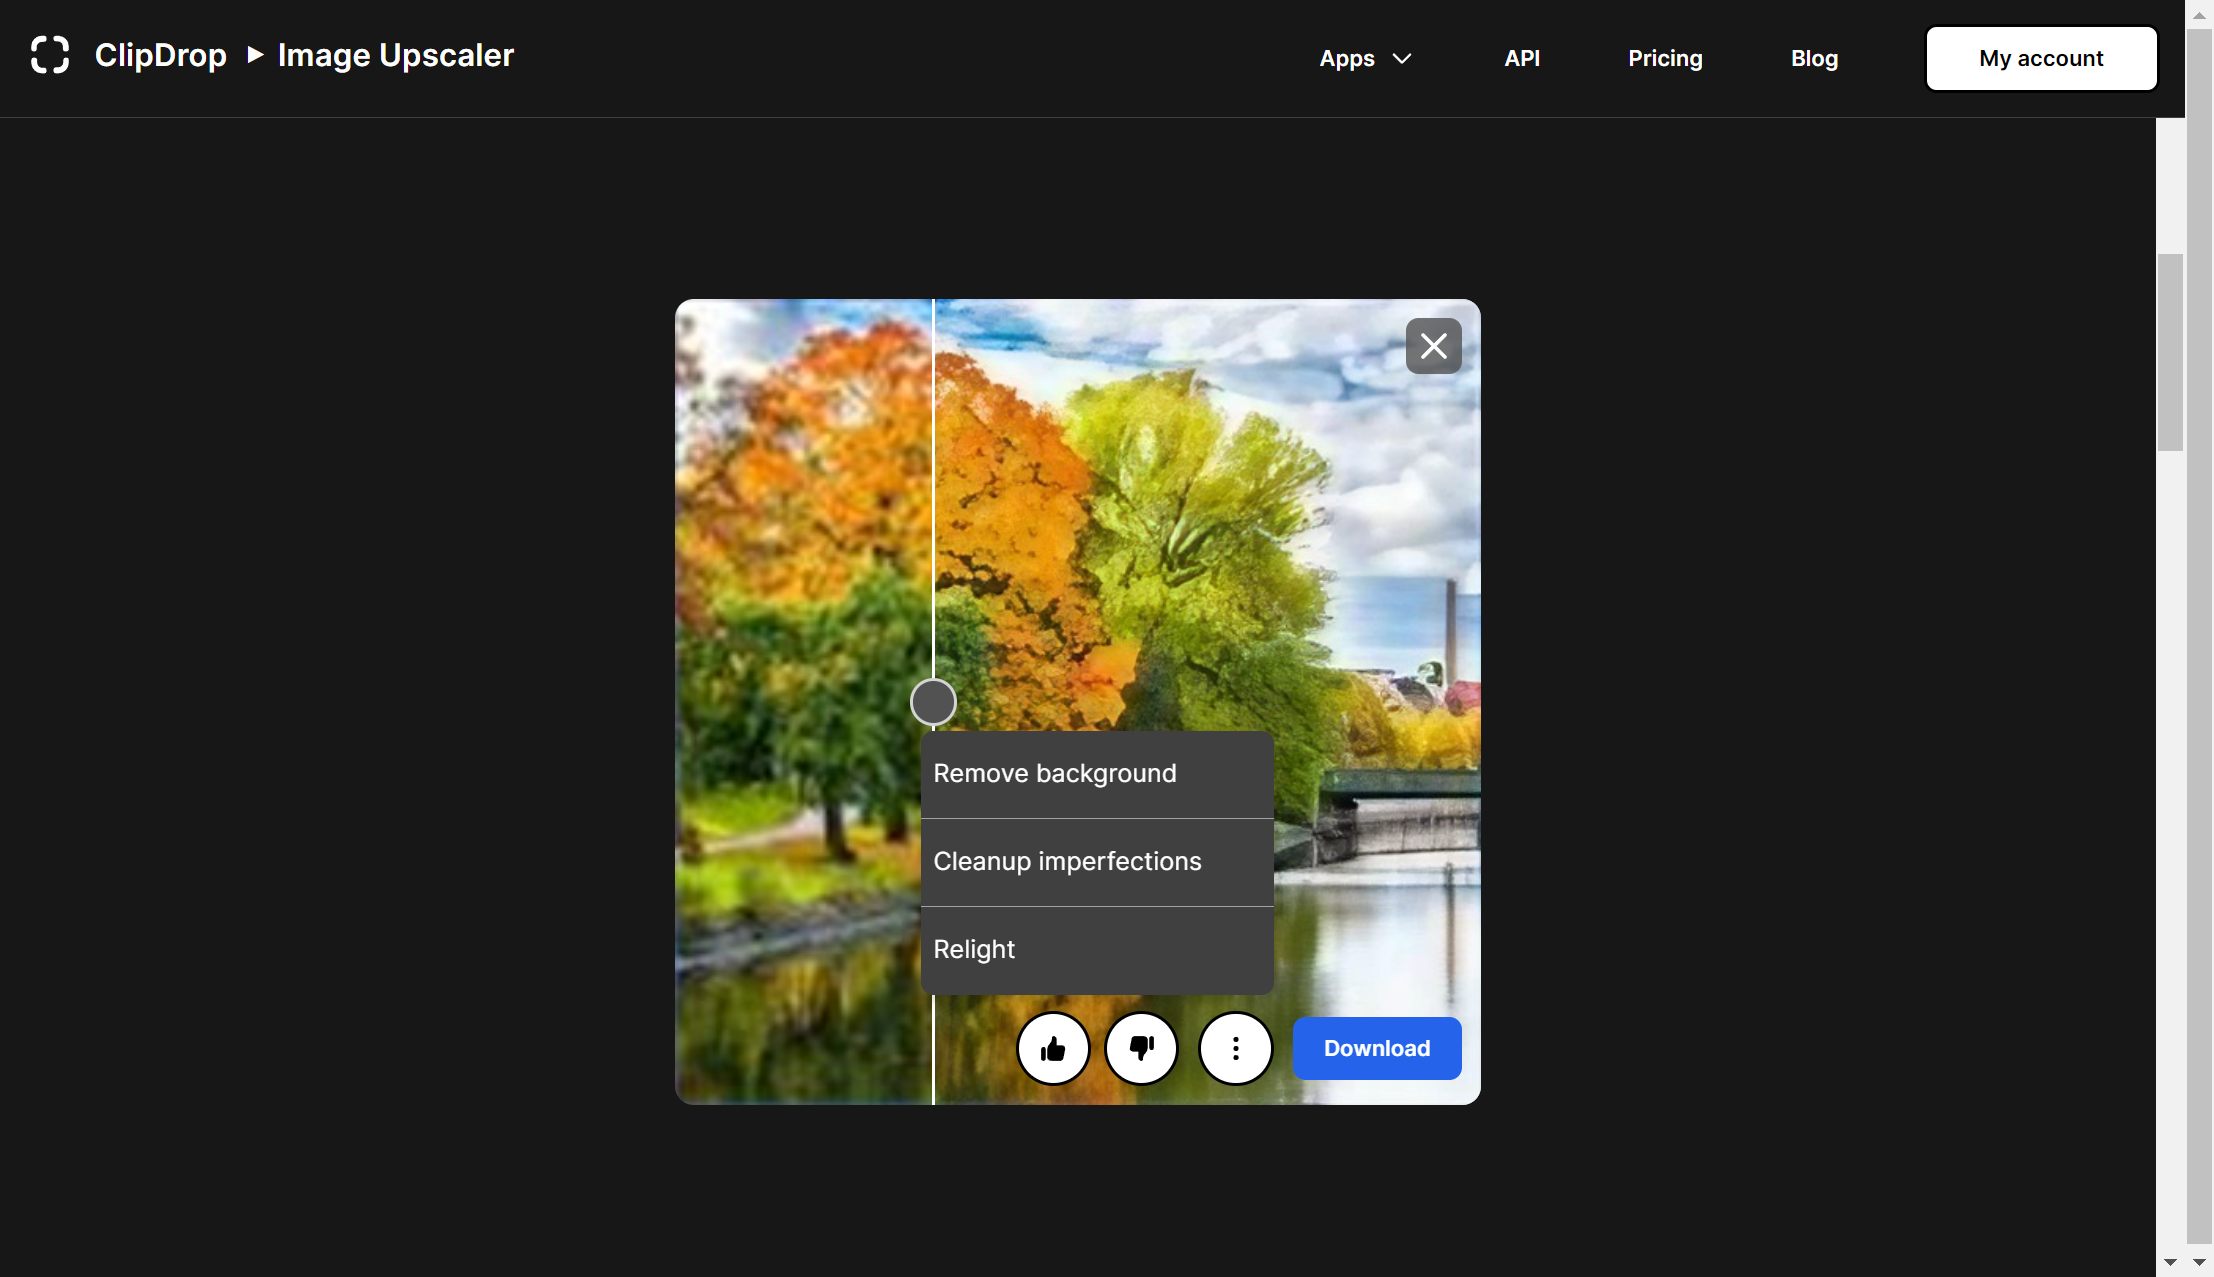
Step 3. (Optional) If you’d like to make other edits to the picture, press the ‘ ⋮ ‘ button to see the context menu. You can choose “Remove background”, “Cleanup imperfections”, or “Relight”—each of which will launch a different ClipDrop mini-app. (Note that I’ll cover how to use these kinds of tools in the following articles in this series.)
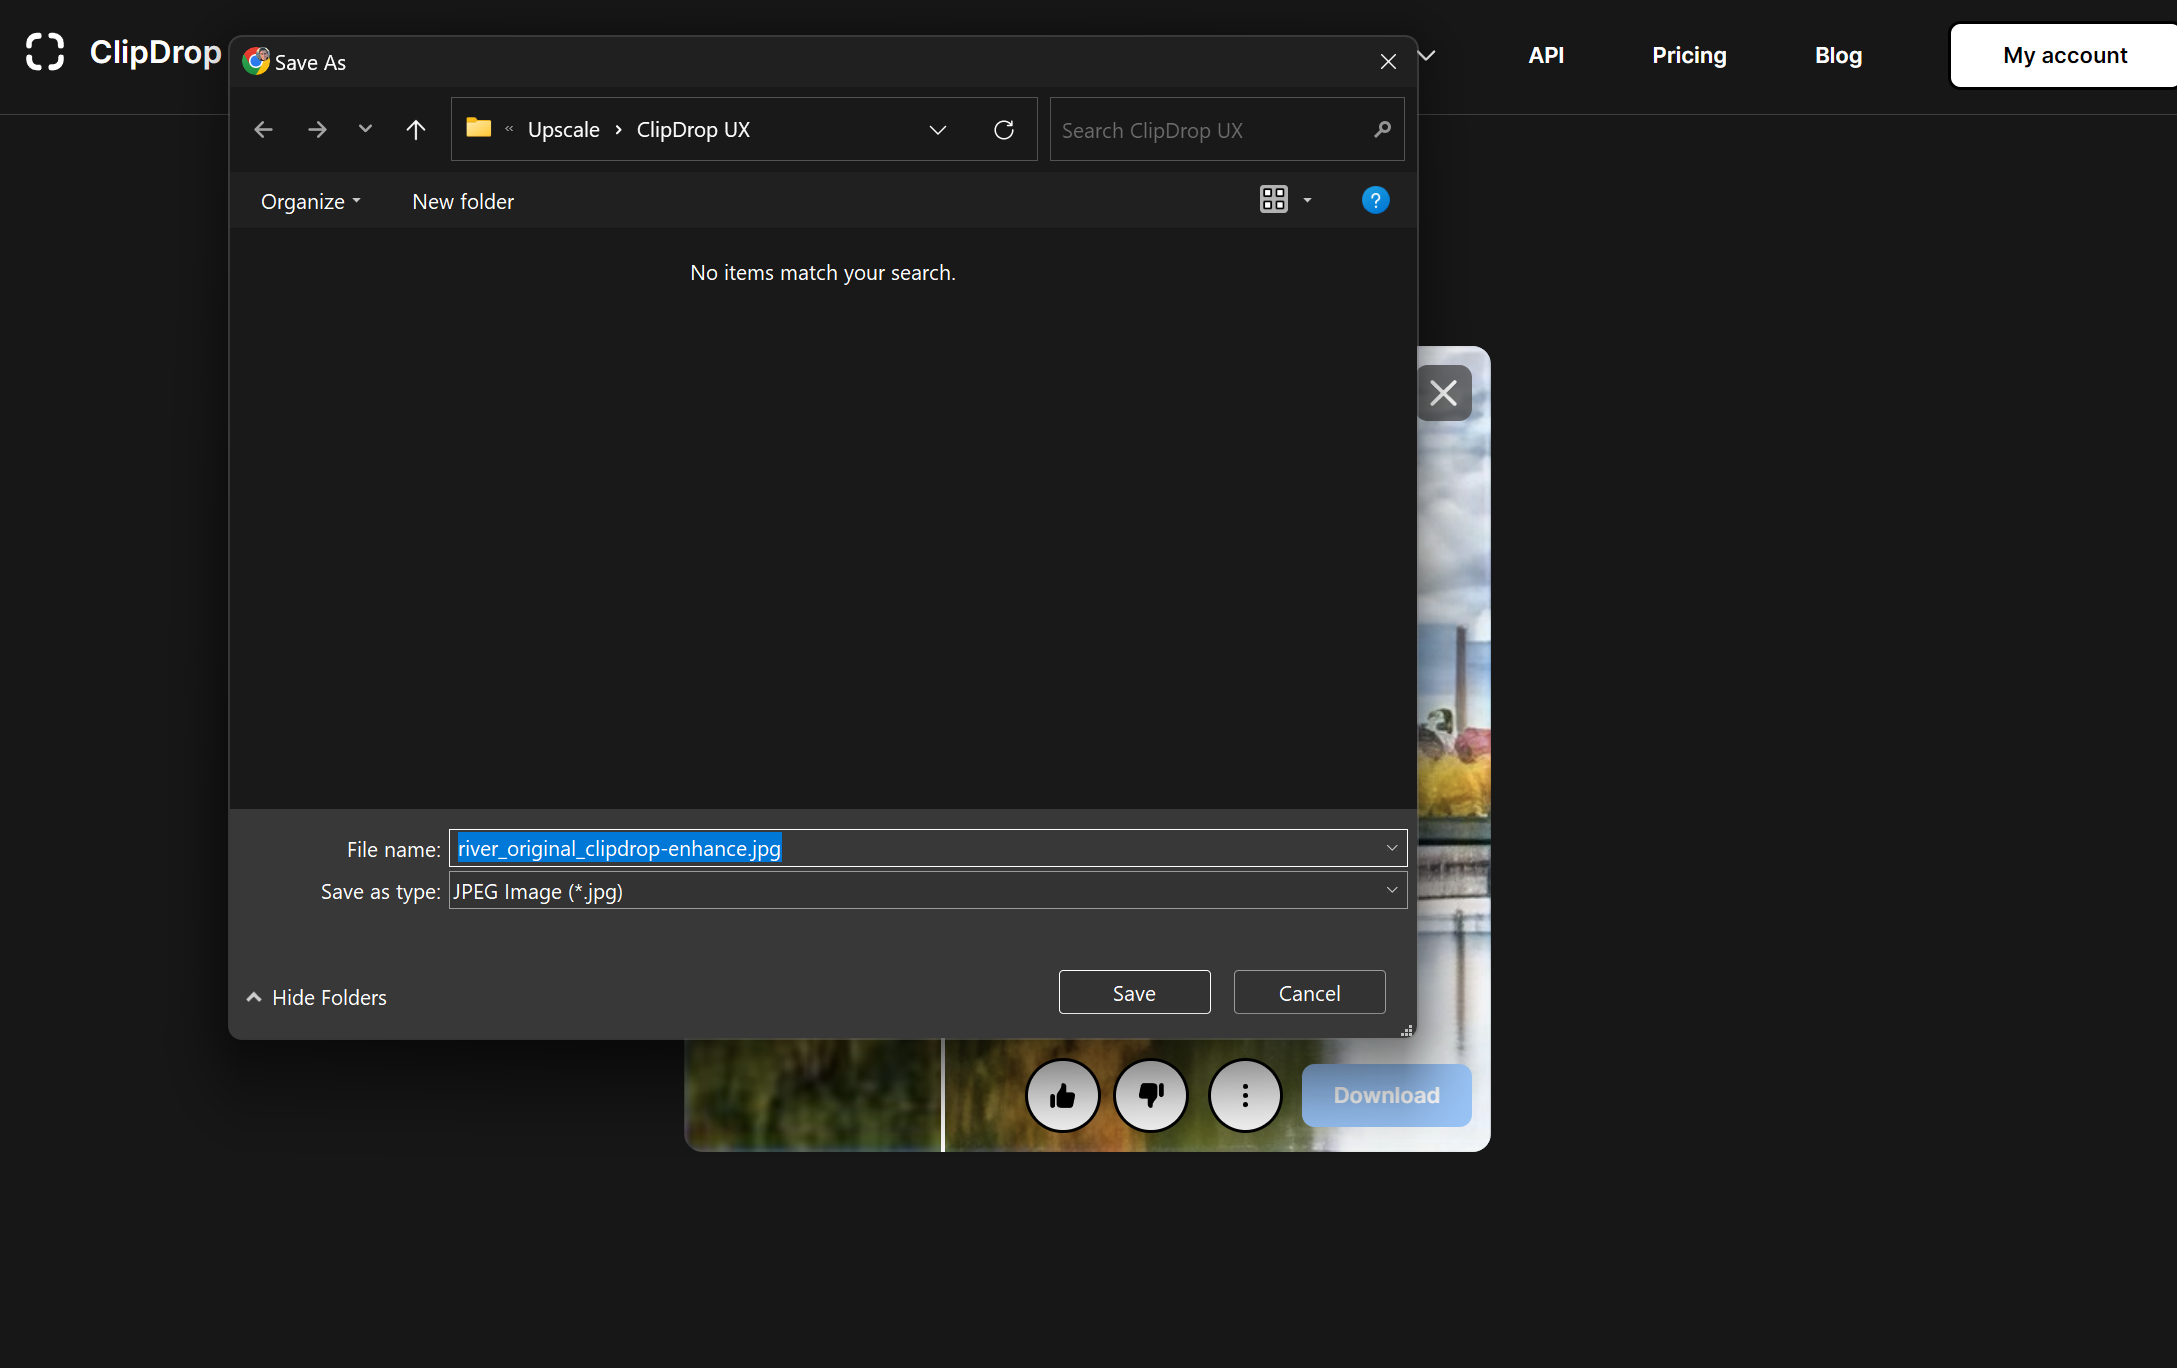
Step 4. Click the “Download” button to save the final, upscaled image! Just pick your preferred folder & filename.
That’s it!
If you like the results, but want to be able to use ClipDrop on larger images and upscale them by 4X, you can upgrade to the Pro tier.
ClipDrop Pro is $9/month, or $60/year (~44% discount), but gives you access to its full suite of AI-powered image editing tools, without limits. This includes upscaling (of course), as well as retouching & inpainting, background removal & replacement, relighting, text to image, native iOS and Android apps, and even plugins for Figma and Photoshop—so you can use AI to edit pictures from wherever you are.
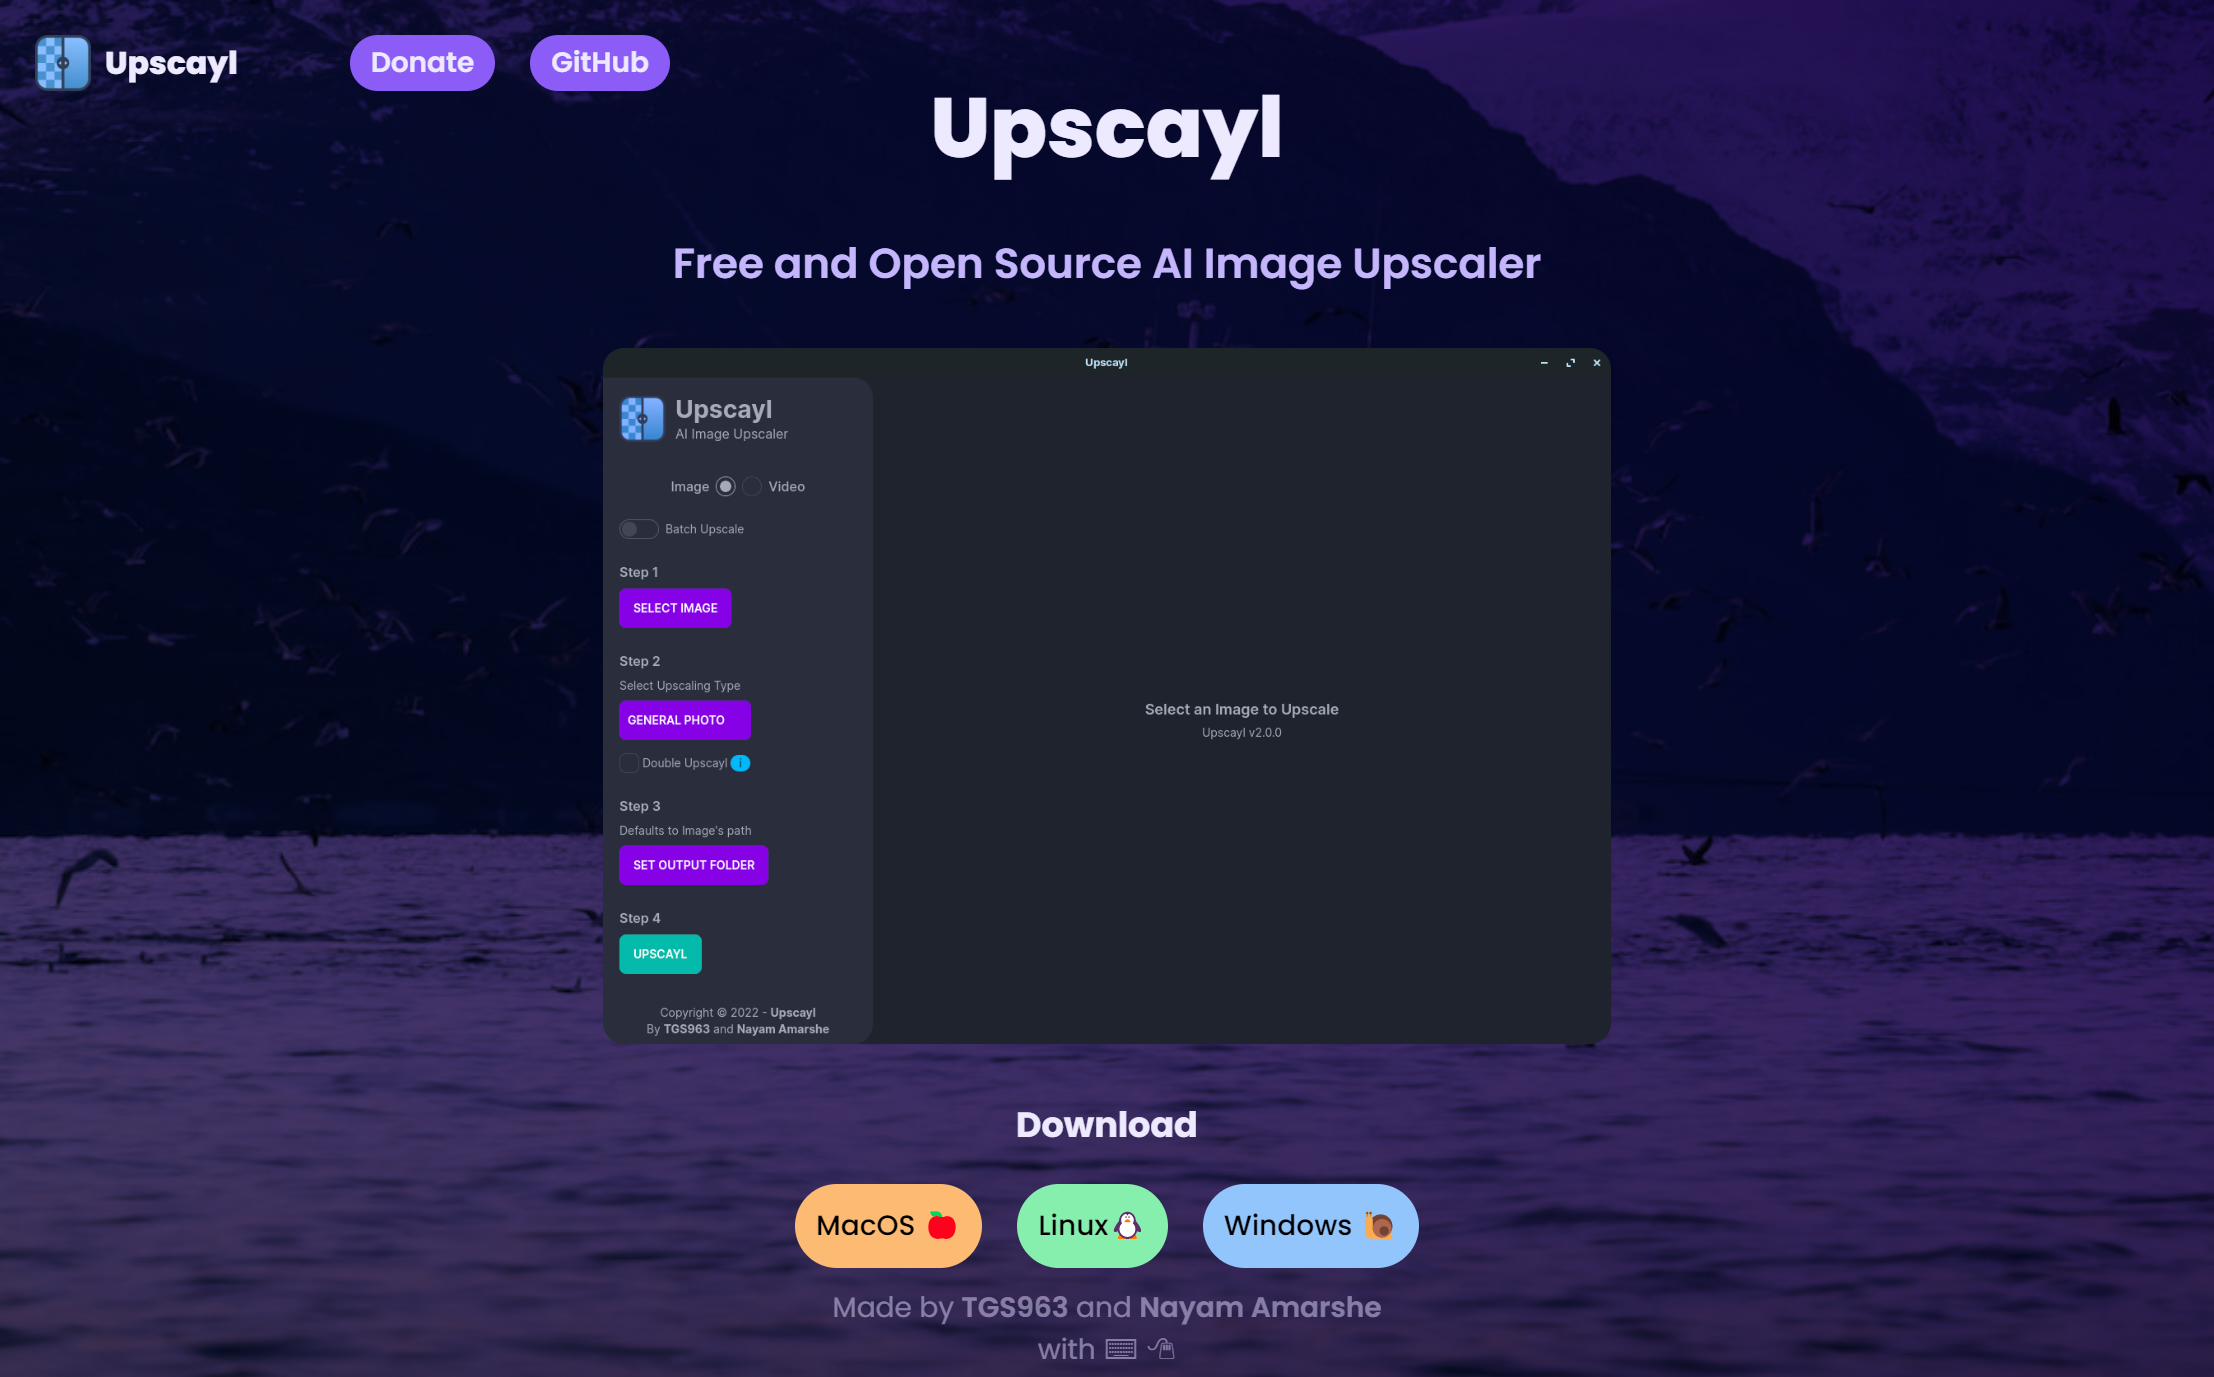
Best for quality & more advanced use: Upscayl
Using a desktop app like Upscayl is the best solution if:
- You want the highest-quality upscaling & sharpening.
- You have a relatively new laptop or desktop—ideally with dedicated graphics hardware (GPU).
- You want to process entire folders or batches of images at a time.
- You care a lot about the privacy & security of your images, or you'll use the output for commercial purposes.
After trying several tools (and researching many more!), Upscayl quickly became my absolute favorite upscaling tool, full stop. Why?
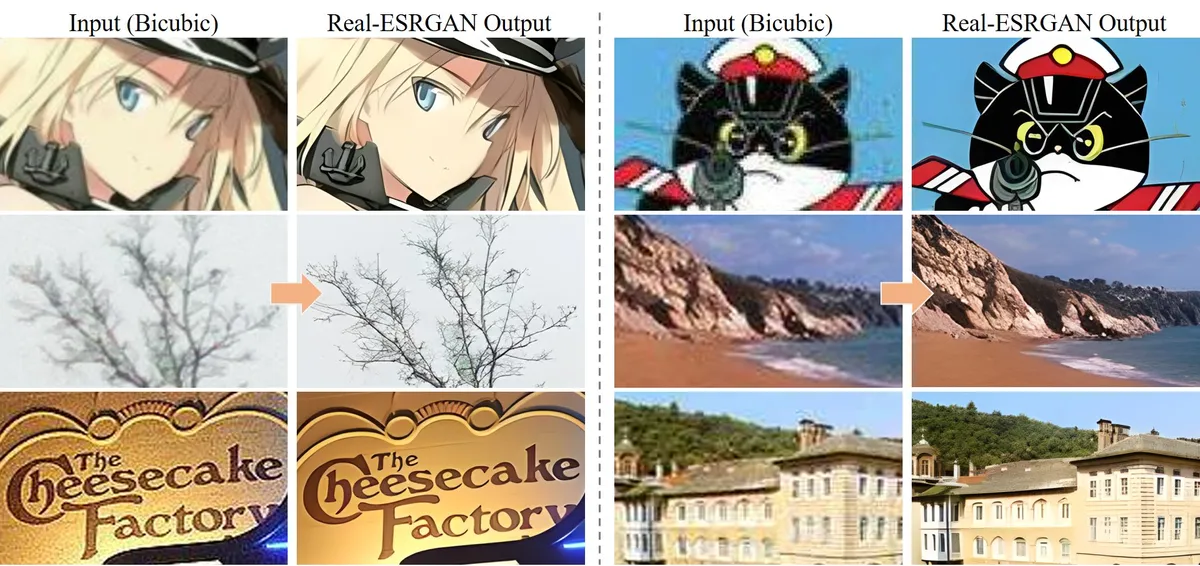
- It uses state-of-the-art AI models under the hood (e.g. Real-ESRGAN), with specific 'flavors' for upscaling specific types of images. Its output quality is very hard to beat!
- It's just as easy to use as web apps (including ClipDrop)—but it does require a download and installation.
- It’s completely (and provably) private & secure. Your images are never uploaded to a web service—in fact, nothing leaves your device, since all processing happens offline using your PC’s GPU/CPU.
- It’s available for Windows, macOS, and Linux.
- It’s completely free and open source (FOSS). This means you can use it for any purpose, personal or commercial, without limits or restrictions.
Here’s how to get going with it:
Step 1. Go to https://upscayl.github.io/ from your PC (laptop or desktop) browser.
Step 2. Under “Download”, click the button corresponding to your PC’s operating system: Windows, macOS, or Linux. Save the installer wherever you prefer (e.g. Downloads folder).
Step 3. Run the installer, and follow the steps to install Upscayl.
- Note: on Windows, you might encounter a “Windows protected your PC” window, from Windows Defender SmartScreen. If you do, just click “More info”, then “Run anyway”. This warning appears because Defender doesn’t recognize it, since it’s not a super mainstream app (yet).
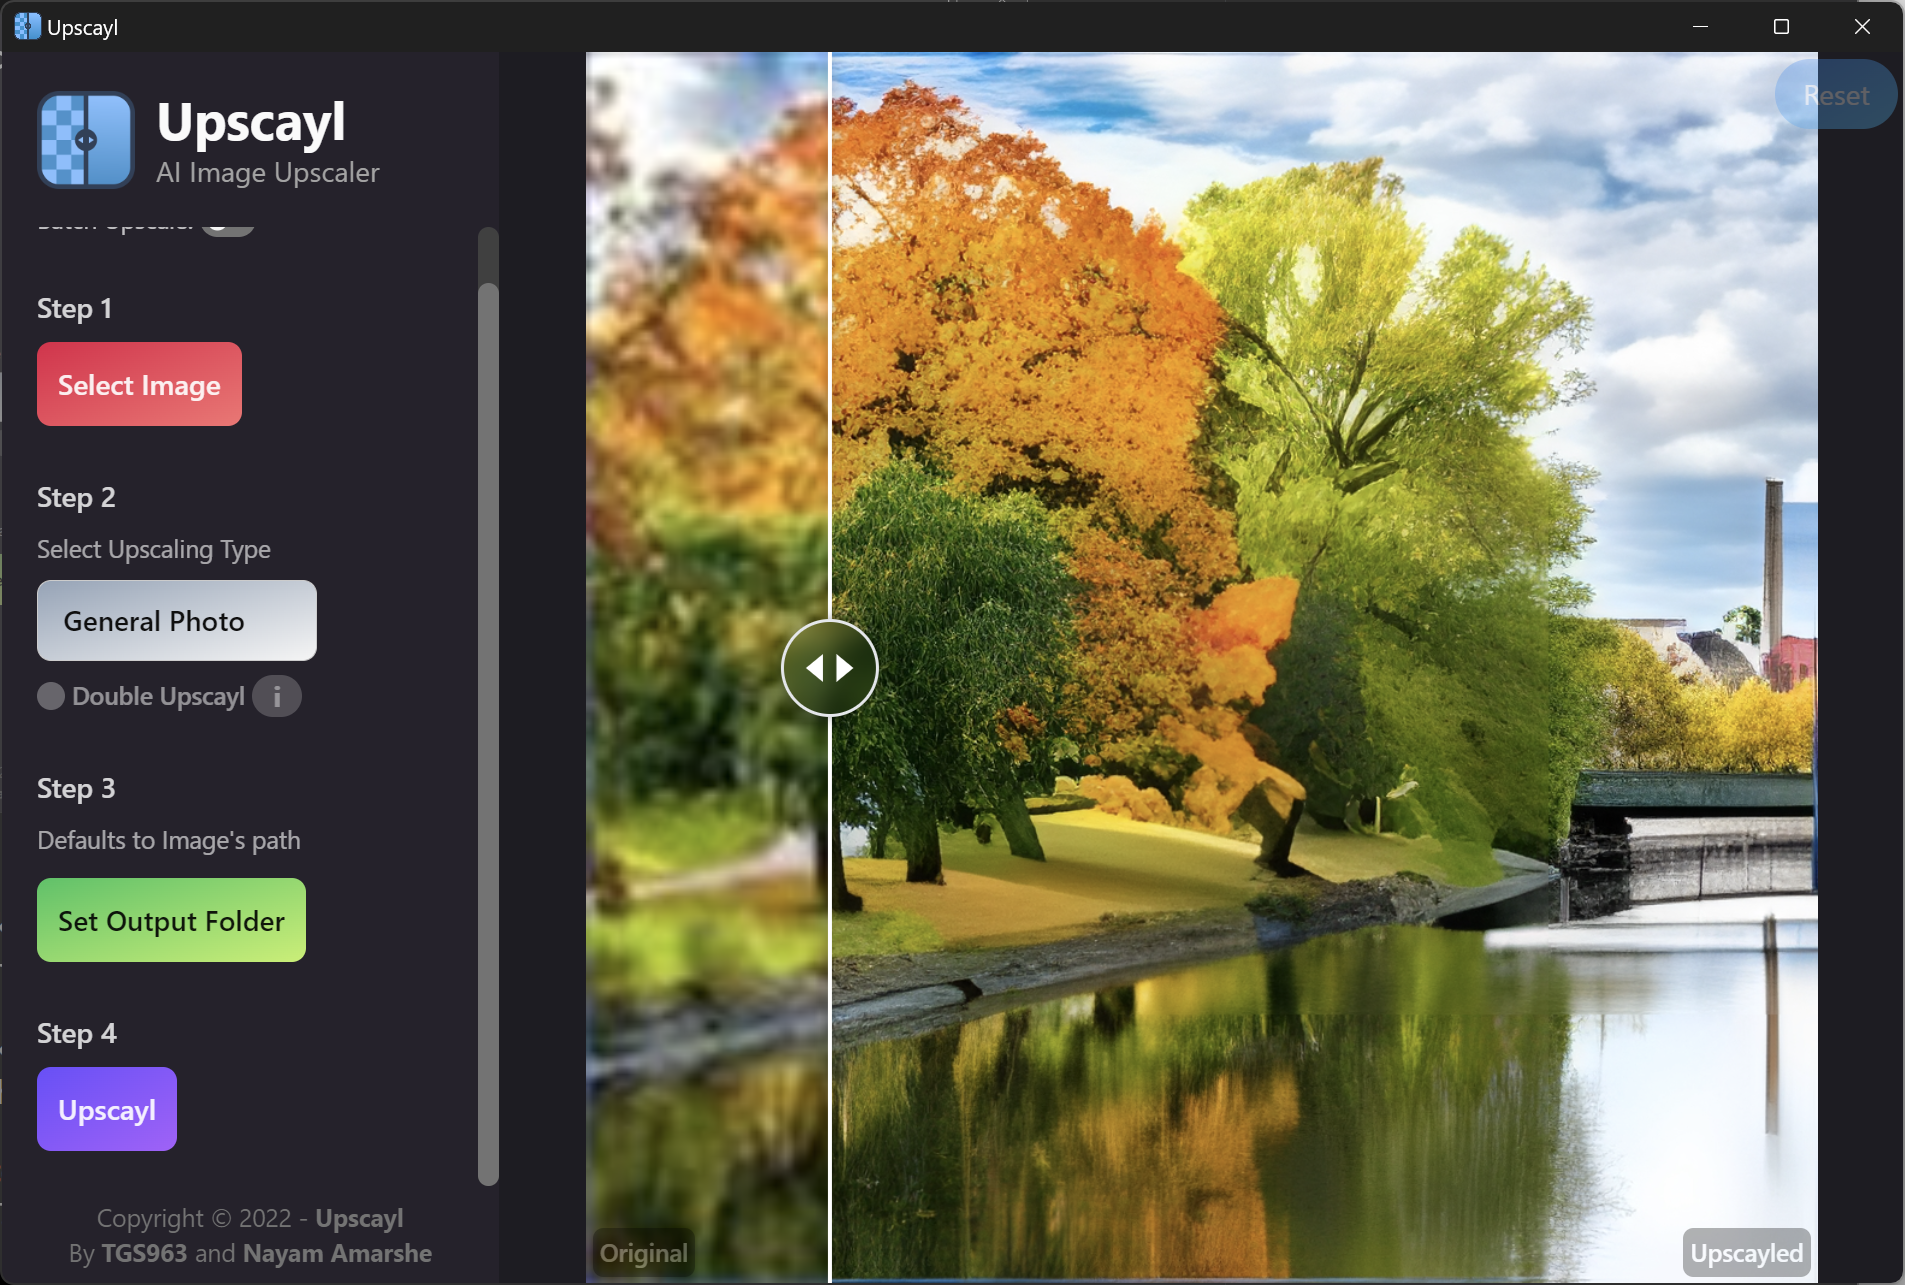
Step 4. Launch the Upscayl app. Then, on the side panel, click the “Select Image” button. A file picker window will open. Choose the image you want to upscale or sharpen.
- PNG, JPG, or WEBP images are supported.
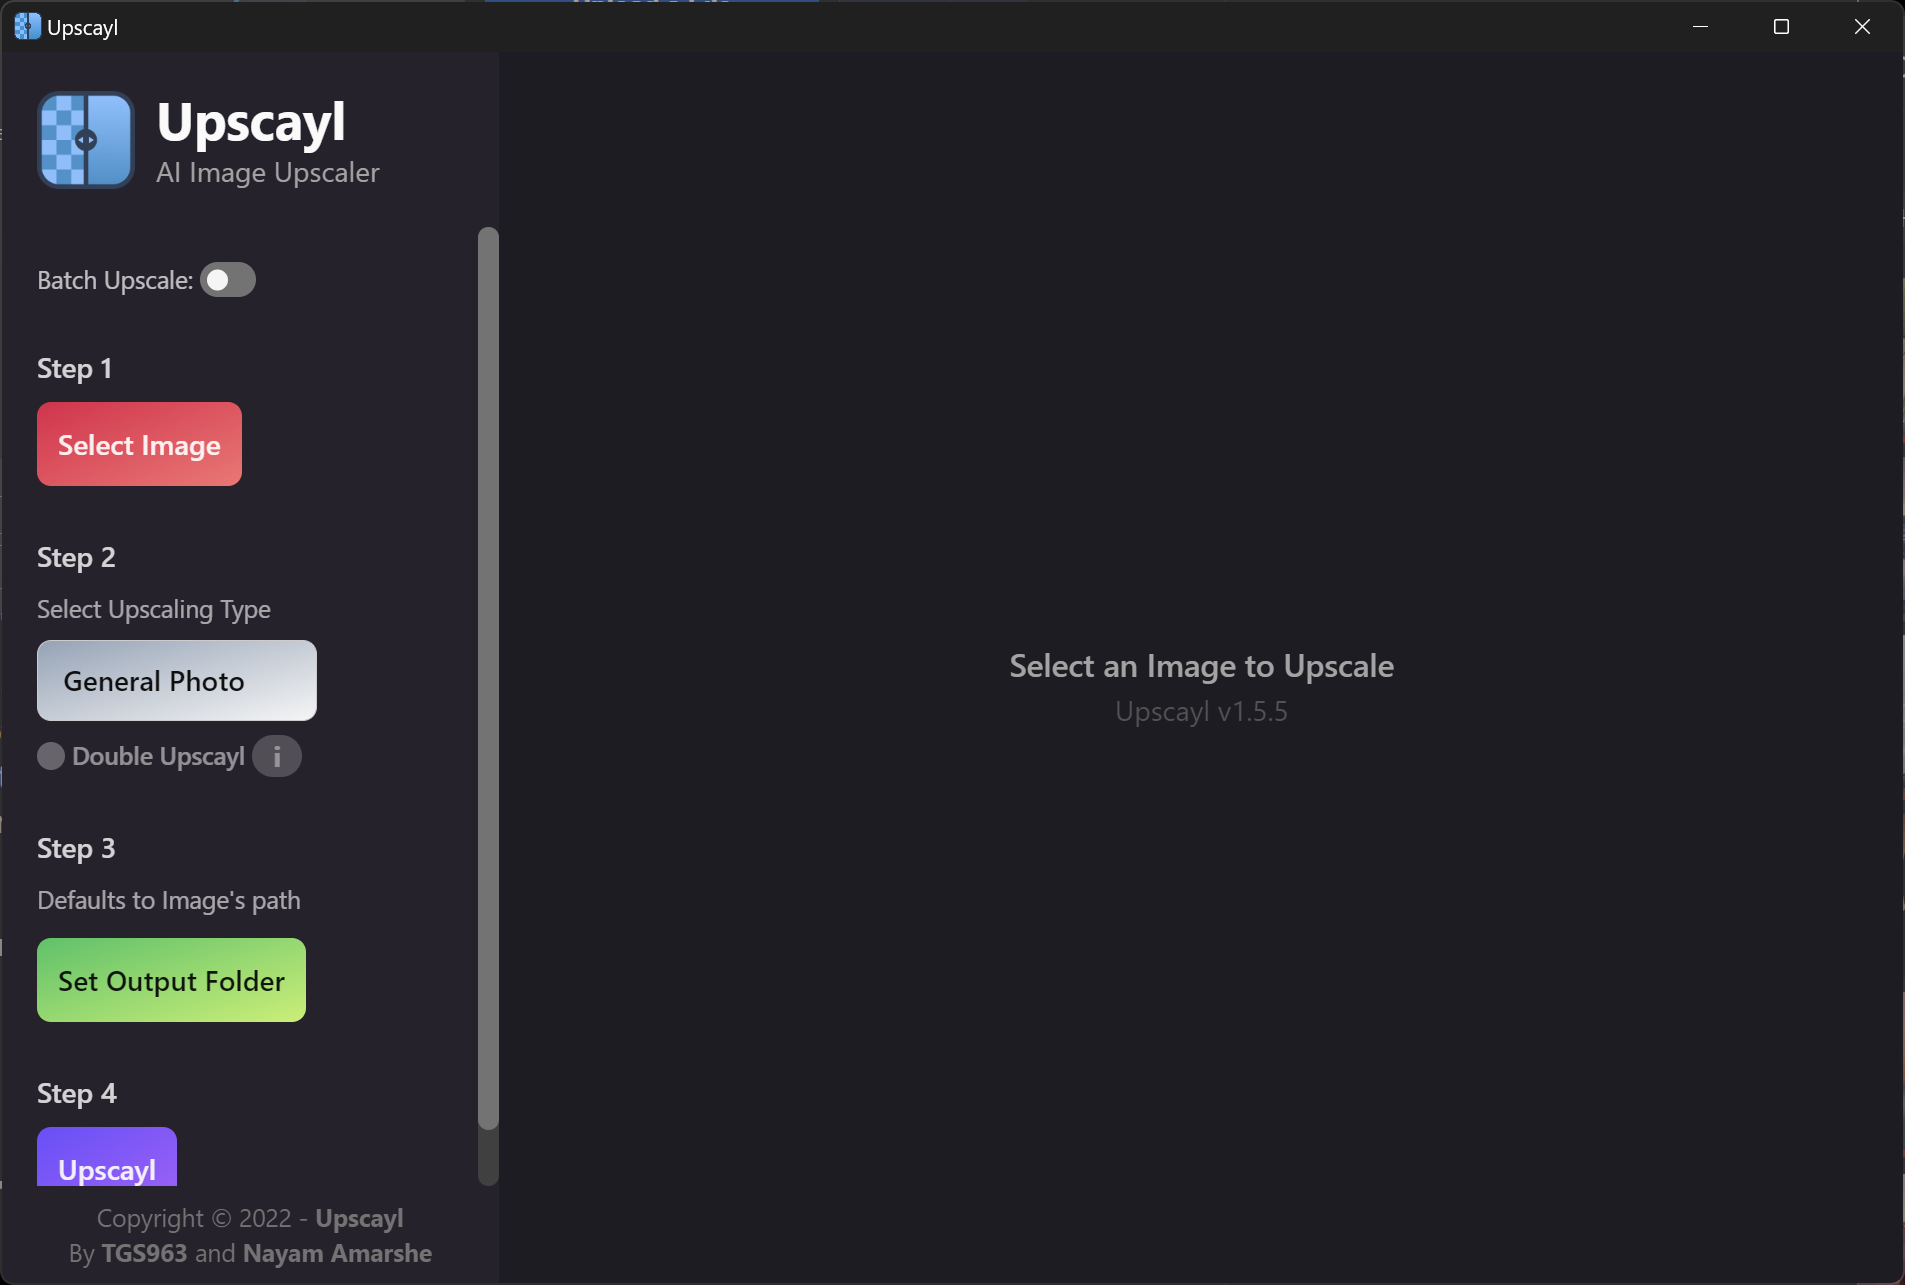
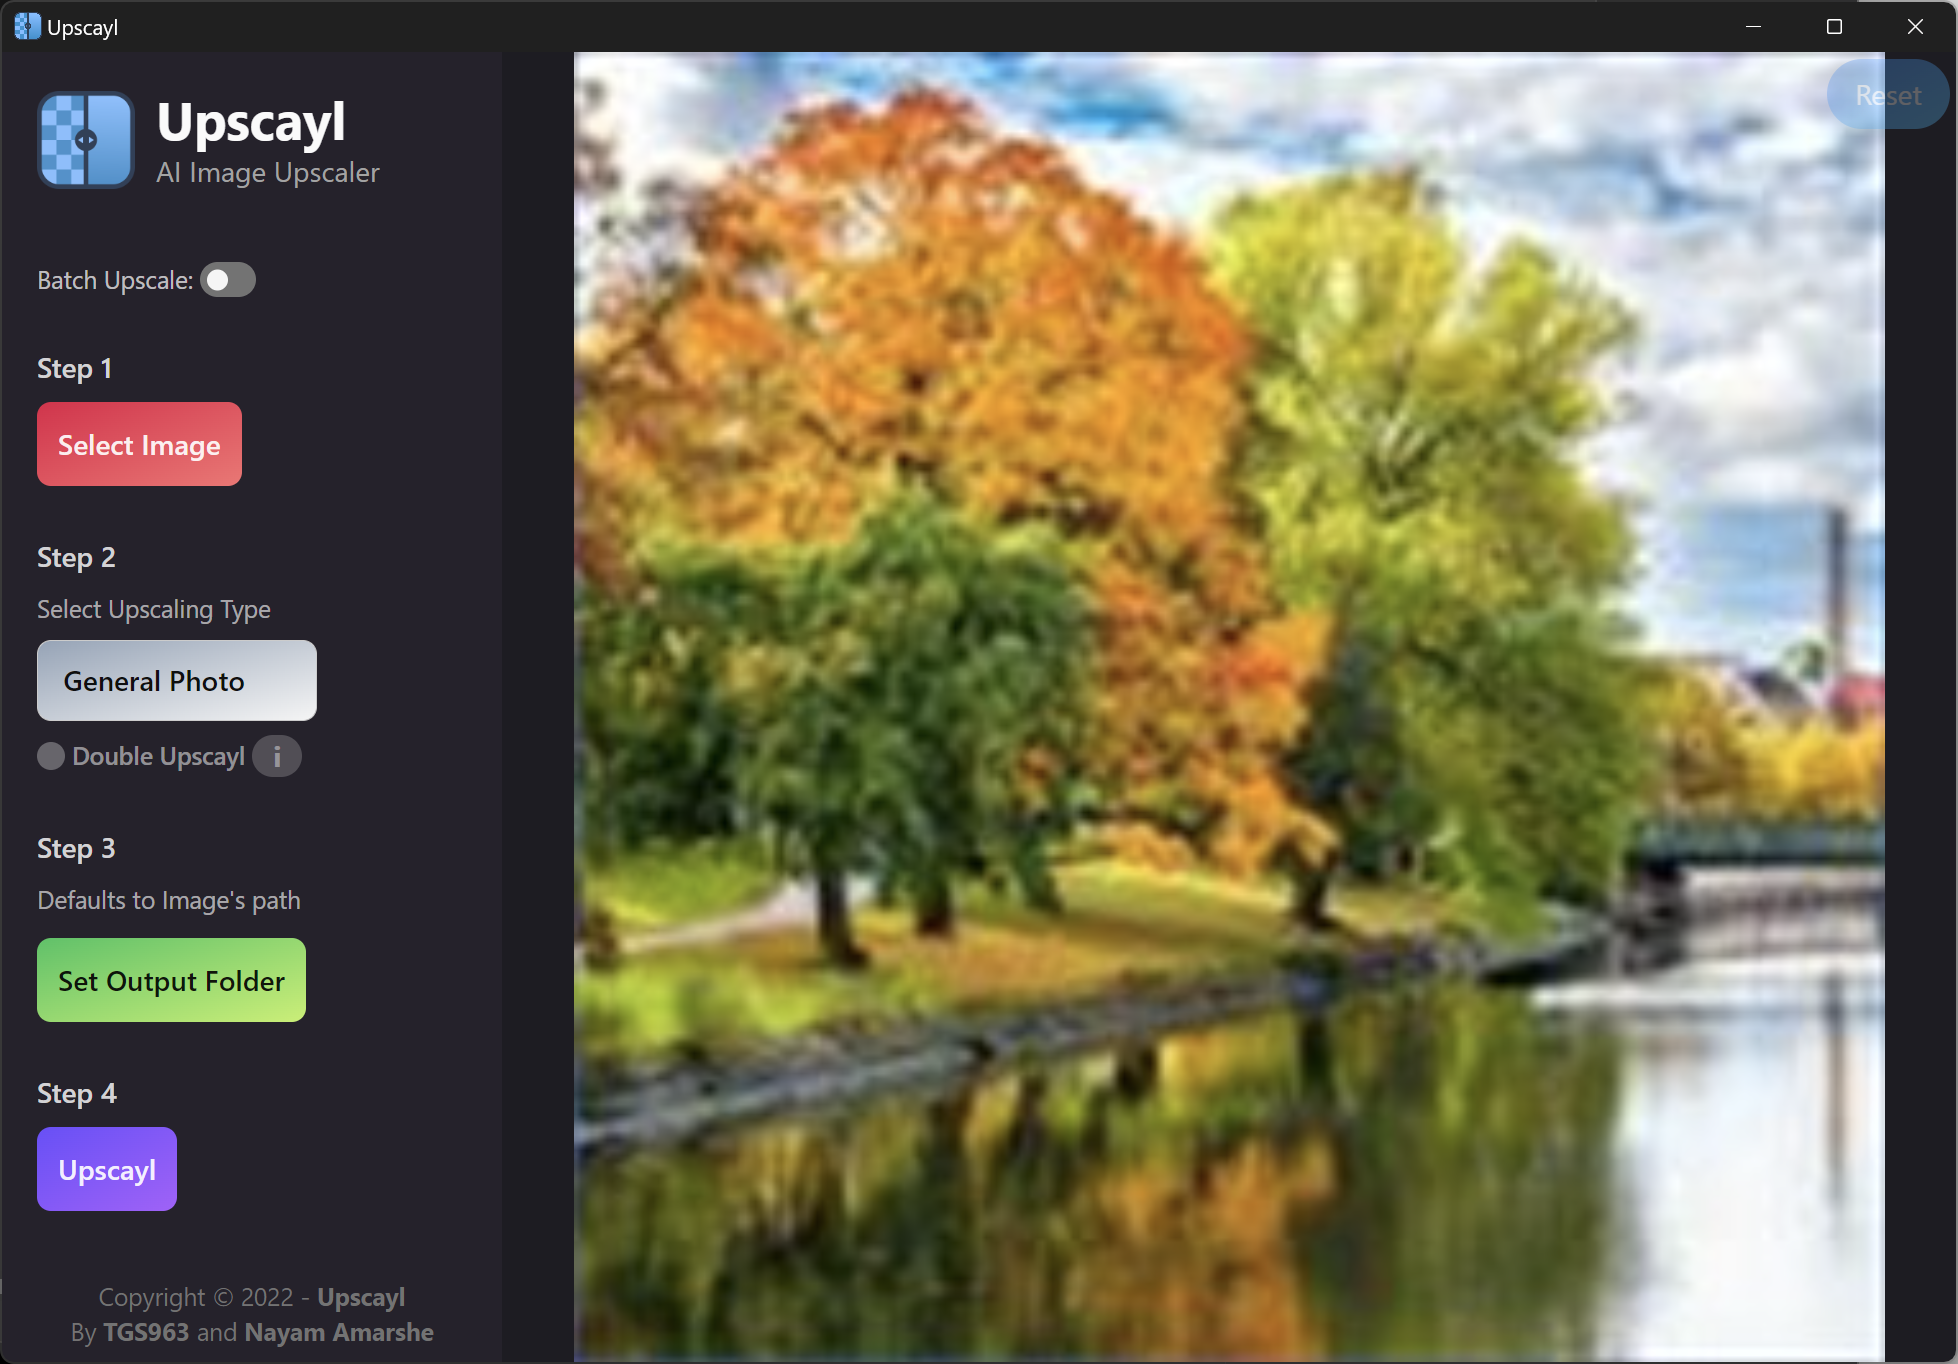
Step 5. Once selected, a preview of the image (original) will appear. Next, choose which “Upscaling Type” you prefer:
- General photo. Best for photography, portraits, paintings, and other images.
- Digital art. Best for digital art such as anime, comics, line drawings, etc.
- Sharpen image. Best for noticeably blurry photos and other images.
Since different images will produce different results (AI results especially vary widely, you may want to experiment with different upscaling "types" (i.e. model flavors) to see which result is best for your purpose.
By default, Upscayl will upscale by 4X (which means that a 256×256 input image will yield a 1024×1024 output image, so 4x as many pixels along each dimension, which is in fact 16 times more total pixels).
- If have a small input image, or need a very large output, you can select the “Double Upscayl” toggle to upscale by 8X. (Note that this might not work with large input images, or may take a very long time to process!)
Step 6. Click the “Set Output Folder” button, and choose where you’d like the upscaled images to be saved.
Step 7. Click the “Upscayl” button to start upscaling. (You may see a progress (%) indicator while it’s processing.)
Step 8. Once upscaling finishes, you’ll see the final image in the preview container. Using the slider, you can compare the input image with the output (upscaled) image. And, it will be saved to your chosen output folder, with a unique filename. Tada!
That’s it!
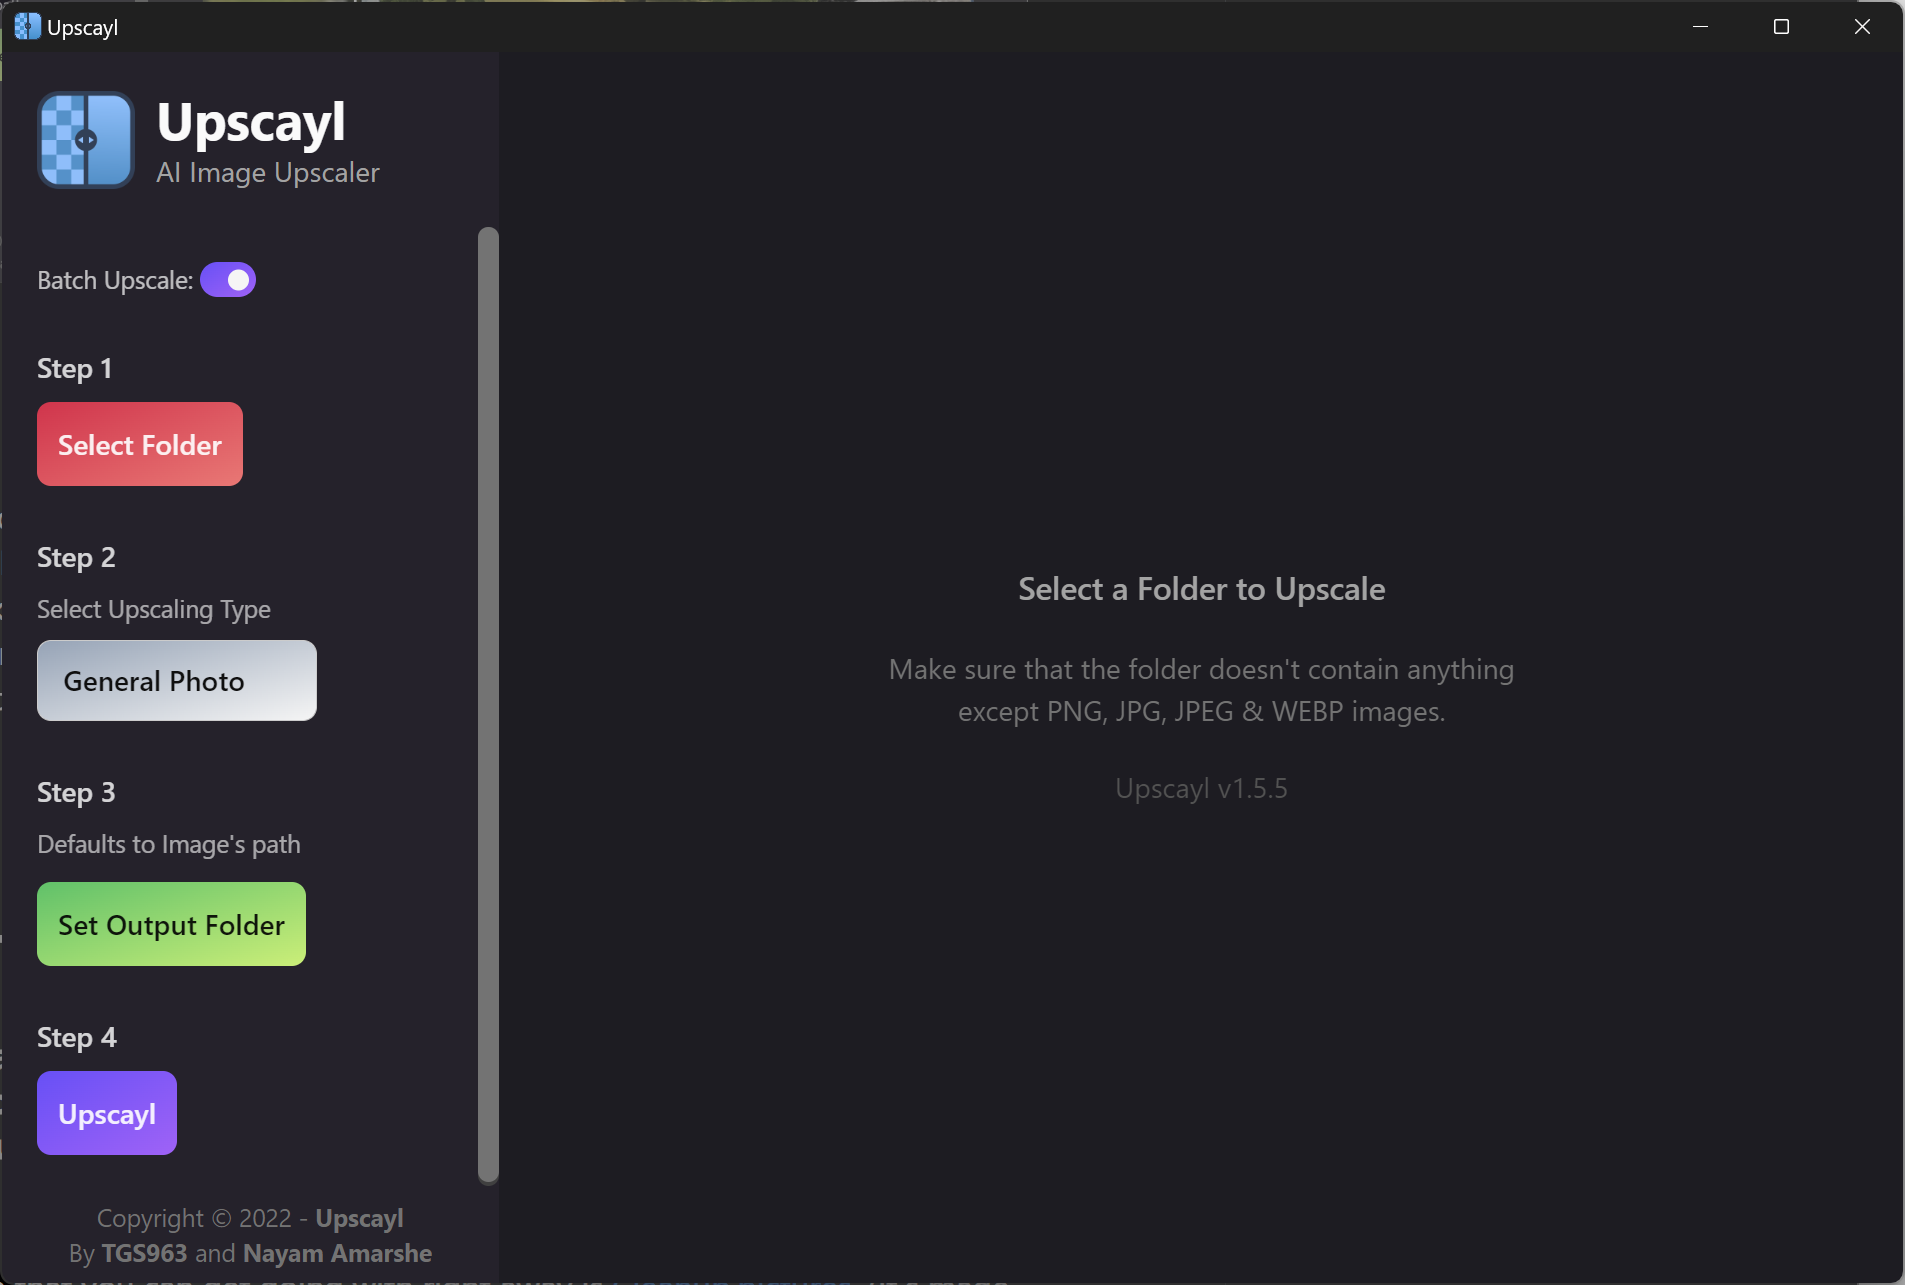
Bonus tip: If you need to upscale multiple images at once—i.e. batch upscale—you can also do this easily with Upscayl. Just click the “Batch Upscale” toggle at the top of the side panel. Then, instead of choosing an image, choose an Input Folder.
- Make sure the folder only contains images you want to upscale (since it will try to process every file), and only PNG, JPG, or WEBP file types. Proceed with the other steps the same way as with the single image scenario. Once finished, the upscaled images will all be saved to the Output Folder you've chosen.
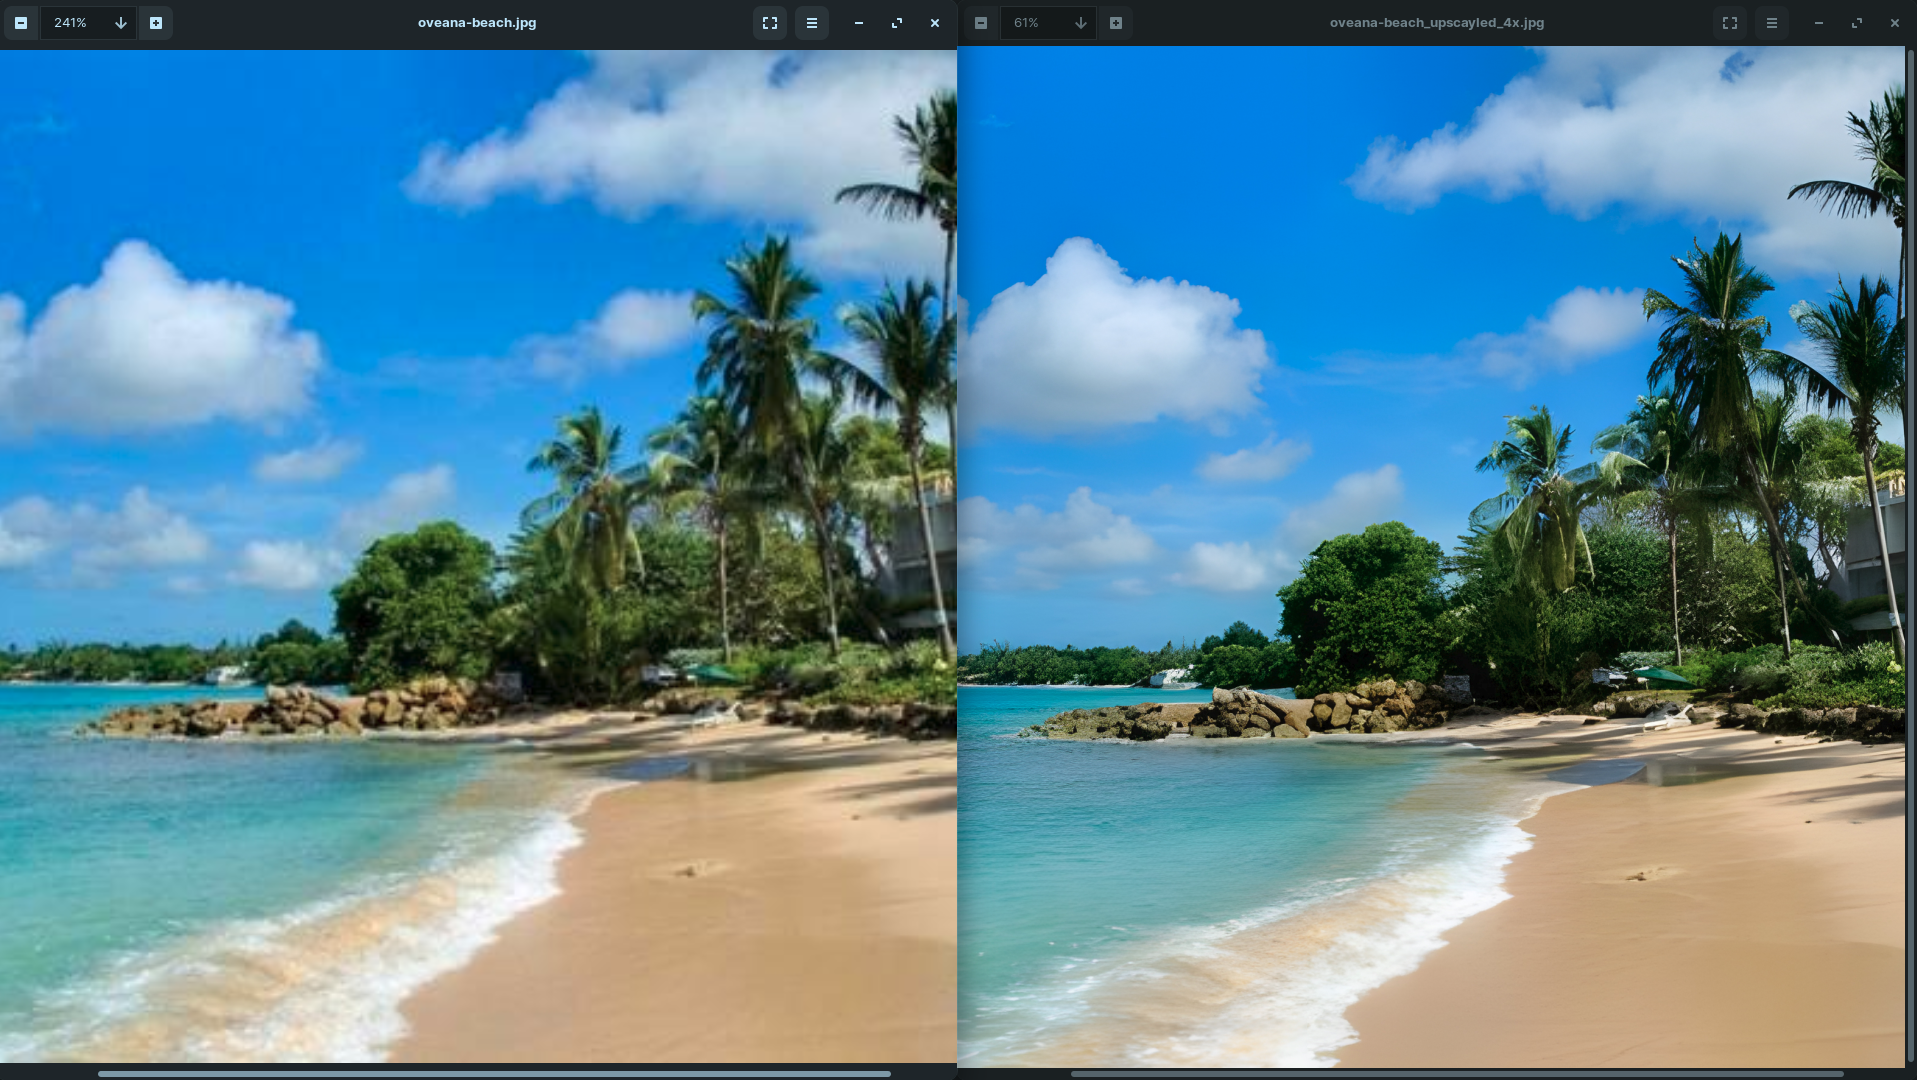
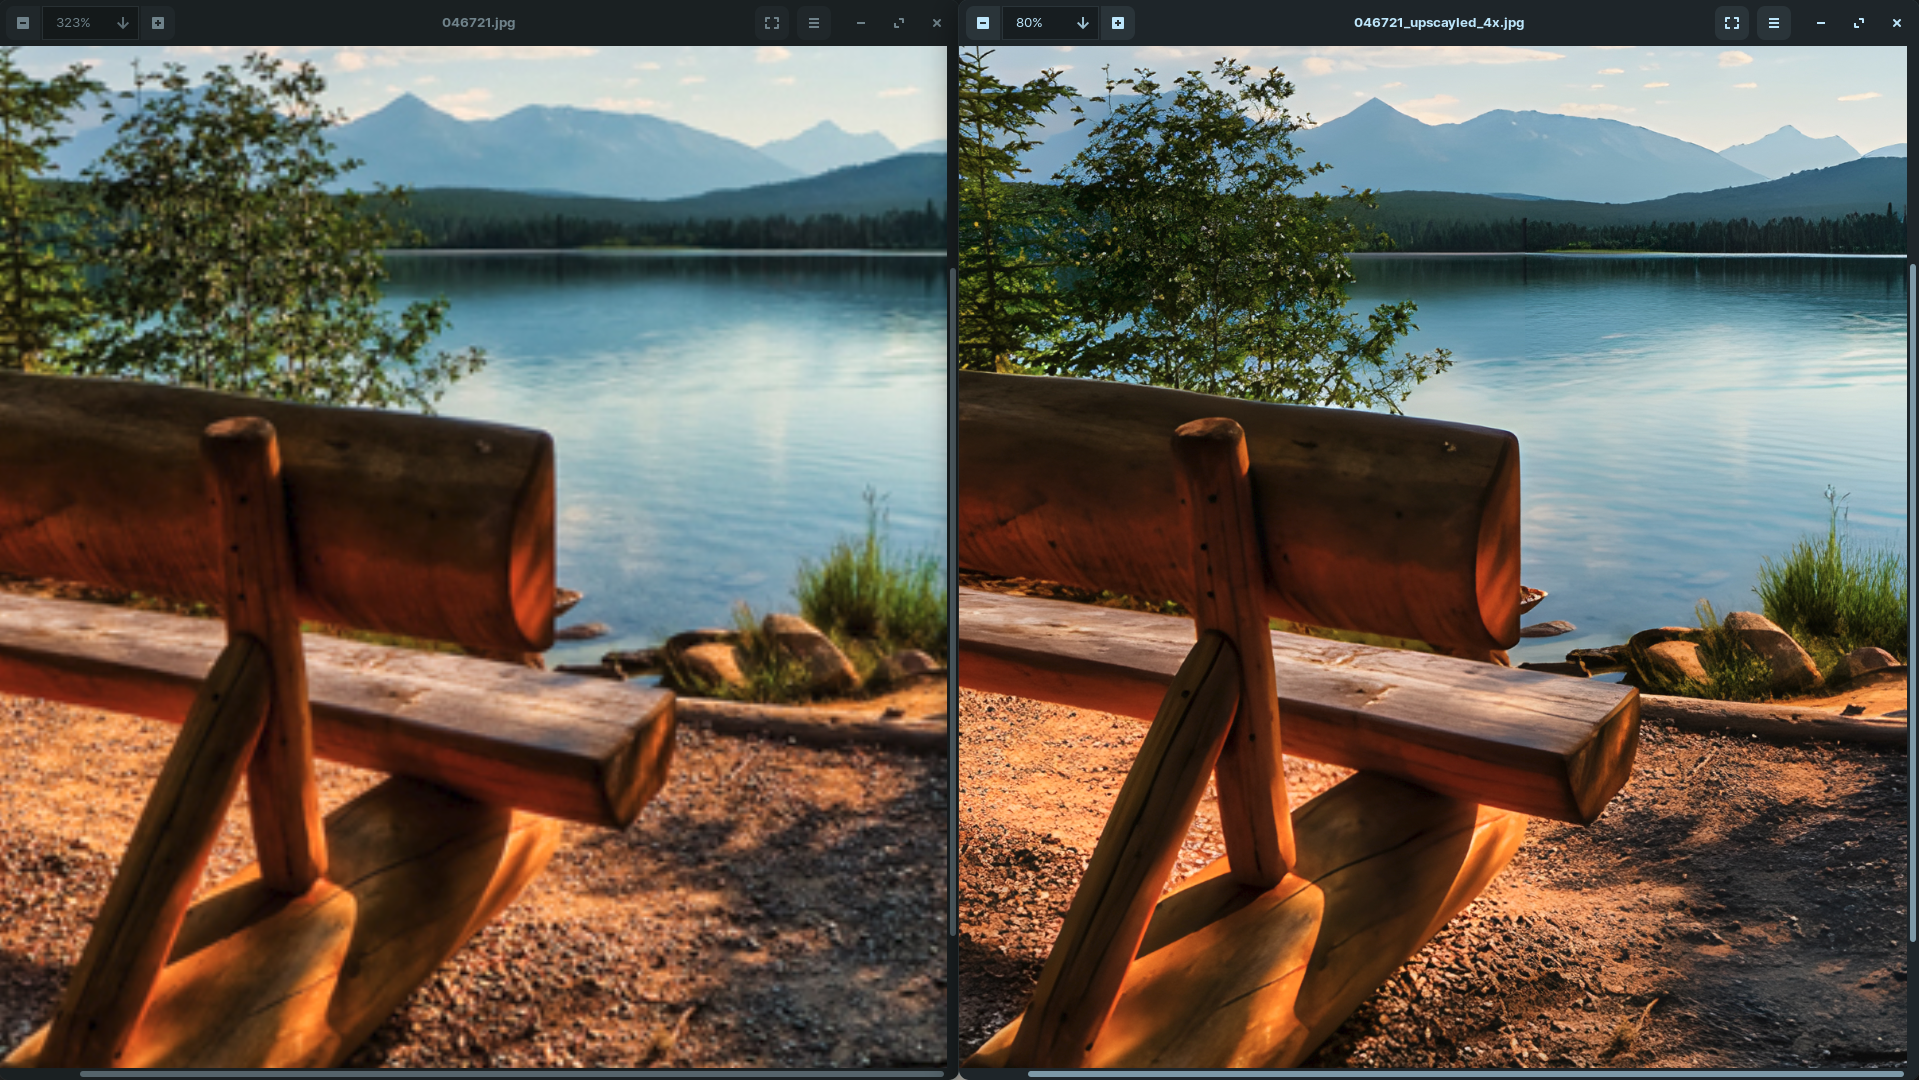
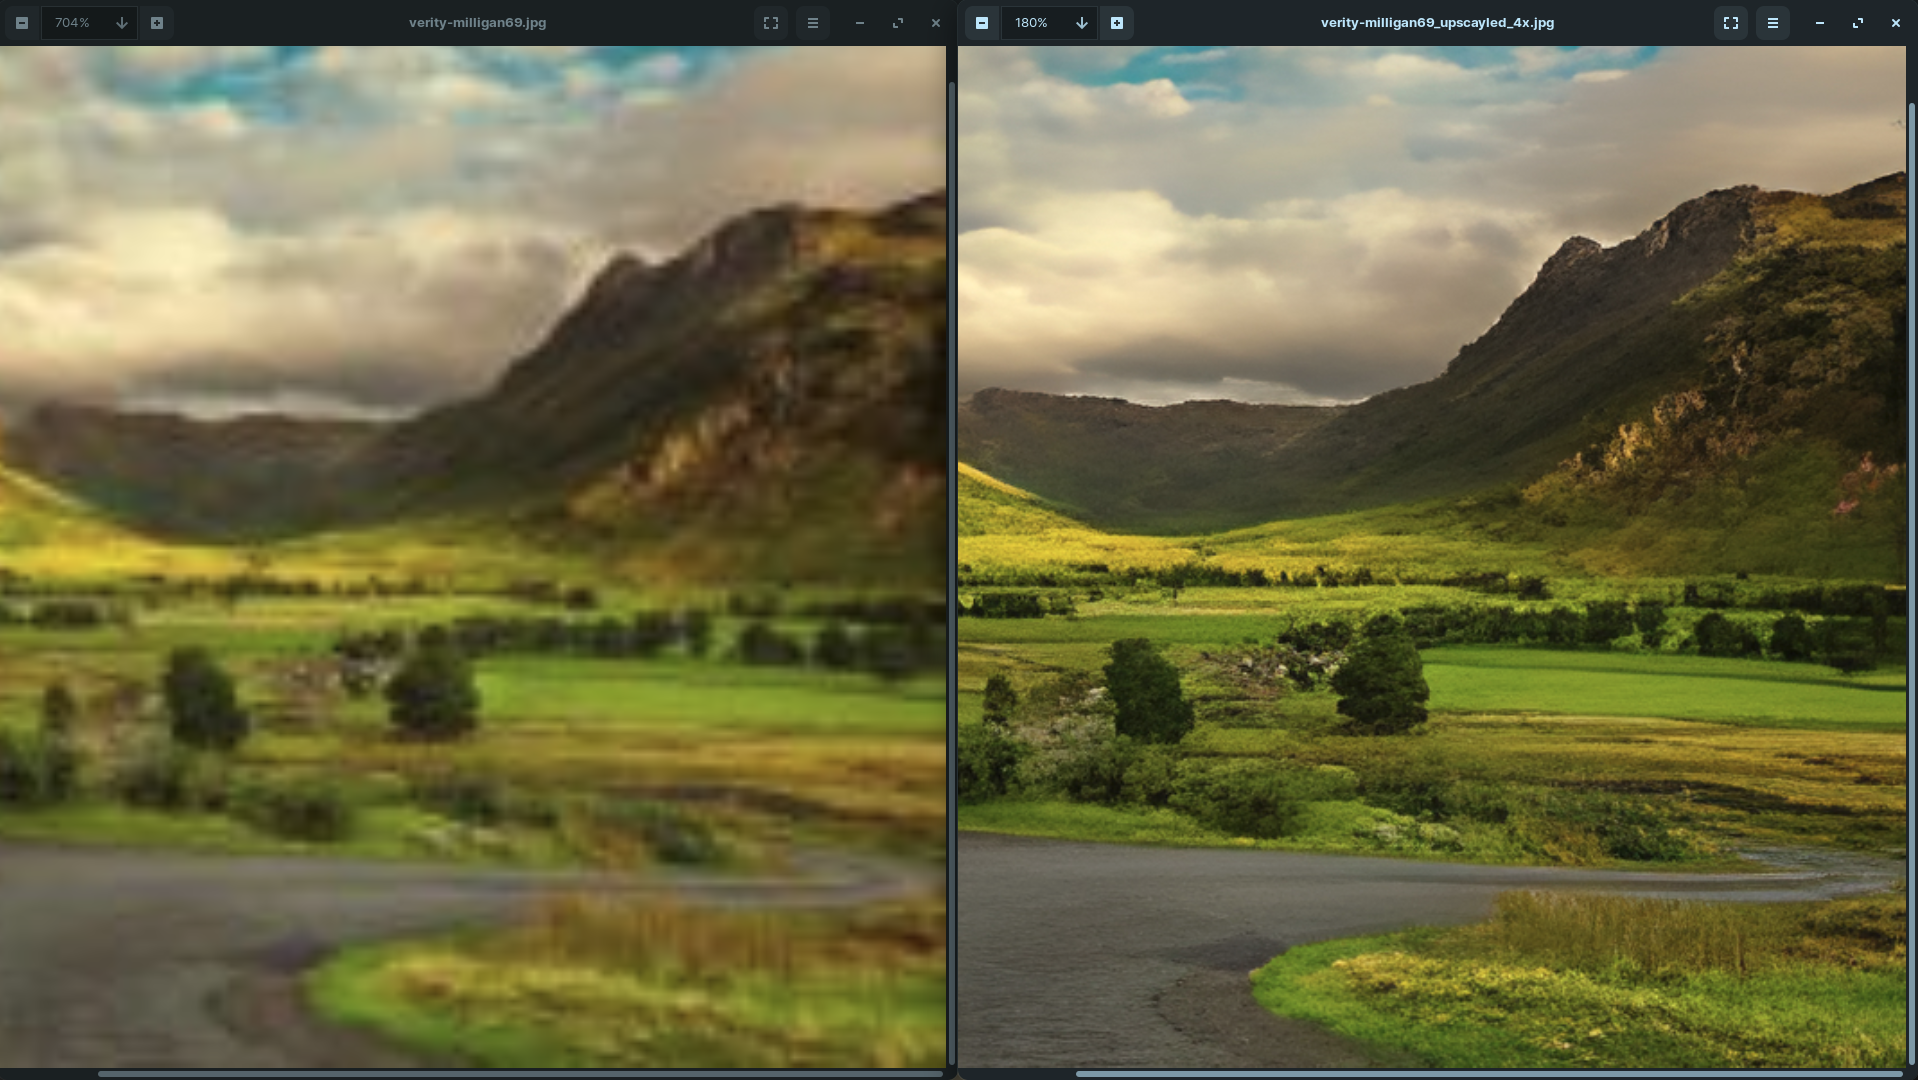
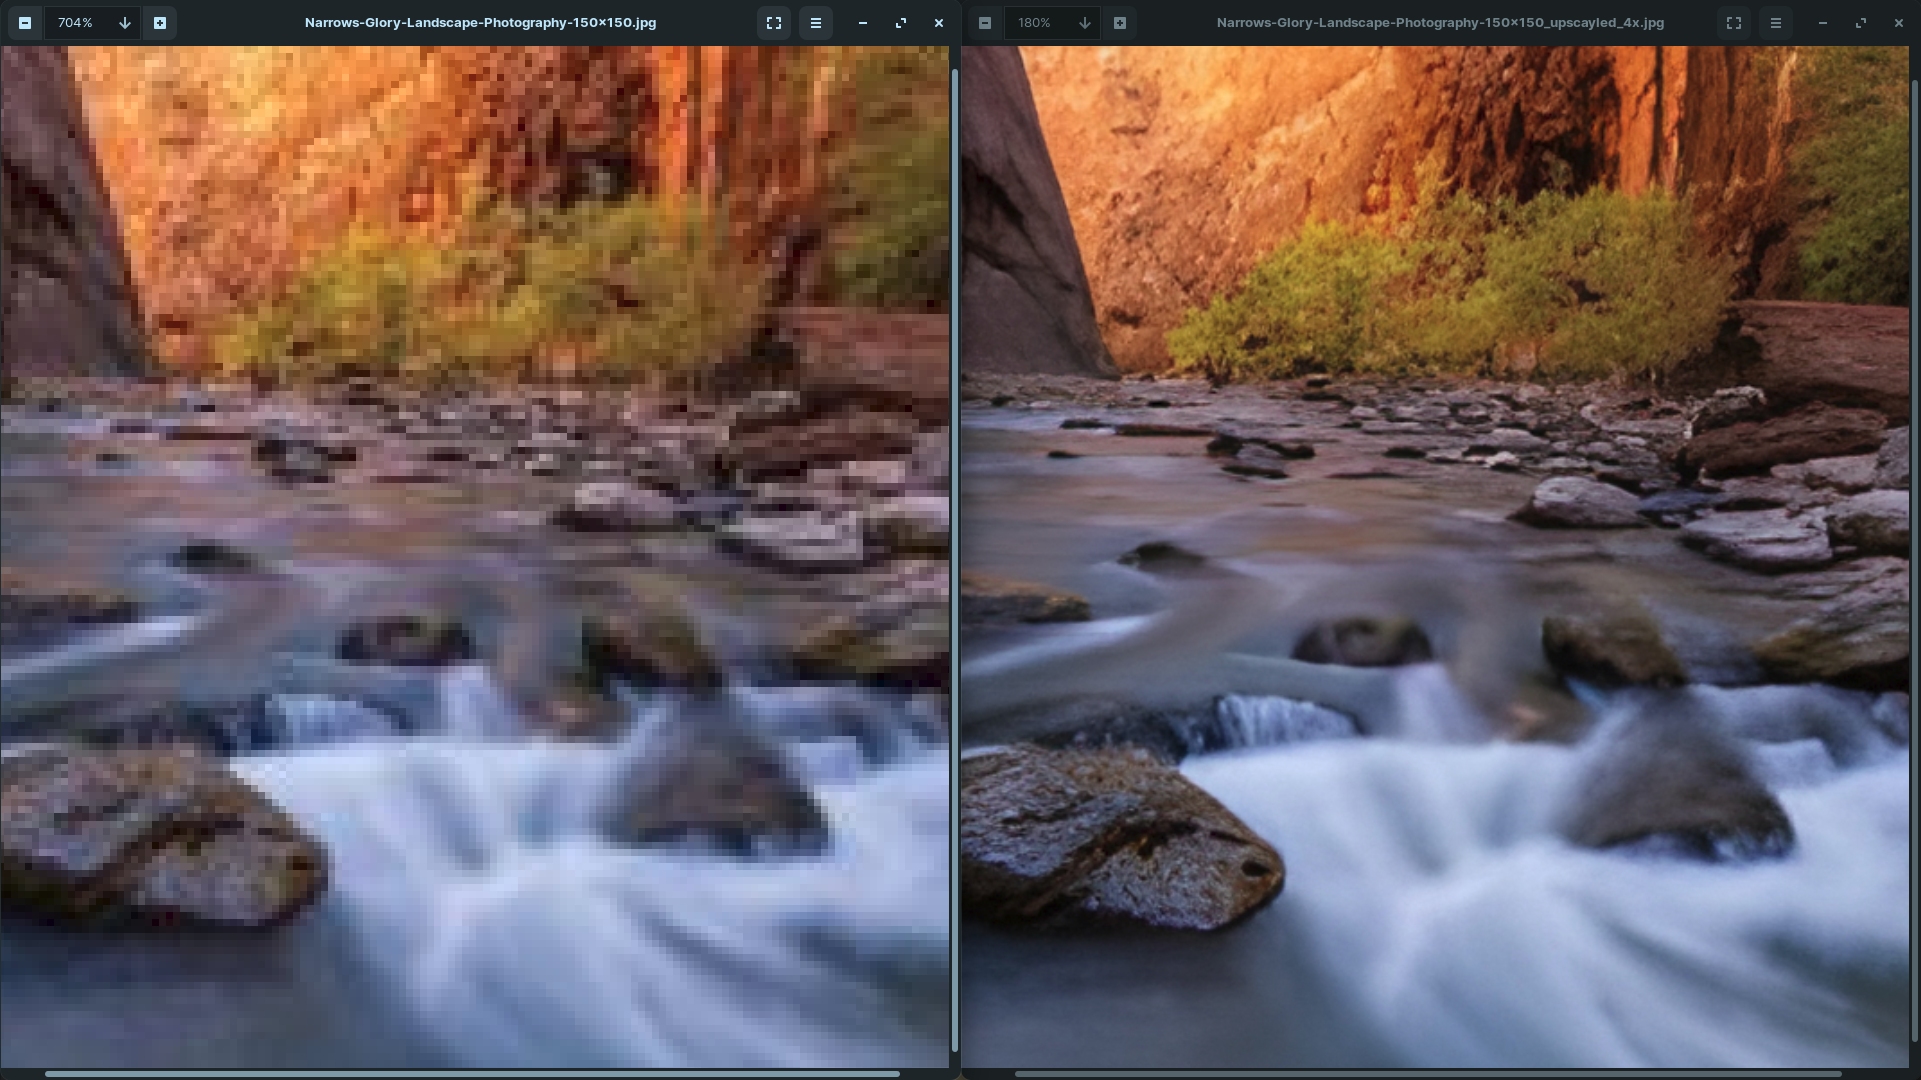
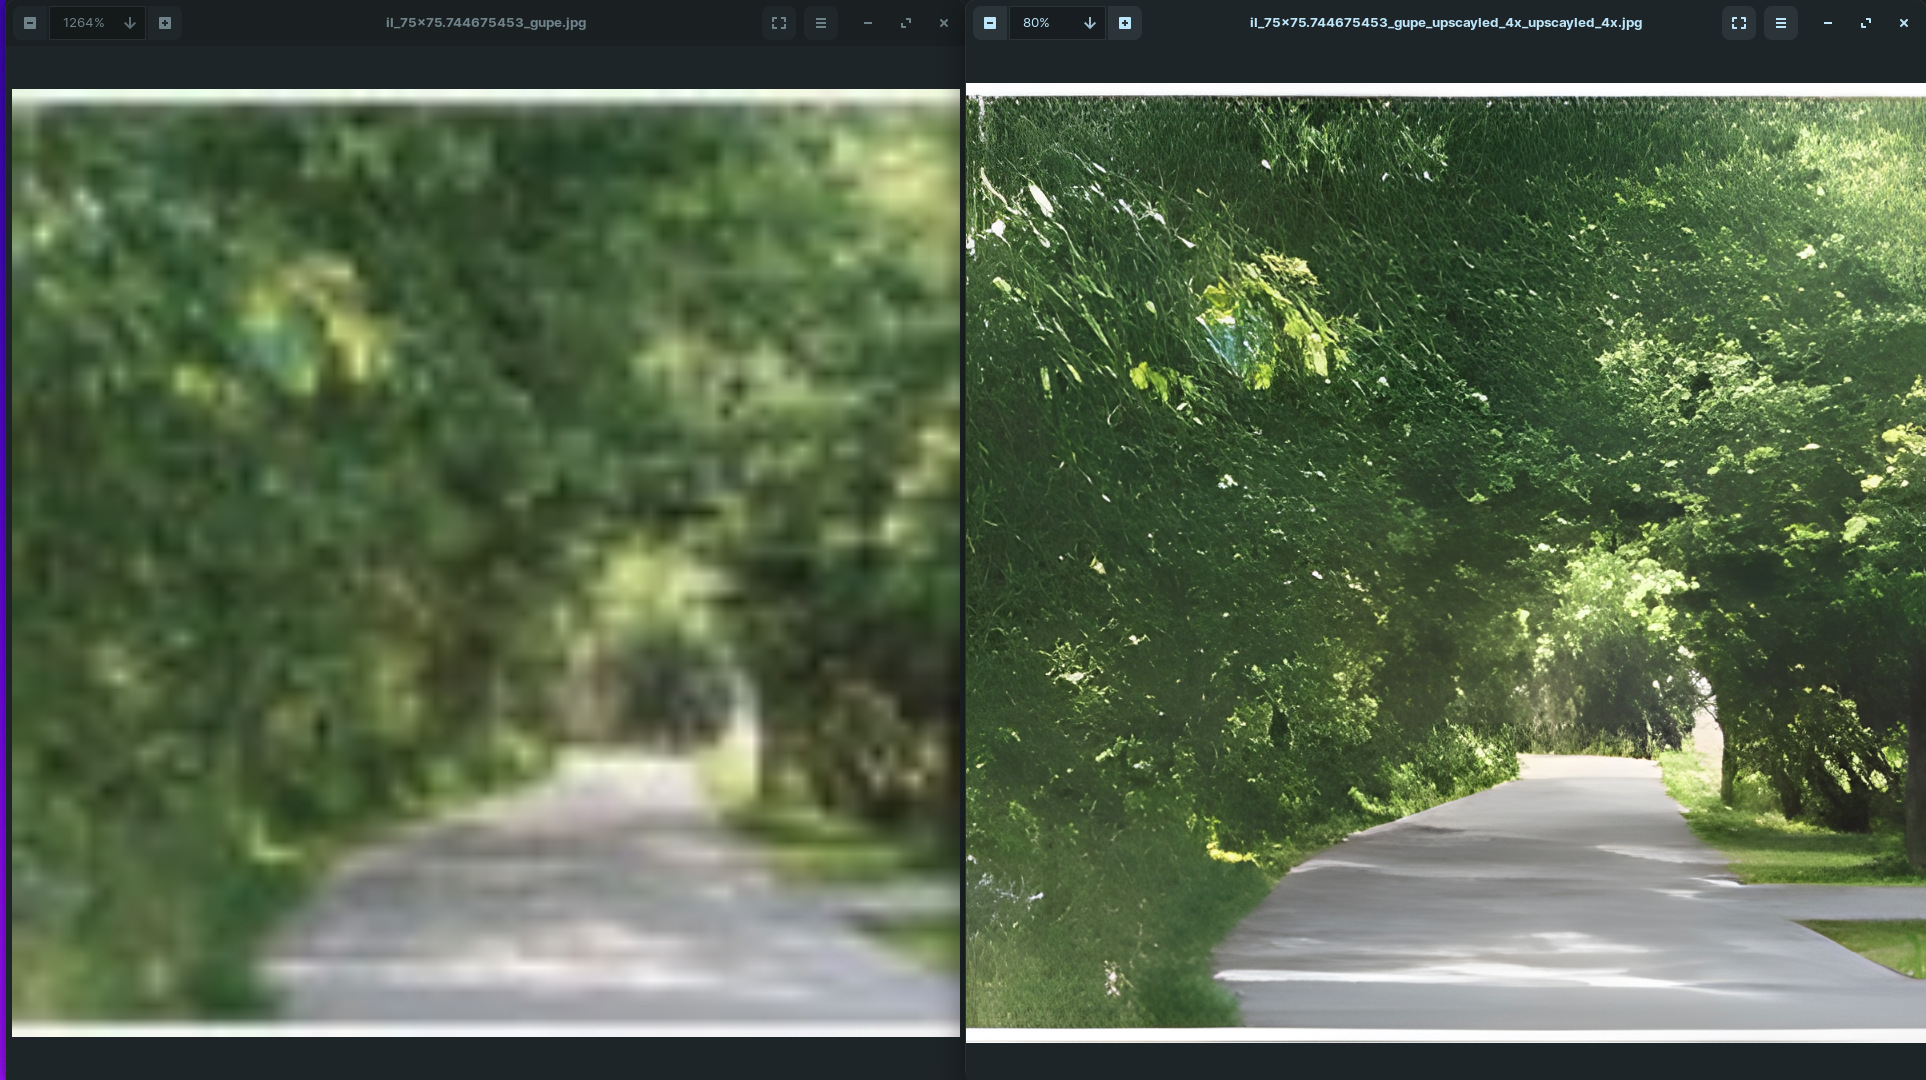
Here are a few more examples of "before and after" images—clearly improved—using Upscayl:
Voilà! I hope this guide helped you make your pictures clearer & sharper, while learning a bit about AI-powered tools. As always, please drop questions, feedback, and more tips in the comments—or DM me. Thanks!
Happy picture cleanup.
- Josta Tech