How to Customize the Start Menu in Windows 11
Customize the Start menu in Windows 11 to suit your needs and preferences. Follow our step-by-step guide to change the layout, add or remove tiles, and adjust the colors of the Start menu.
Customizing the Start menu on Windows 11 is a quick and easy way to make your operating system feel more personal and efficient. Whether you want to change the layout, add or remove tiles, or adjust the colors, the Start menu is highly customizable and can be tailored to suit your needs and preferences.
In this tutorial, we'll show you how to customize the Start menu in Windows 11 step by step.
1. Changing the layout
Pins vs recommendations
To customize the Start menu layout on Windows 11:
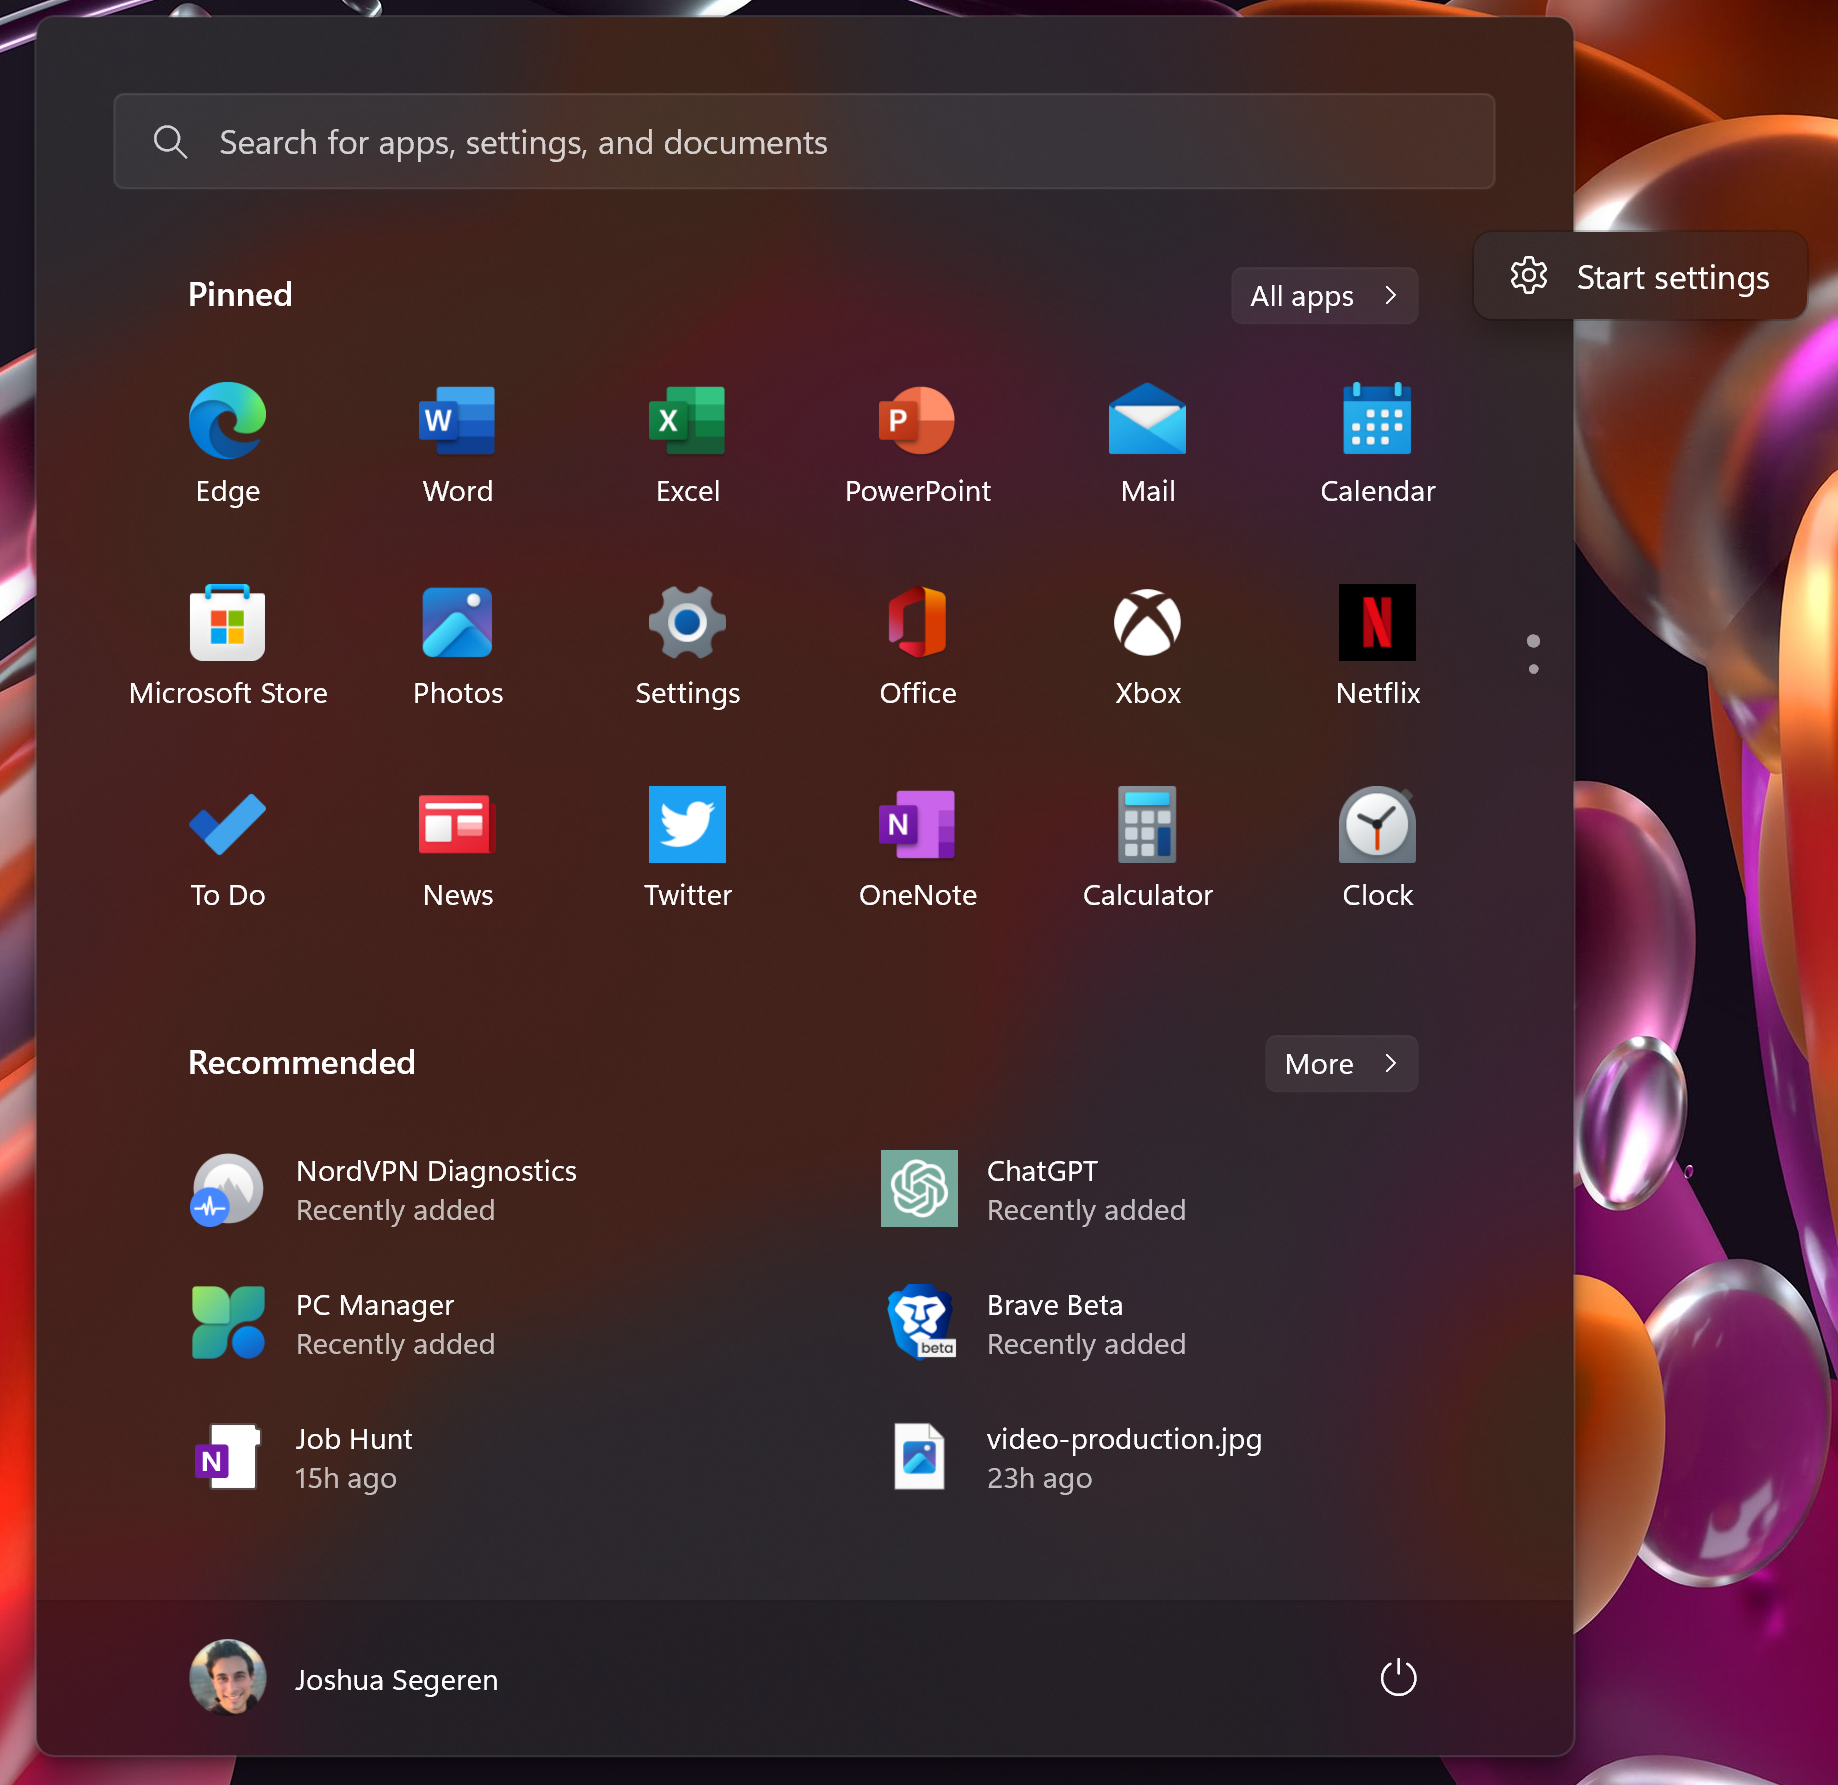
- Click the Start button at the bottom of your screen, or press the Windows key.
- Right-click on an empty area of the Start menu.
- Click "Start settings".
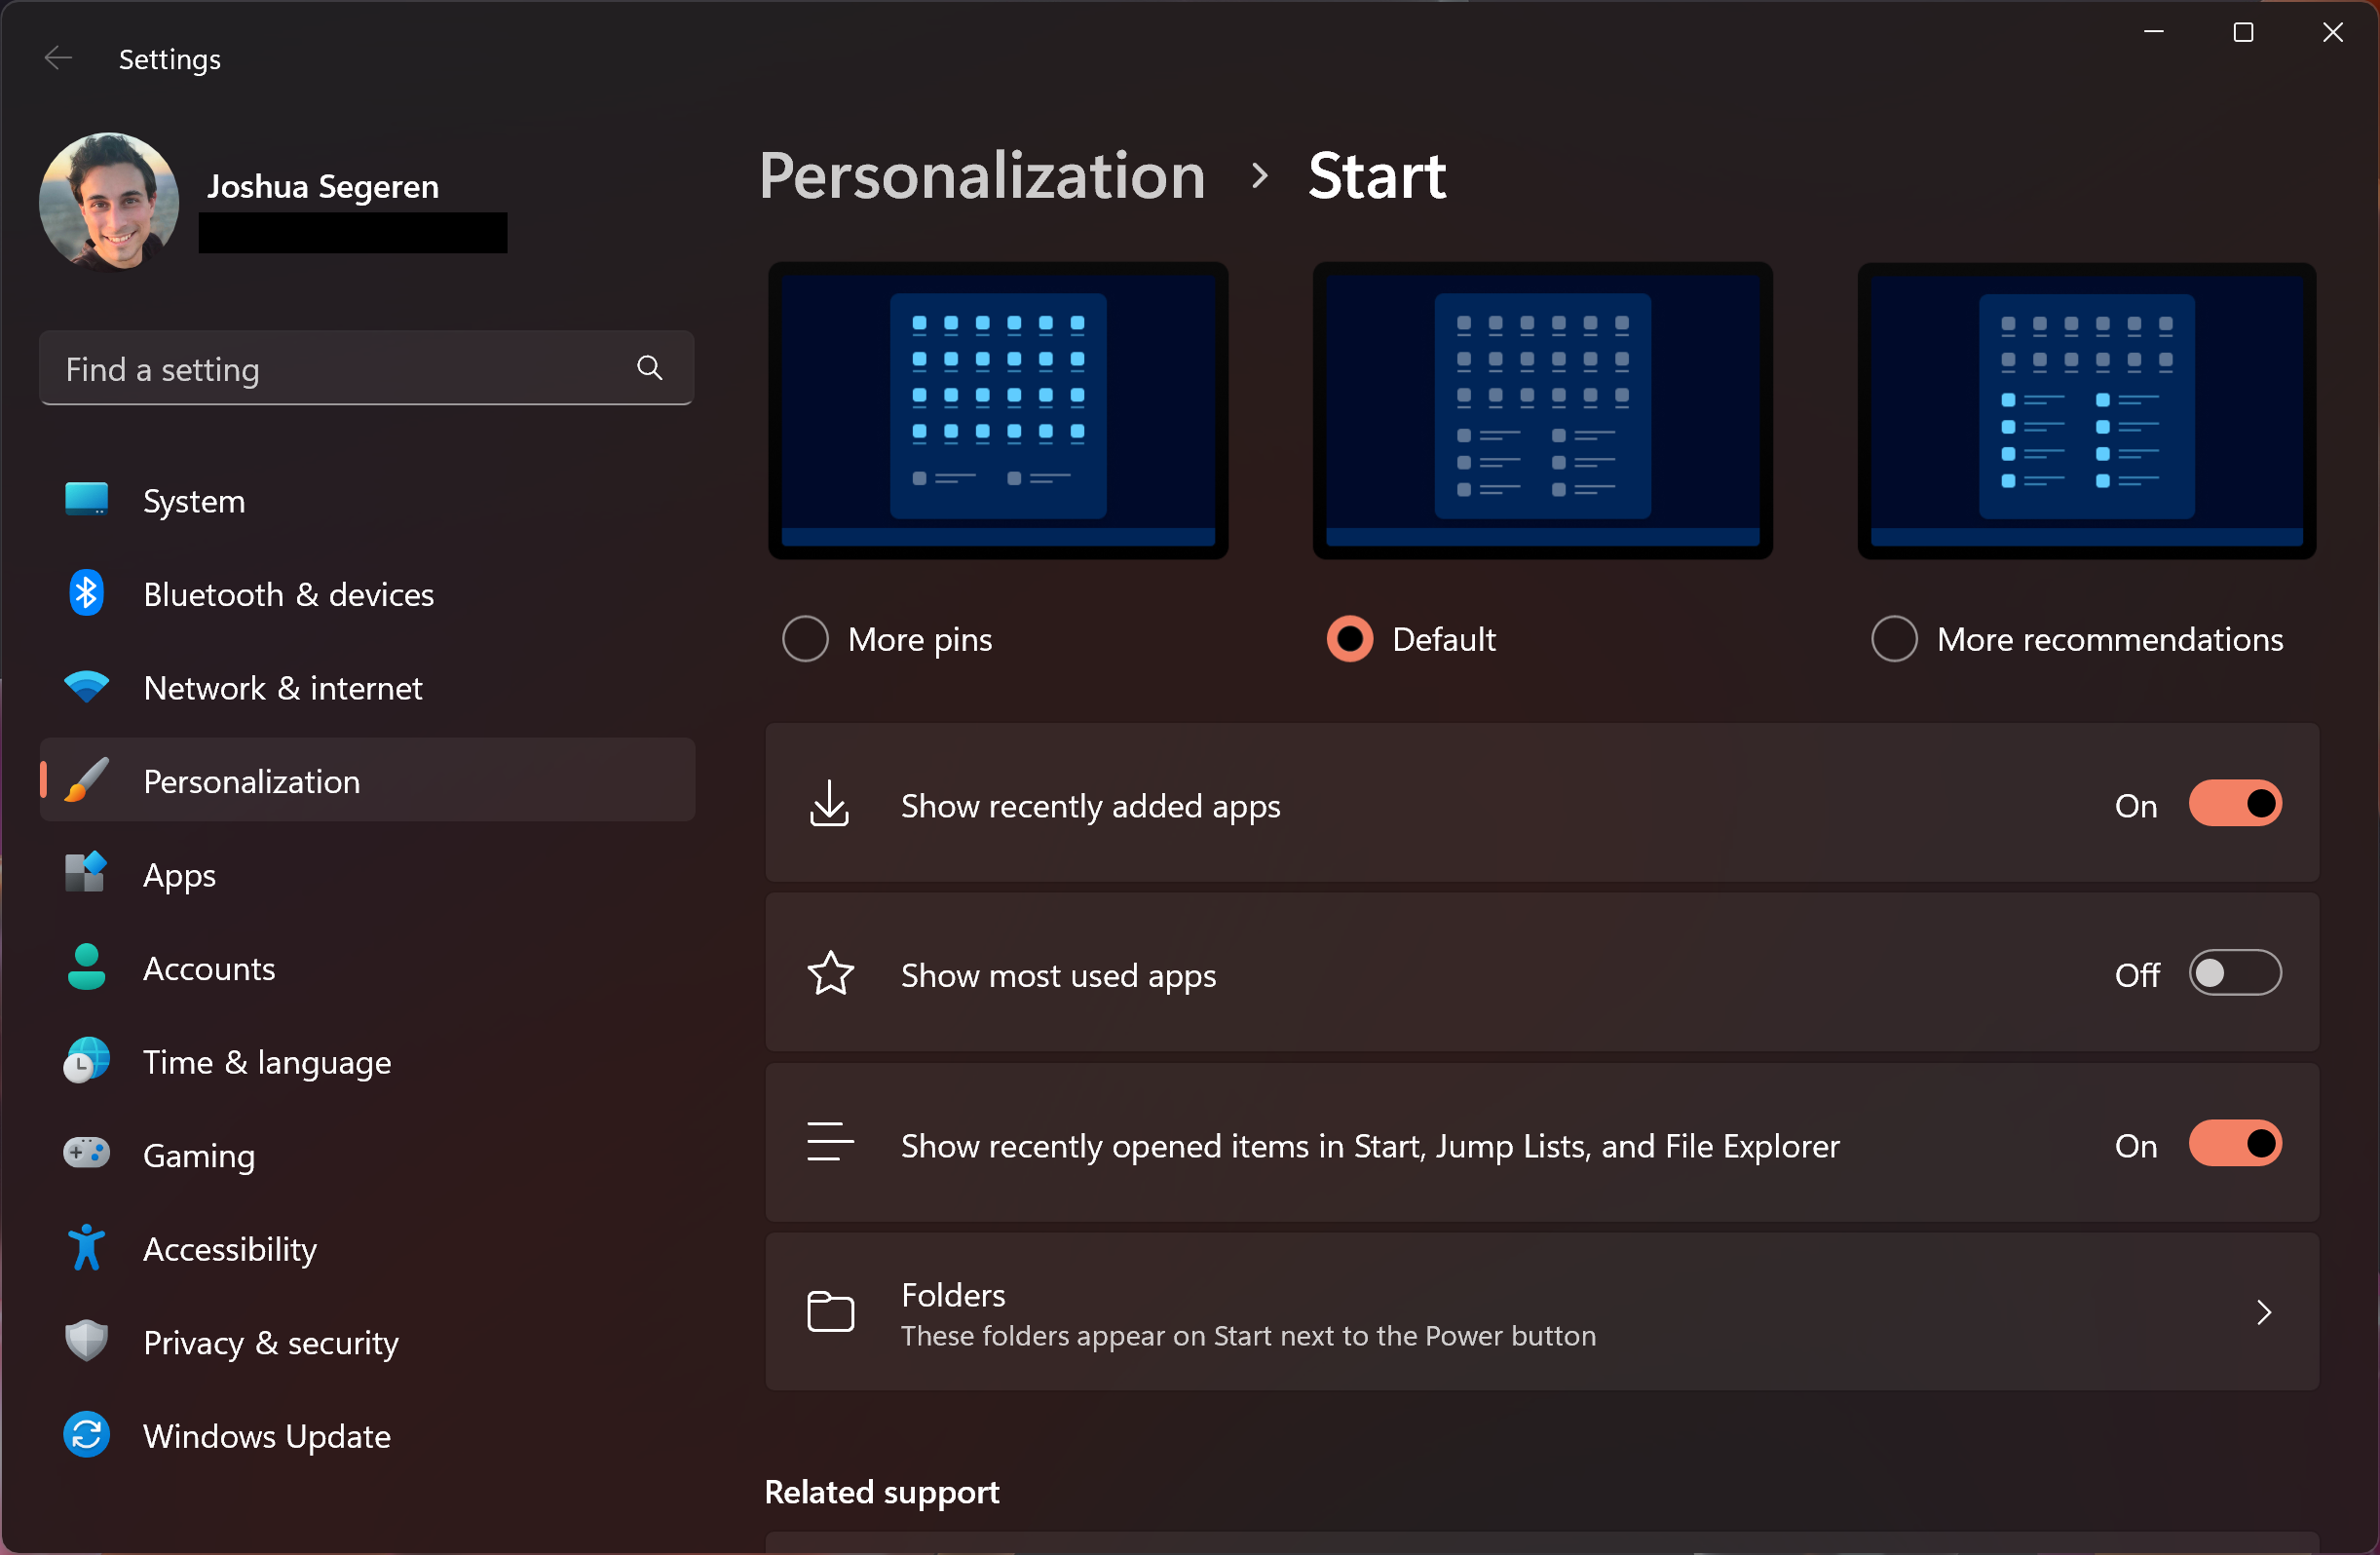
The Personalization > Start settings window will appear. Here, you'll see a few options for customizing the layout of the Start menu:
- Default
- "More pins". More space will be dedicated to pins, i.e. app shortcuts.
- "More recommendations". More space will be dedicated to recommended files and apps.
Types of pins & recommendations
You can also adjust some settings that determine the types of app and file shortcuts that will appear on the Start menu — i.e. the apps list, pinned section, and recommended section.
- "Show recently added apps".
- "Show most used apps".
- "Show recently opened items (files) in Start, Jump Lists, and File Explorer".
Shortcuts to folders
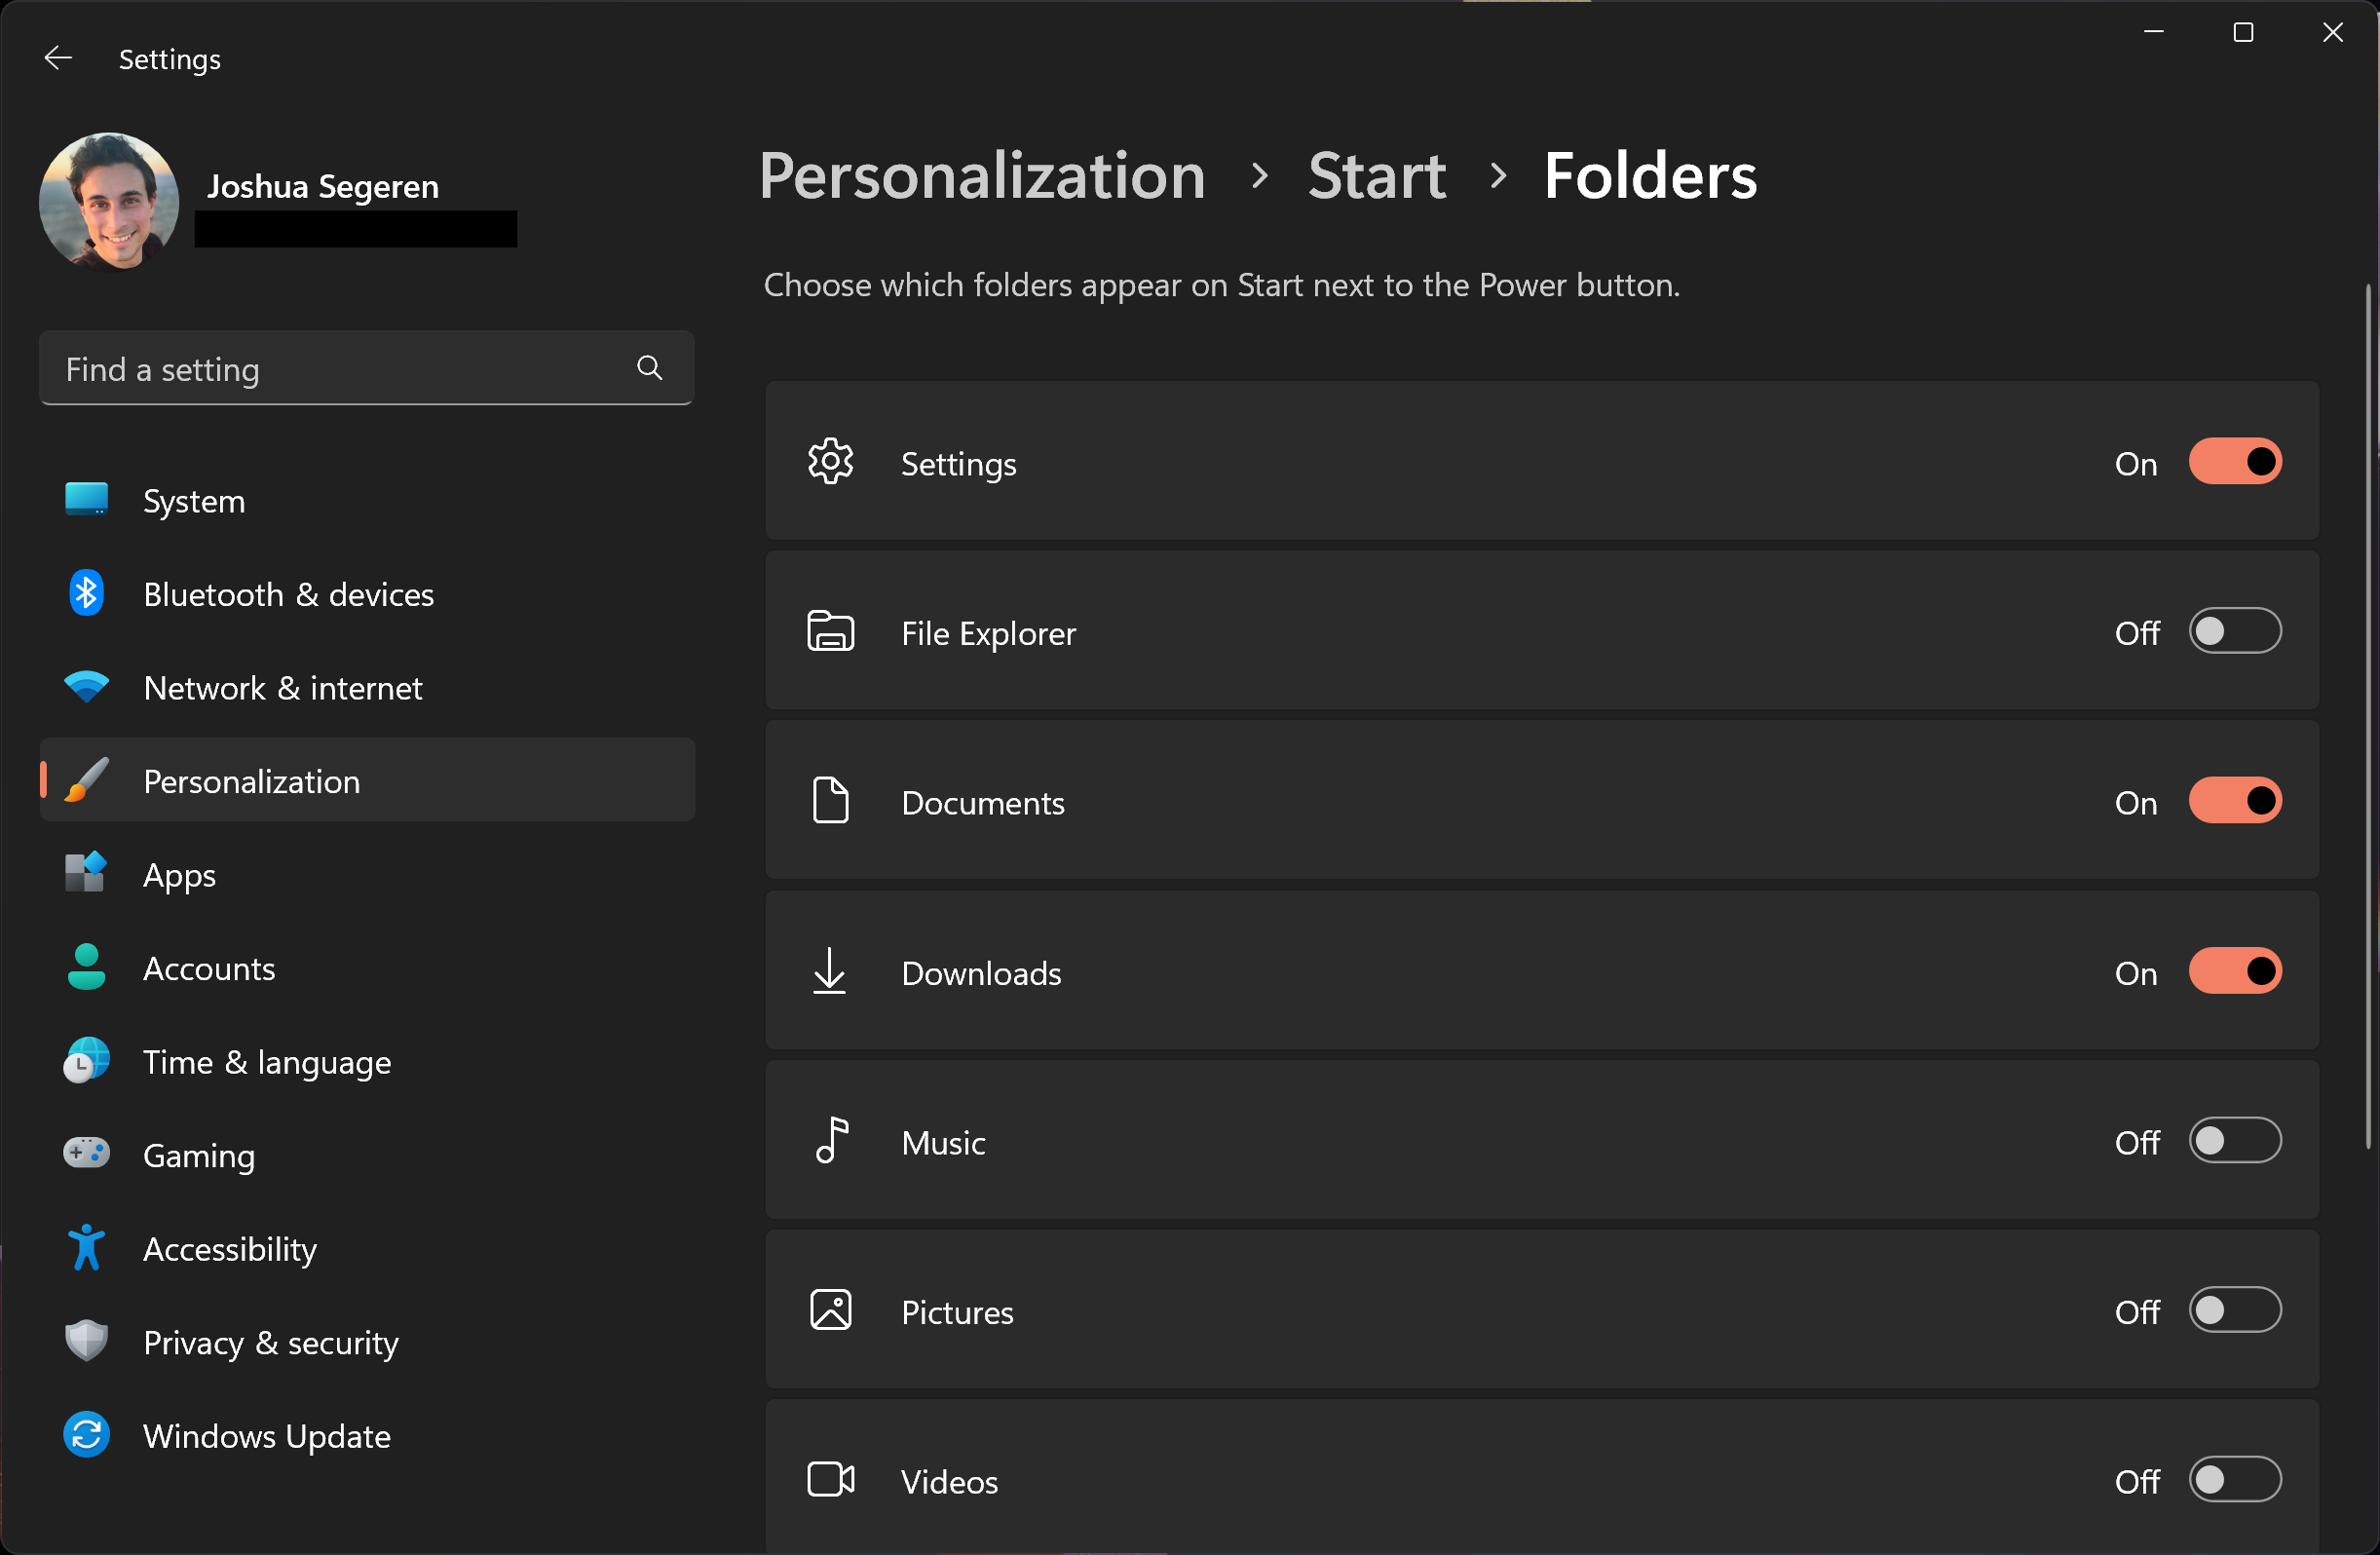
Finally, you can choose to display shortcuts to 'folders' beside the Power button on the Start Menu.
Click on "Folders", then toggle the shortcuts that you'd like. (Of course, it can get cluttered if you add too many here.)
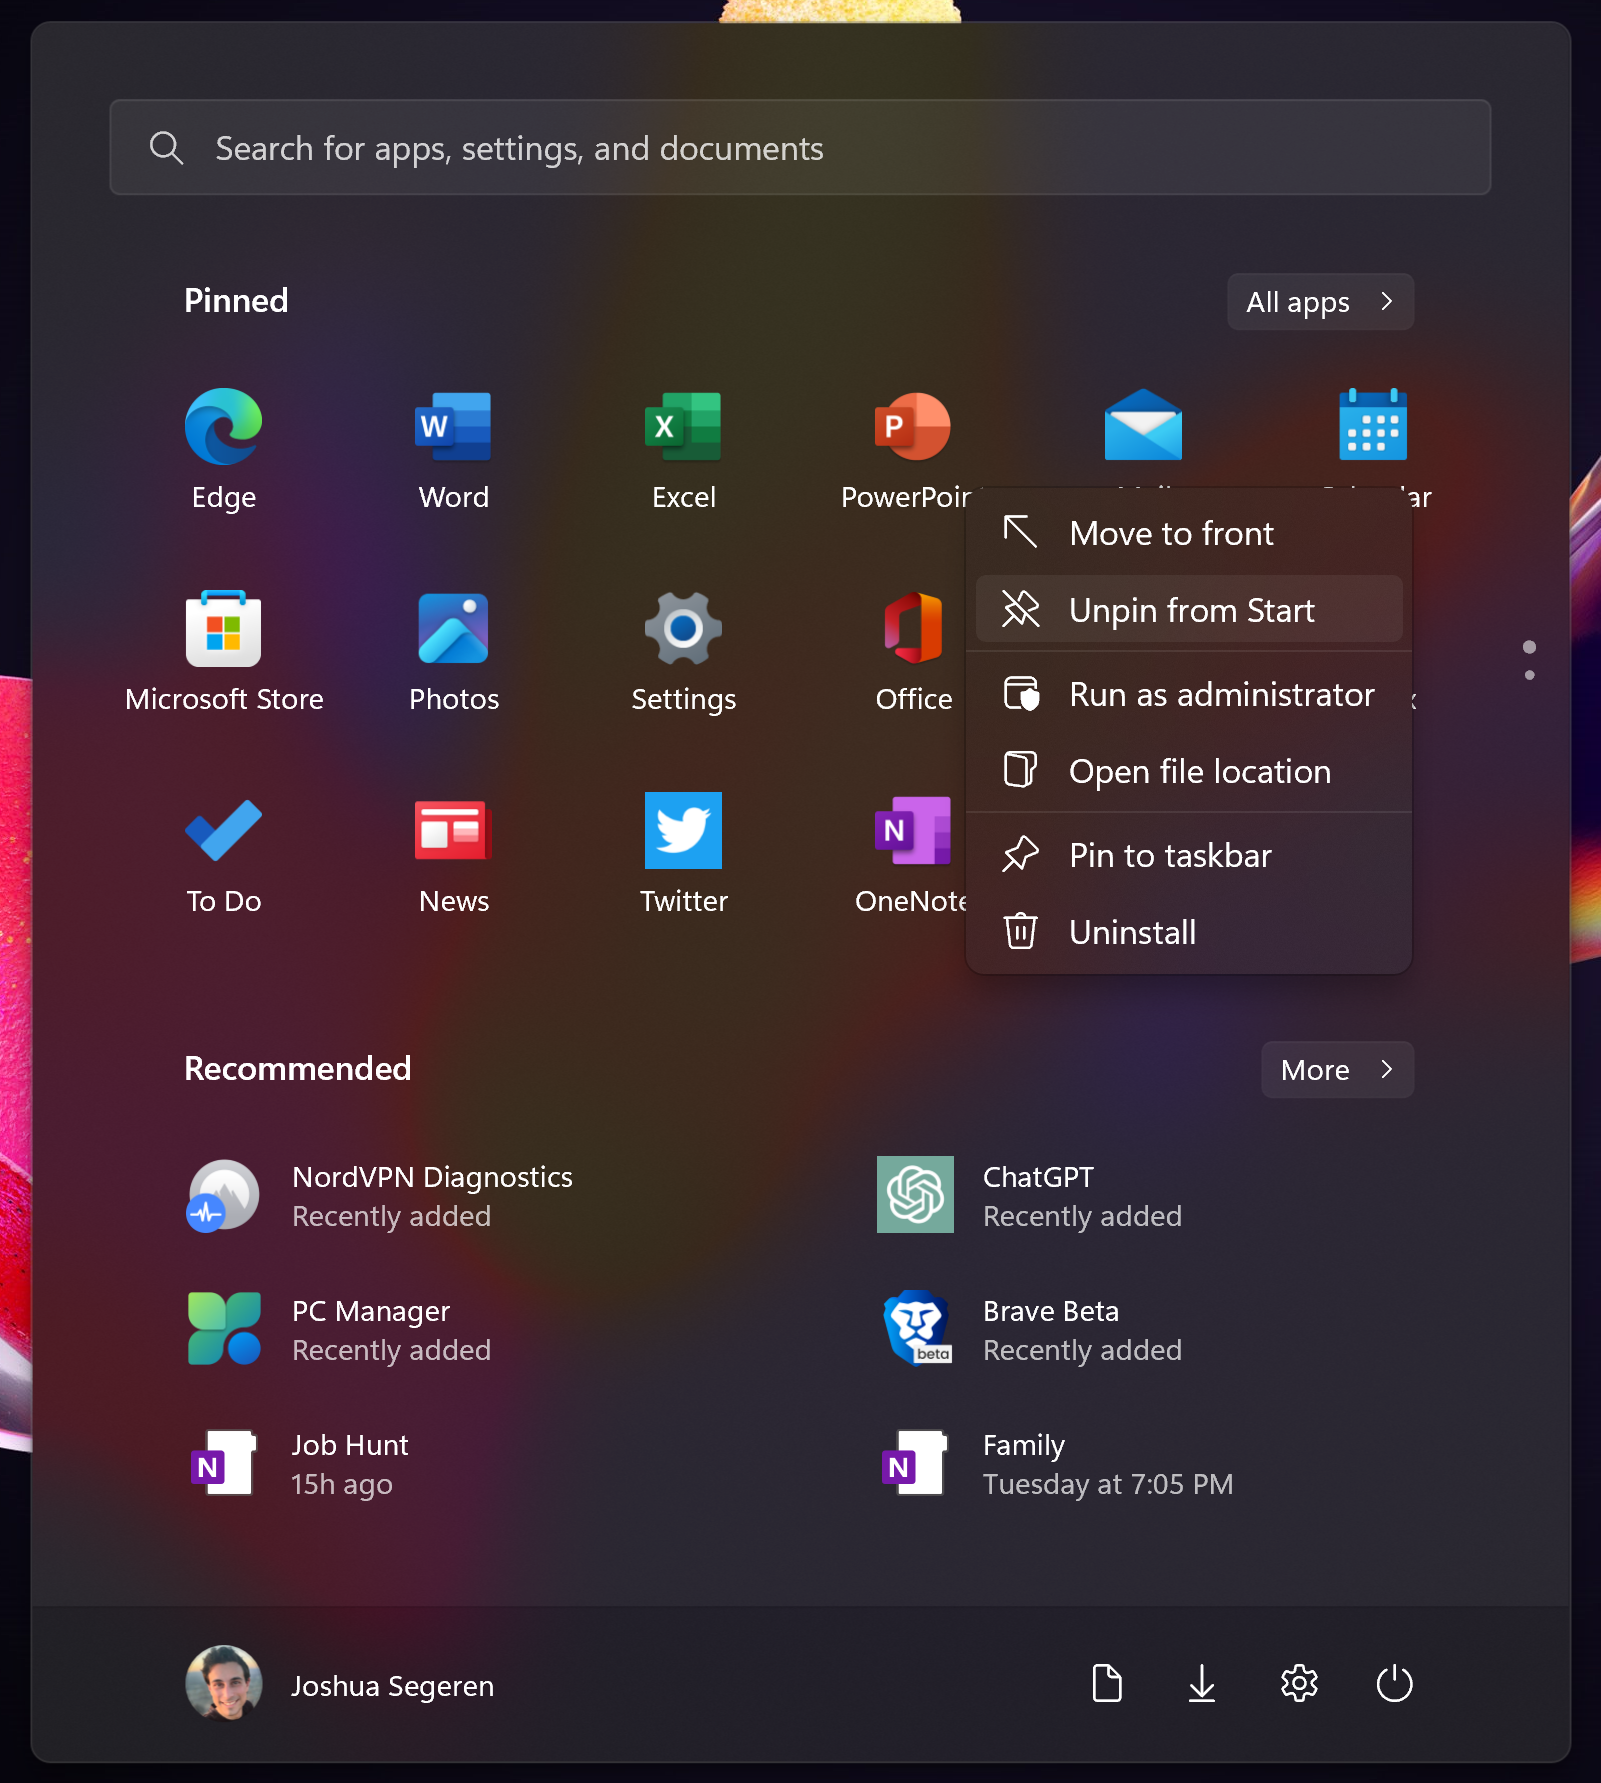
2. Adding or removing tiles
To add or remove tiles from the Start menu:
- Click the Start button in the bottom of your screen, or press the Windows key.
- Right-click on a tile that you want to add or remove.
- Click "Unpin from Start" or "Pin to Start," depending on your desired action.
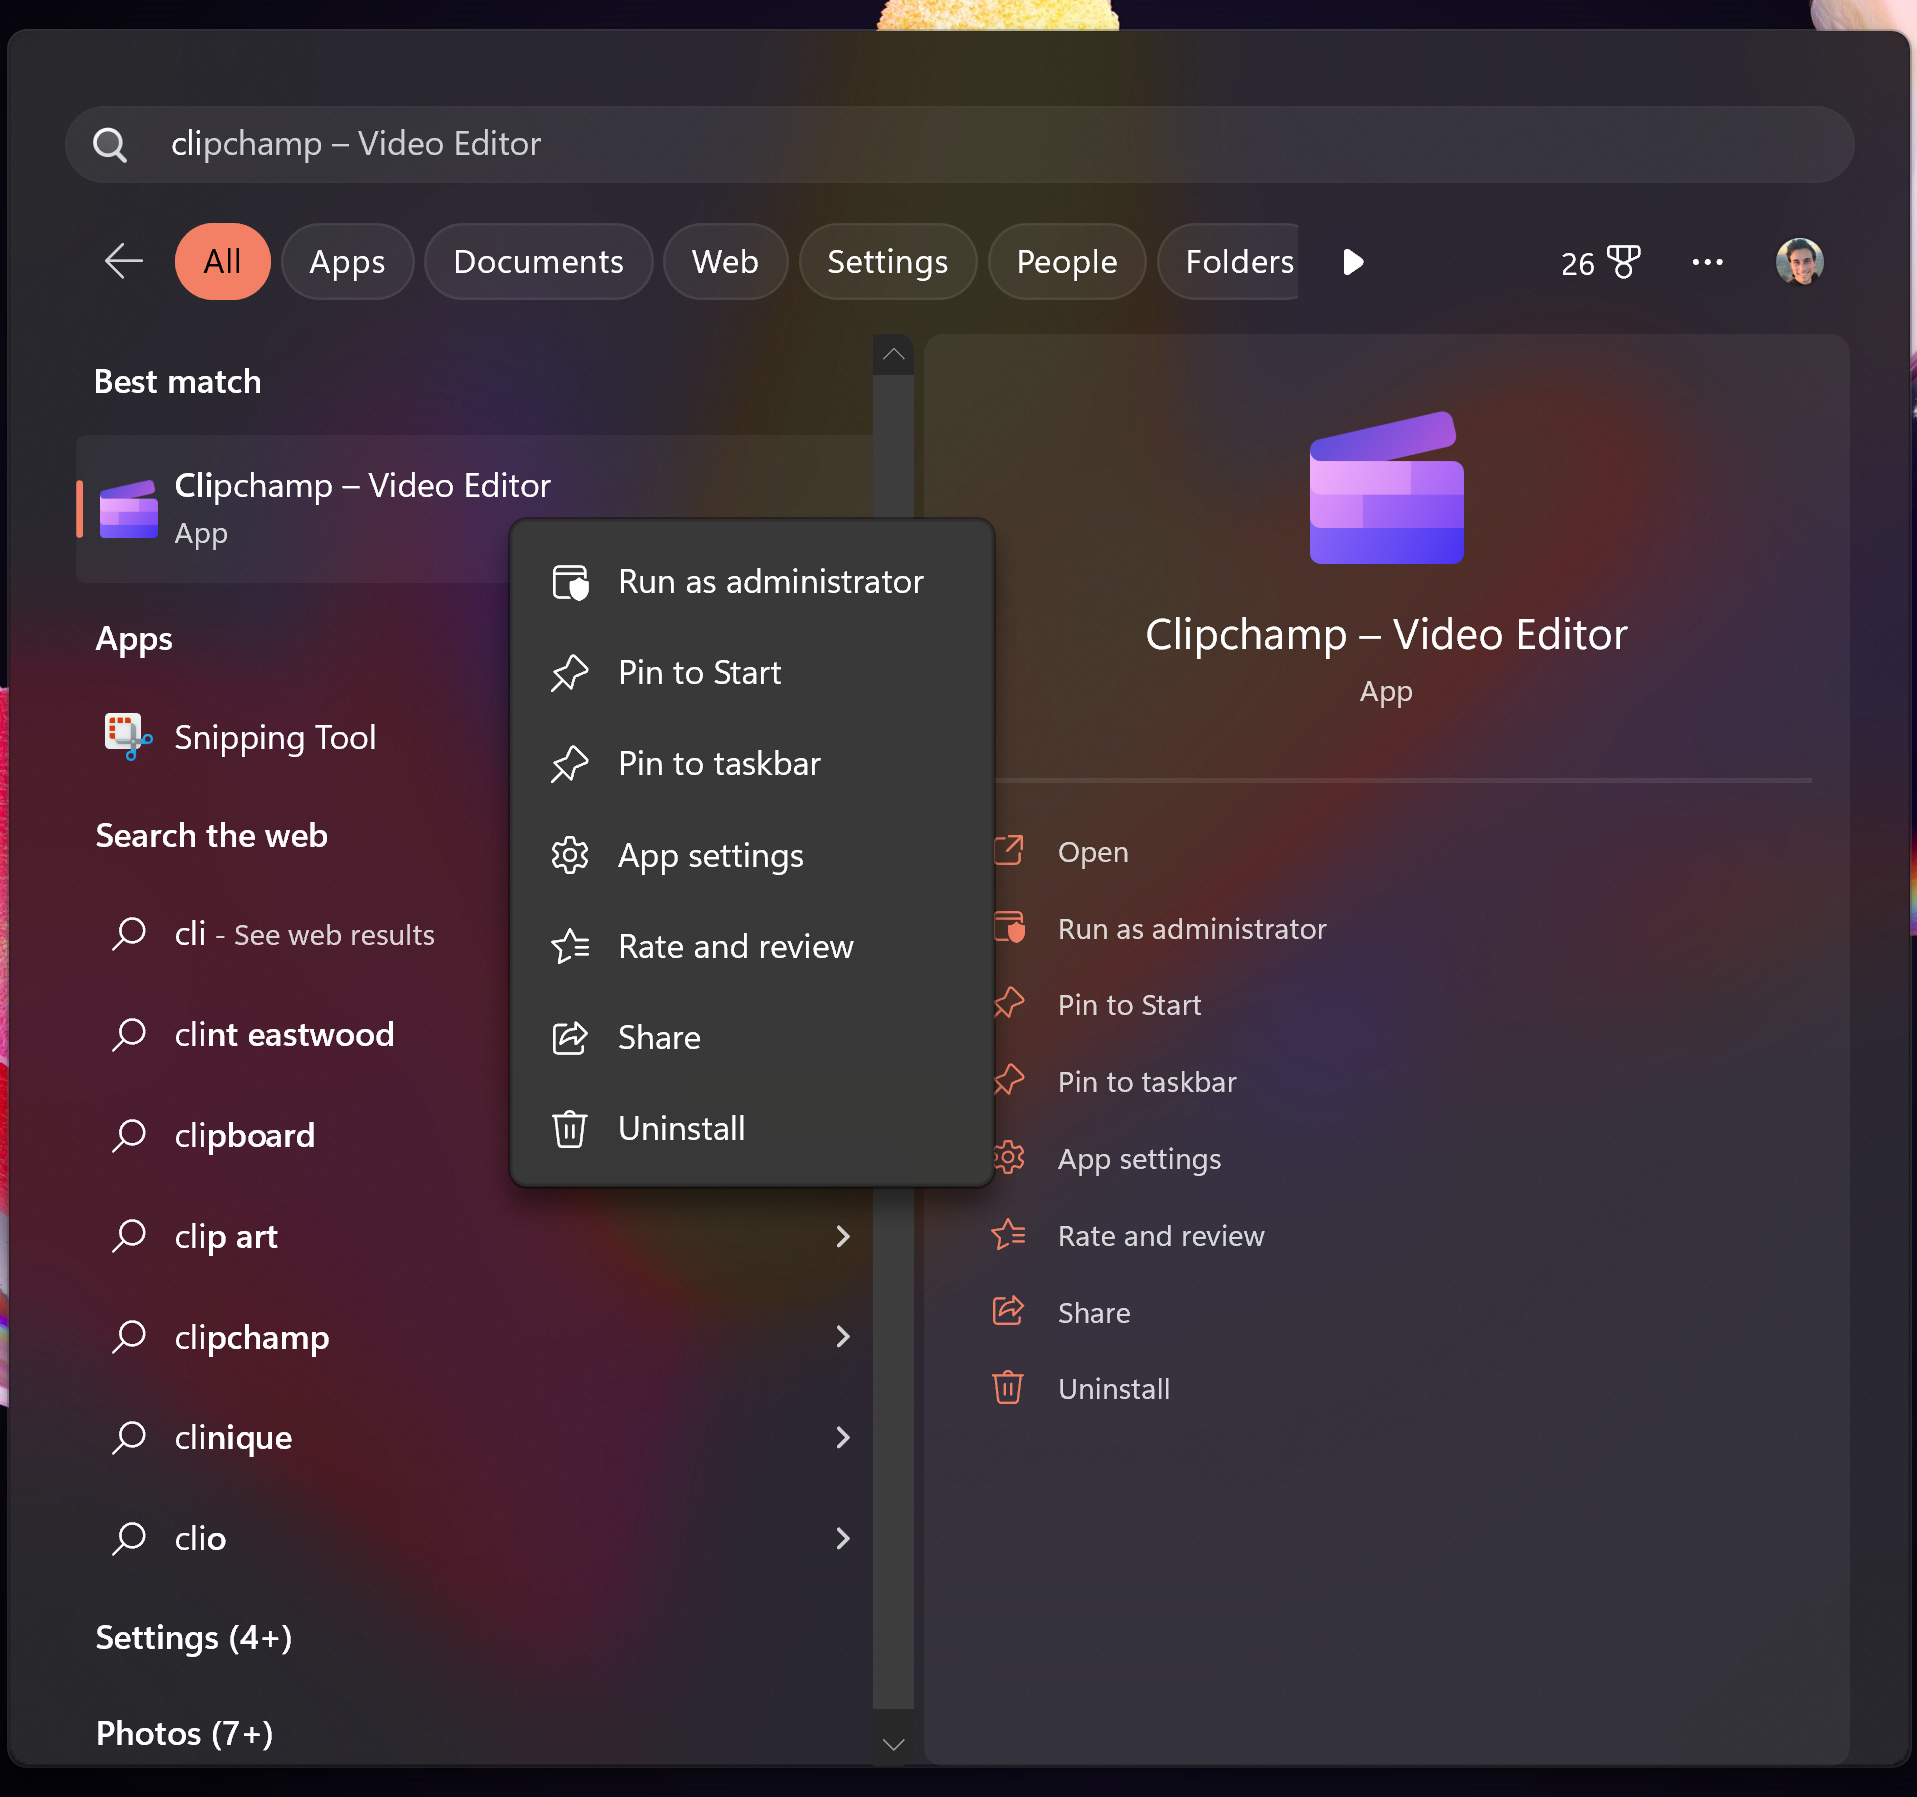
You can also add new tiles to the Start menu:
- Searching for the app, program, or file that you want to add, by using the search box at the top of the Start menu, or by navigating to "All apps".
- Right-click on the search result.
- Click "Pin to Start".
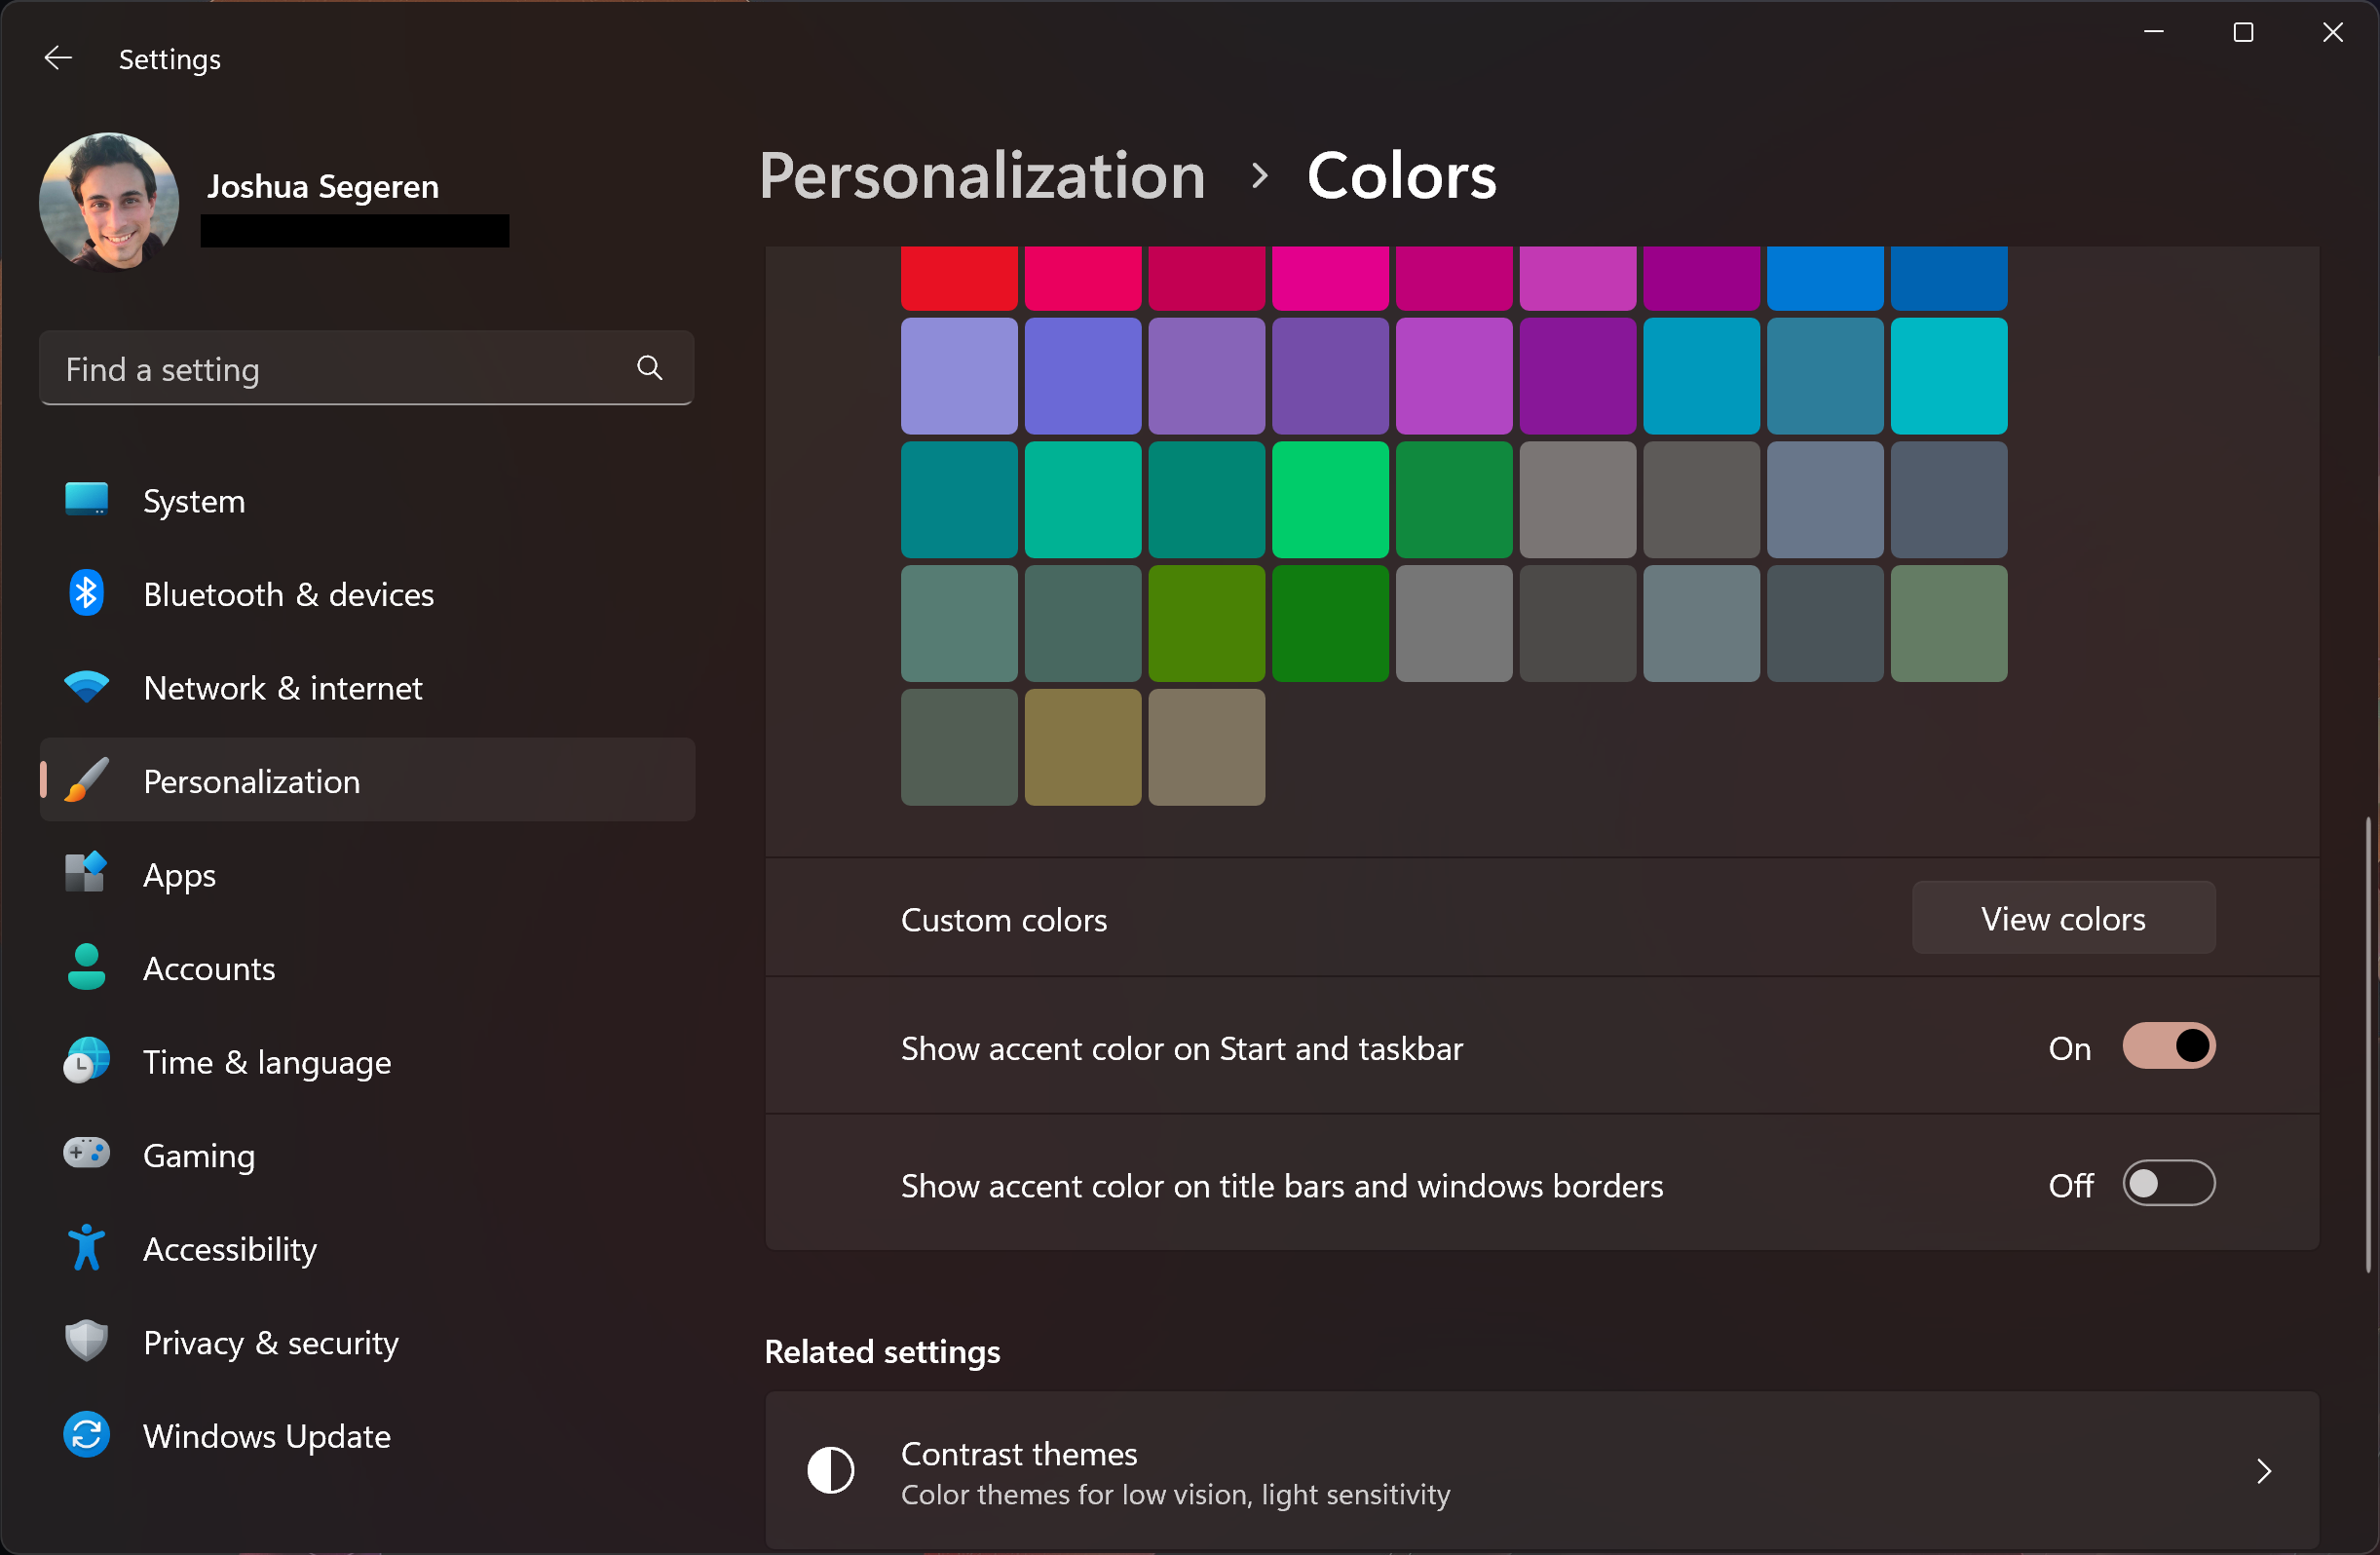
3. Customizing the colors
To customize the colors of the Start menu in Windows 11:
- From the Start menu, search for and open Settings. (Or press the Windows key + I.)
- Click on "Personalization" in the sidebar.
- Click on "Colors".
Here, you can set some system-wide color preferences, including:
- "Color mode for Windows and apps": Light or Dark.
- "Accent color": manually chosen, or automatically set based on your desktop background/wallpaper.
- "Show accent color on Start and taskbar". Enable this to give your Start menu and taskbar a splash of color.
That's it! With just a few simple steps, you can customize the Start menu in Windows 11 to suit your needs and preferences. Whether you want to change the layout, add or remove tiles, or adjust the colors, the Start menu is highly customizable and can be tailored to your liking.